A TECHNIQUE DRIVEN Blog dedicated to mastery of surface design techniques. First we dye, overdye, paint, stitch, resist, tie, fold, silk screen, stamp, thermofax, batik, bejewel, stretch, shrink, sprinkle, Smooch, fuse, slice, dice, AND then we set it on fire using a variety of heat tools.

Wednesday, October 29, 2014

Shibori Final

So that was a month full of Stitch resist Shibori at the Fireblog!


First of all I would like to thank my co-workers Sheila Fowler, Marsha Leith, Yvonne Watson and Eke Krug. It has been such an inspiration to see their experiments, it felt like we were in a classroom together for four weeks. Thank you digital revolution to make this possible!

Ofcourse, this is only the start of our journey in stitch resist shibori, if you like more inspiration, please check these websites for more tutorials and dye information:

http://www.tobasign.com/en/silk-painting/fabric-dyes/home.php

http://www.dharmatrading.com/home/traditional-indigo-shibori-basics.html

http://silkshibori.wordpress.com/

http://serendipitypatchwork.com.au/PDF/shiboriNo1.pdf

http://shibori.org/traditions/techniques/


Or check this  Pinterest board:
http://www.pinterest.com/verfvirus/shibori-stitch/


Finally I would like to share my 3 favourite books on Shibori too:


Hope that you all enjoyed this month of hand stitched resist shibori. Next year October I intend to host a month full of machine-stitched resist shibori. So, if you want to join us, leave a comment and I'll get in contact!

Tuesday, October 28, 2014

My fourth week with stitch sibori

This is Eke again, for the fourth week and also my last Tuesday in this month with the stitch shibori project.
Last week I worked very hard to be able to present my last swatches today.
Area enclosing was the theme, and  I didn't know exactly how to realise this.
So I taught that, when I made shapes in an area, they would automatic enclose each other, such as positive and negative images.
I started drawing circles and squares, and filled them, or the surroundings, up with stitches.
While I worked very hard, stitching and knotting, I forgot to take pictures of the parts after knotting and before dyeing.
At the end I saw, that I only made one photo with threads of the first swatch I made.


On this photo you can see my way of thinking for this week.
I made a shape, filled it up with lines, stitched with different sizes of stitches and different spaces between the lines. In this way, I made my six samples for this week and the bigger part for the middle of the quilt I want to make of all the swatches.


  After I pulled out all the threads, I was a bit disappointed by the results.
My shapes were not as clear as I expected. Then I realized that it was, because of the dye bath I used. This time I used turquoise and amber in the combinations 30/70, 50/50 and 70/30%. I forgot that the turquoise is very strong and takes over the white parts and I realized that I used too little dye, made a mistake while calculating.
However, there was no time to do it  again, so this is what it is.


For the big piece I used different techniques,  a circle and a triangle which I stitched with lines. To minor circles, where I stitched the outlines and turned the thread around the fabric before knotting. And a square in which I used Nienkes technique with the pleats and stitching over it.

After that every piece was ready, I layed out all the pieces on my kitchen floor, to see how the quilt would become to look like.


And I used another technique from Nienke, to dye three strokes of fabric, which will be stitched between the squares. I looked for the post on Verfvirus, but couldn't find it. Nienke, if you read this, maybe you can share a link to your post in the comments? (PS Nienke here, do you mean this post: http://andthenwesetitonfire.blogspot.nl/2014/02/tray-dyeing-with-ann-johnston.html?)


And I sewed three squares together to give an idea how it will be.


This is the end of my participation on this blog.
I learned a lot of the shibori process.
In this last week I learned, that a lot of stitching not always gives the best result.
That the colour you dye with, is essential for the results.
And that my hands and thread work perfectly together after four weeks of stitch shibori.

Thank you Nienke, for giving me the chance to participate on this blog this month.
And thanks to all the other, who shared there experiments this month.
It was great  fun.

my blog kleurdesign


Monday, October 27, 2014

Week 4 Yvonne Watson

Hi Everyone,

Doesn’t time fly when you are having fun. I can’t believe it is week 4 already and this will be my final post.

Here are my interpretations of area enclosing.

I thought I would start with a basic shape just to get the hang of enclosing an area.

I stitched a diamond shape and dyed it black. 


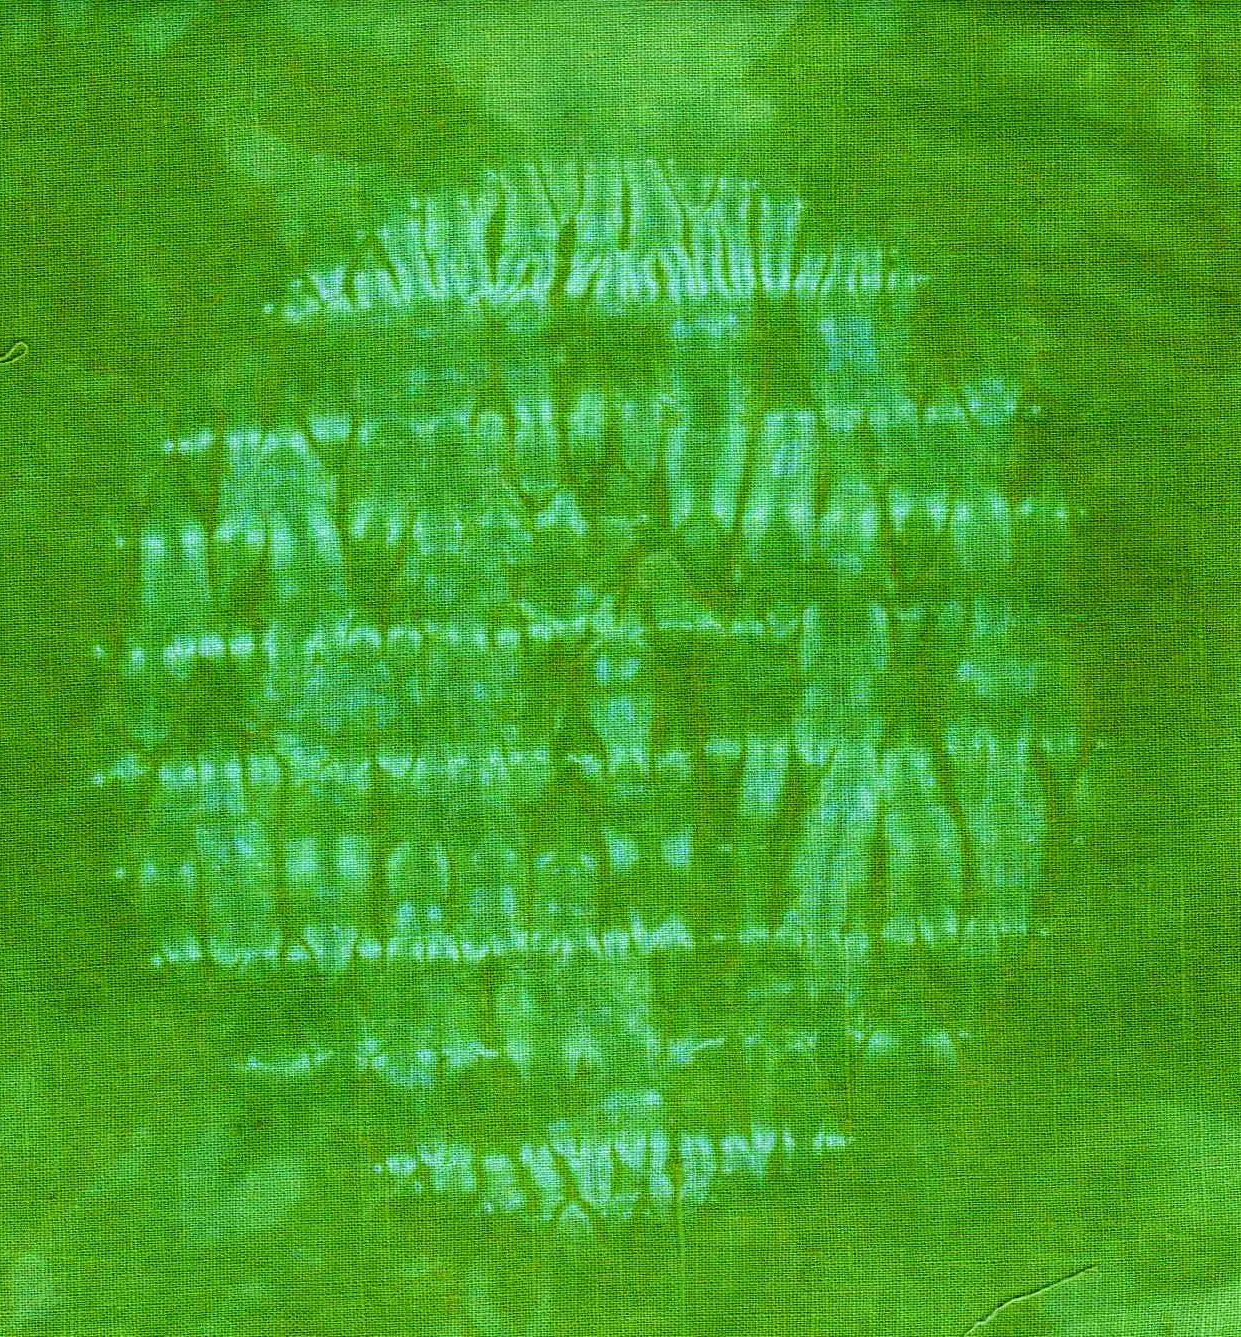
I decided that I would look at the direction and regularity of stitch and here are a couple of samples below.
Both are done on a piece of white fabric that I had painted with Procion dye in Lemon Yellow, Magenta and Turquoise.

I marked lines on the circle and decided to have stitches going in different directions on the butterfly.


Below is the circle after drawing up the thread and dyeing the fabric


Below is the butterfly


Whilst I was exploring circular stitching in week 2 of our blog I started to look for images that involved a circular form. My husband on a visit to our local library picked up books that they were selling off for £1 per bag. He filled a bag with books of his choice and when he returned home I discovered amongst the treasures a book on Labyrinths. Ideal for my project

I looked at stitching the outline of the Labyrinth and the pathways between.

Below is a photo of the pathways stitched. Unfortunately I don’t have a photo of the outline of the Labyrinth in stitch but I stitched the blue lines as in the photo below and stitched an extra line between the other two lines.


 Here are the results of the two samples


I propose developing this theme and will stitch on the first sample to define the Labyrinth and will probably print onto the second one with text. These are very simple Labyrinths but I hope to develop some more intricate designs later.

My next sample came from reading Nienke’s post on using a stencil. Thank you Nienke for the inspiration.

I looked for a flower stencil and having found a small stencil, which I photographed and then manipulated in Photoshop to achieve the size and colour I wanted.


I stitched each of the petals and outlined the leaves then stitched an extra row in the centre of each leaf. This was a piece of muslin that had been painted with Lemon Yellow dye and a touch of Magenta dye. I think this has real possibilities if stitched onto a firmer cotton or silk.

I’m sorry I don’t have a photo of the stitched fabric.

I have one more sample, which I call my “Dancing dolls”

I have tried this design a few times but to date this is one I think is the most successful of the samples.

I drew the shape pictured below on a piece of previously shiboried silk that I had folded into five sections.

The fabric had been previously dyed with Lemon Yellow and Magenta and after stitching the fabric and drawing up the threads I dyed the fabric with Turquoise dye.

I stitched around the head and pulled up the stitches but before putting the fabric into the dye bath I tied a piece of cling film around the head to retain the colour.


The outline of my “doll”

Below is the result of my stitching and dyeing.


I have thoroughly enjoyed contributing to this blog and I have learned several things.

The type of thread you use is crucial with stitched shibori. At the Knit and Stitch show this year in London I went round testing several spools of thread for their strength, with the stallholders permission of course!! In most cases I doubled the thread and it needs to be pulled up as tightly as you possibly can.
The dyeing method you use is also important in order to achieve good results. I usually make my Procion MX dyes up with chemical water so they are ready to use for painting, printing or low water emersion using Ann Johnson’s method. However this time after a few unsuccessful dyeing experiments I simply soaked my stitched fabric in water. When I had mixed together the salt, soda ash and dye powder into enough water to cover the fabric, I added my fabric and left it soaking for an hour stirring the pot occasionally. This worked well for me.
Remember to take photos at every stage. I lost count of the number of times I found myself with a piece of fabric stitched with the threads drawn up before I had photographed the stitching. Grrrr 

Last but not least I should like to thank Nienke for inviting me to join in this blog and posting for me.

Yvonne