A TECHNIQUE DRIVEN Blog dedicated to mastery of surface design techniques. First we dye, overdye, paint, stitch, resist, tie, fold, silk screen, stamp, thermofax, batik, bejewel, stretch, shrink, sprinkle, Smooch, fuse, slice, dice, AND then we set it on fire using a variety of heat tools.

Showing posts with label Kerr Grabowski. Show all posts

Thursday, April 21, 2016

Using Plants in Screen Printing


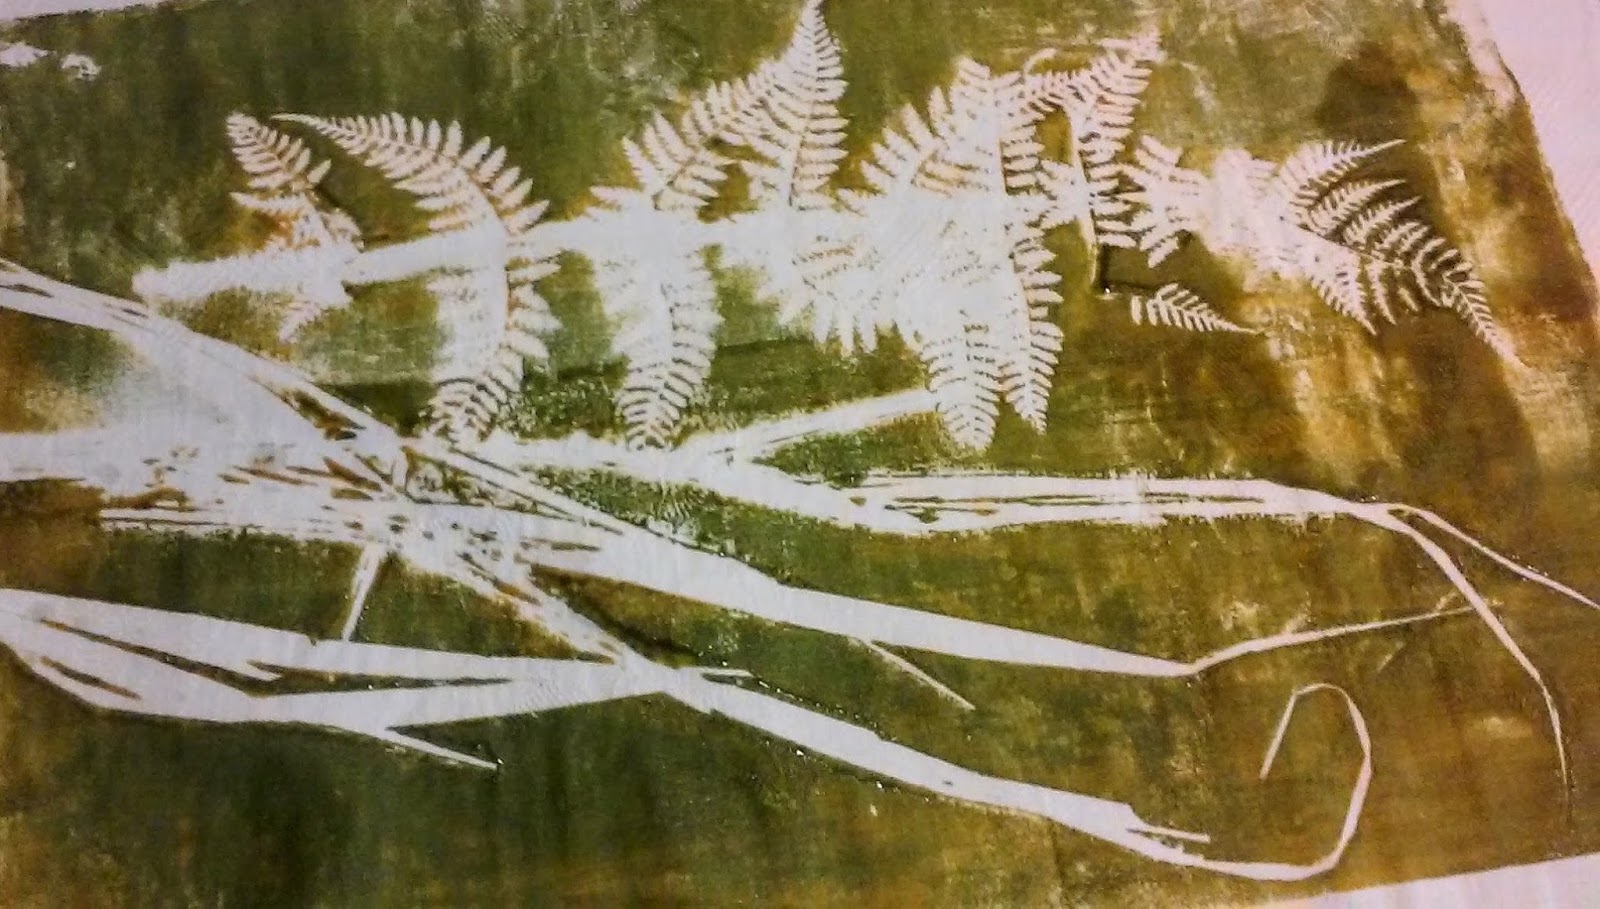
Deconstructed screen print made with dried American Beech leaves
In this post, I want to share a project I enjoyed recently – using plant parts and thickened fabric dye to screen print on fabric and paper. The plants were used in several ways:

  • as stencils to block the transfer of dye to the fabric
  • as materials to make a dried screen for some deconstructed screen printing
  • as direct prints using the plants that collected dye under the screen

I won’t go into detail here about the techniques of screen printing or of deconstructed screen printing – lots of great information elsewhere for that. Just to clarify though: screen printing is the process of using a sheer fabric (silk or synthetic) fixed in a convenient frame to distribute a medium (paint, ink, thickened dye, etc.) onto a substrate (fabric 
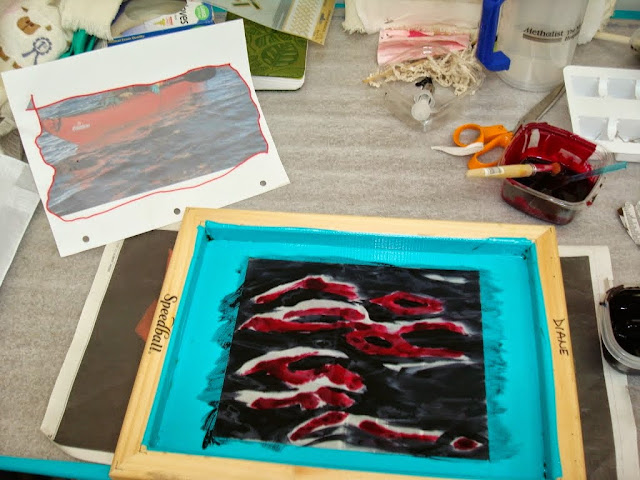
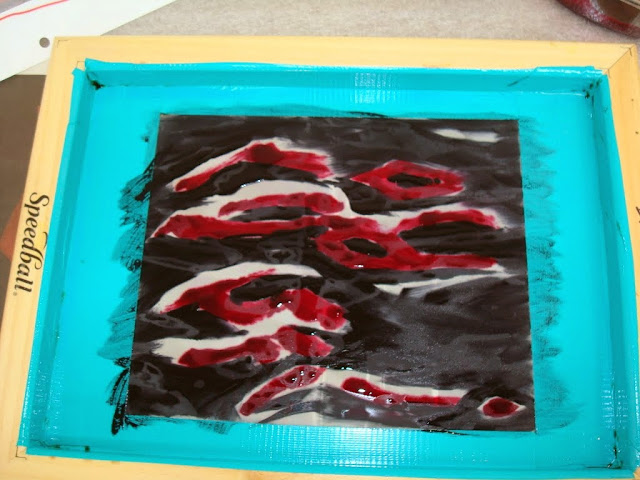
or paper, generally). Deconstructed screen printing uses the same materials but thickened dye is allowed to dry on the screen in patterns made by objects placed under the screen. The thickened dye is gradually dissolved during the printing process, then it can be washed completely off the screen with water when finished. Beth Berman has a very good tutorial on her blog. And Kerr Grabowski posted this video tutorial. I used thickened fiber reactive dyes for my entire process - screen printing, deconstructed screen printing, and direct printing. I soaked my cotton and linen fabrics with a soda ash solution and dried the fabric ahead of my printing session. I also sprayed the printed fabrics lightly with a soda ash solution before put them in plastic to "batch."

We'll start with basic screen printing. Below is a small screen with three fresh Alstroemeria sp. leaves laid under the screen. After the first swipe with the thickened dye, the thin leaves stick to the screen until rinsed or picked off the underside of the screen. That makes it very easy to make repeated prints, shown in the bottom left of the photo below. The fern print at top right was made by laying a fresh florist fern under a screen, printing with thickened green dye then swiped with yellow dye on a card without the screen. I love putting this additional layer of dye over a previously screen printed image to add a more random color layer. I let the original print set for several minutes, then it seems to resist the new dye layer that adheres to the white fabric left by the plant "stencil".
 Here is a series of prints showing the first screen print with the white stencil images and then some additional card-applied dye.

Multiple Alstroemeria leaf screen prints.
Alstroemeria leaf screen prints with added purple dye.
 BOTANICAL NOTE: The Alstroemeria leaves and petals I used for these prints are from the florist. Those sold in the florist trade are cultivars (meaning selected from wild plants and then propagated for desirable characteristics). One of their common names is Peruvian Lily. Great information and images at Wikipedia.

 Here are more plant parts used in my screen printing.
Alstroemeria petals

Alstroemeria petals under screen.
Multiple petals prints.


Grasses and fern on underside of screen.
Grasses and fern as stencils.

American Beech leaves as stencils.
Next, I let the screens dry with my thickened dye and plant material on them. I then used them with either clear print paste or with fairly pale tinted print paste as my printing mediums.
The Beech screen with dried dye, leaves removed.
Deconstructed print on paper from Beech screen with tinted print paste.

Deconstructed prints on fabric made with paperwhite narcissus, flowers left on screen in top print as stencils.
Back of grasses and fern dried screen, plants removed

Front of screen with tinted print paste ready to apply.
Detail from finished print on paper.


And here a couple of prints made with the dye-covered plant material first used under screens as stencils and then pressed onto substrates.
Balsam fir stem screen printed on right (with too much dye) and then printed with the residual thickened dye in center.
Alstroemeria stems with leaves directly printed on paper with the original thickened dye, then overprinted with lavender dye before stems were removed.
I find this process fairly addictive, as you can continue to use the original screens and plants in so many ways. Hope you enjoyed my fun day in the studio!

Monday, May 18, 2015

laying down the prints

Good morning!  Diane back again, this time showing Nancy Warren's deconstructed screen printing. 


Nancy and I were members of a study group which met regularly to experiment with various techniques and projects.  We all were weavers who liked to branch out!  I showed them the video from Kerr Grabowski and we were off and running with breakdown printing.


In this example above, Nancy placed her screen right next to the previous print to cover the cloth completely.  Below is an example of one style of putting the dye on the screen that we called our Jackson Pollack period because we dripped the dye randomly around the screen and let it dry. 

Here's how the screen released - I think she went on to cover another cloth with prints from this screen because the drops were so juicy.


Nancy has had success in entering her work as framed art in several shows.  The photo below shows each print matted separately to emphasize their similarities and the progression of each pull.


Notice the lower one in this photo of Nancy at a gallery opening.  The prints overlap and  screens of different sizes are used to create the image.

Placement of the screen can be planned as you print or you can plunge ahead and consider it a design challenge later.

For basic information on deconstructed screen printing, select that Label on the right or click here. You can also read about the process in the December 2014 posts by Beth and Judy.

Diane - yarngoddess

Monday, May 4, 2015

water refections

Beginning with a photo of reflections of a red canoe on the water. I took a workshop from Kerr Grabowski in 2011. A great opportunity since I had watched her DVD on deconstructed screen printing about a zillion times and yet still wanted to be able to ask questions and listen to her comments and encouragement to everyone in the workshop.

 
Her screens looked more experienced!  She never washes them because she likes the serendipity of stray bits of leftover color and there's less risk of the frames getting soggy and rotting. 


So after letting the screen dry overight, I printed it several times on a length of my handwoven cotton.  There was more texture in the image than I got using commercially available "quilters" cotton. The dye sat proud on the fiber unless I used a lot of print paste and pushed hard with the squeegee.    Several repeats filled the fabric.


Unfortunately, what I had envisioned as red turned out to be hot pink.  I am not a fan of fuchsia dye; I should have known better!


Oh, well, when life gives you fuchsia, you make fruit punch. 


Deconstructed Screen Printing with pink commercial fabric, embroidery on a denim background.