Even though it's only the middle of July, I thought I would share some of my pieces with you that have the Autumn Leaves theme.
For as far back as I can remember, I have always loved autumn leaves, especially the fiery colors of red, orange, yellow and gold. So it's not surprising that they have made their way into my artwork over the years. When I began learning various surface design techniques, they surfaced, both in my wearable arts but also in the art and landscape quilts I began making.
Below are photos of a few examples, along with descriptions of how I created the pieces. You may notice that the leaf shapes look similar in the different pieces, and that is because I use a set of leaf stencils to draw the leaves... purchased years ago at a craft supply show.
This was probably my first piece, and it was based on a photo I took of leaves floating on a lake. I started with a piece of hand dyed muslin in blues. After selecting the fabrics I would use for my leaves, I ironed on double-sided fusible interfacing, then traced the leaf shapes onto the fabric. Removing the paper backing, I carefully cut out the leaves, then placed and fused them onto the foundation fabric. Once I had the leaves all fused into place, I added batting and backing fabric, and then used free-motion stitching to create the leaf veins. The piece hangs in our family room, and I still love to study it!

Here is another example of using autumn leaves as a theme - this fabric was pre-dyed using yellow, orange and red procion mx dyes on muslin fabric. Next, I batched and laundered the fabric. Then I traced the leaves on, covered them with melted soy wax, and after the wax cooled, I overdyed with dark brown dyes. Once the dye had batched, I laundered again, then I made my quilt "sandwich" with batting and backing. Using free-motion stitching, I outlined the leaves. I used some remaining red/orange fabric to bind. I have made a few of these, and love how the leaves glow as if the sunset was enhancing their fall colors.
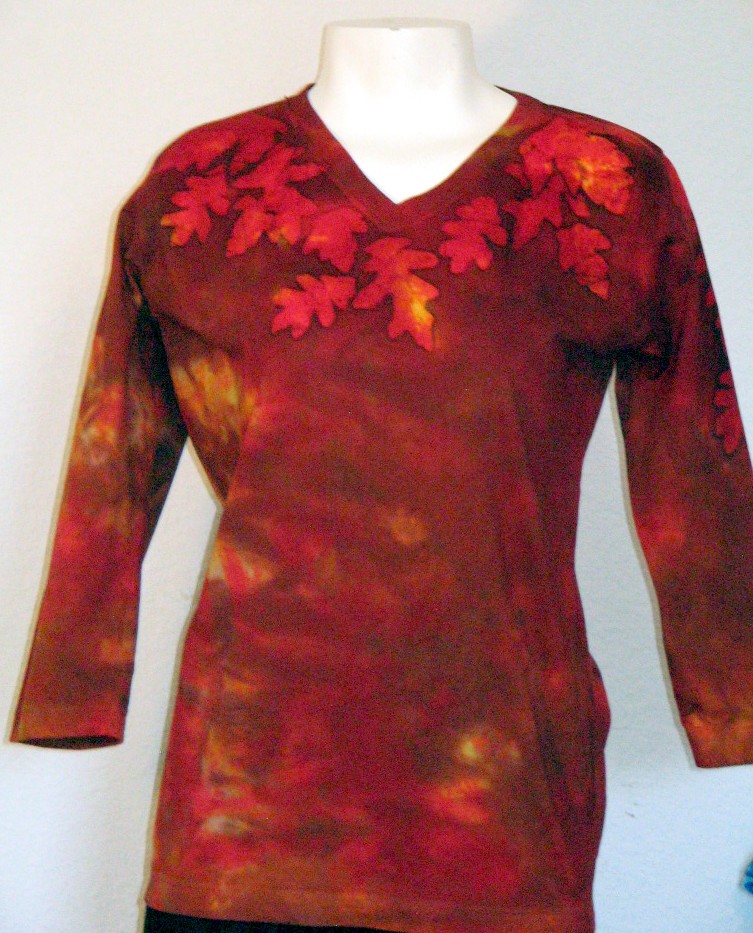
One of my favorite ways to use my autumn leaves is by adding them to clothing using soy wax batik. I used the same method here as I described for the batik wall hanging, except I did not add any stitching.
And finally, this a framed piece I made using leaves cut out, fused on hand dyed fabric with stenciled shadows, and then free-motion stitched. Below is a shot of the original piece in progress. After I stenciled the shadows, placed and fused the leaves and stitched the leaf stems and veins, I cut the whole piece into several smaller pieces for framing. They were mounted on a heavy backing to give them stability before I cut and framed them.
I like how the framed pieces are just a portion of the whole... just a snippet that isn't too overpowering.
I hope you have enjoyed my discussion about using Autumn Leaves as a theme. What subject do you like to use in your artwork? Do you have a recurring theme? If so, I would love to hear about or see how you have incorporated it into your work! Thanks for stopping by...