A TECHNIQUE DRIVEN Blog dedicated to mastery of surface design techniques. First we dye, overdye, paint, stitch, resist, tie, fold, silk screen, stamp, thermofax, batik, bejewel, stretch, shrink, sprinkle, Smooch, fuse, slice, dice, AND then we set it on fire using a variety of heat tools.

Showing posts with label scrunch dyeing. Show all posts

Monday, March 4, 2013

Serendipity Scrunch

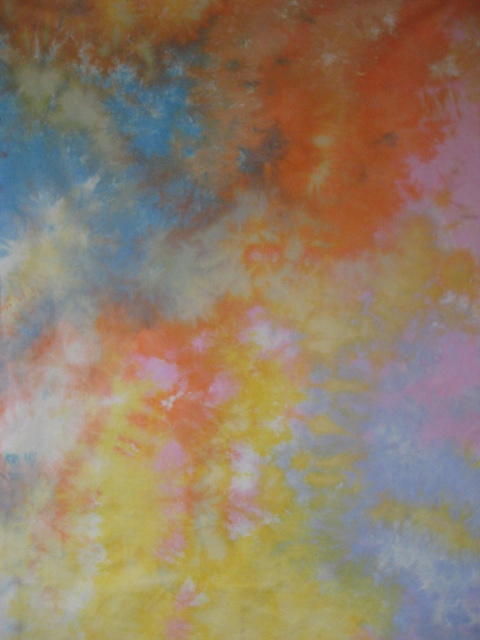
This "technique" I discovered quite by serendipity some time ago. But I so loved the outcome that sometimes I do it on purpose.

I take PFD and let it soak in soda ash until the liquid has all evaporated.  What's left is as hard as a rock.  The first time I thought I had ruined the fabric. But....since I didn't have anything to lose, I squirted dye onto it. And I loved the results!!

Here are two fat eighths after the SA has all evaporated.  You can't tell it is quite hard by the photo so you'll just have to take my word for it (ORRRRR experiment with it on your own!!)


I used dye I had mixed for another project, let it batch. Washed it out and ironed it and VOILA!!
Great FIRE colors don't you think?


Wednesday, February 20, 2013

Scrunch Dyeing – a few examples and more borrowed plumes


I don’t have too much experience in scrunch dying. This is of course my fault. So trying to mend this gap i’ll try to adorn myself with borrowed plumes ...  
To keep it in line, first my few examples.
Though I dye all my fabric myself, I do mostly solid colours. My older scrunch dyed fabrics ended up sewn as dresses.
Here is one which a friend of mine streched as a colour panel for her wall.
I did some new scrunch dyeing this month, using not only monochrome or analogue colours but the whole palette: mixing red, bright orange, sun yellow, intense blue.
Here is one with intense blue and bright orange.
What interested me more, to make a nice scrunch-dyed fabric with pale colours. I found dyeing pale colors much more difficult as strong ones and apparently I still have to work on the right dosage.


And here are my ice-cube scrunch-dyed fabrics. During the process

and the results


The blue became very pale and though I used mixing red (a slower red) it still turned out too close to fuchsia. The results both in the blue and in the red, I think have to do with the cold.

And now the borrowed plumes: They are from my friend Heide Stoll-Weber who is a magnificent dyer and who’s beautiful fabrics are very sought after, at least here in Europe. I asked Heide for some examples, how she uses her multicolored, scrunch-dyed fabrics.
First five quilts of her older series, Sprituals. They are machine-pieced and embroidered with seed-stitch with hand-dyed embroidery floss.


They are beautiful examples to use these fabrics. If you would like to see more of her recent work here are some pictures of her latest exhibition.

Thanks for reading it and I'm happy to hear your comments.

Monday, February 18, 2013

Scrunch Dyeing - finished project

I decided to use some of my fabric from my scrunch dyeing experiments in a free-form art quilt.  I combined some of the fabrics with some other hand dyed fabrics as well as commercial fabrics from my stash, and created some strip sets and blocks.  After auditioning several combinations on my design board, I settled on a grouping, stitched the top, then got inspired to try doing a little embroidery to embellish the middle.  I generally use lead pencil to sketch designs on my fabric, but thoughtlessly grabbed a graphite pencil and ended up with a smudged mess!  So I decided to complete the quilt, then launder it to remove the smudges, and I am so happy I decided to do that!  Ordinarily, I use fusbile interfacing to create my art and landscape quilts, but in this case, everything was done with stitching, so it was possible to launder the piece, creating some wonderful textures!  Afterward, I used a lead pencil to sketch a vine on the middle strip, and added some embroidery to the square on the right top quadrant, enhancing a design that came from dyeing the fabric with a portion wrapped around a button with a daisy design.  Okay, enough words!  Here is the project:
I used free-motion quilting on the border, the upper right square and the lower left square.  The rest was 'in the ditch' quilting.

Closeup of the flower - the design was very faint without the embroidery embellishment.


Closeup of the scrunched square with free-motion quilting.  I am calling this piece 'Tribute', in honor of my Mother, Step-Mother, Grandmothers and Great Grandma, all of whom were inspirational to me through their talents in various fiber arts.  I hope this will inspire you to not only try the dyeing techniques I demonstrated here, but also to use the fabrics you create.  One thing I have learned is that they look much better in projects than they do in my storage boxes! Thanks for reading and participating in the discussions here!

Saturday, February 16, 2013

My Try at Ice Dyeing

I finally had a chance to try some ice dyeing.

Here is my set up--I used two small containers (I only show one in the picture.) in which to scrunch fabric and one big container covered with a grid. I placed two fabrics in the big container under the grid and placed the remaining fabrics on top of the grid. Then, I covered the fabrics with ice I purchased at the store and sprinkled the ice with powdered dyes. Here's the setup...
Here are two of the fabrics before dyeing. The piece on the left is a "wipe-up" rag. The fabric on the right is an OLD calico fabric that I really hated. I thought any kind of dyeing could only help this poor "dog."
Here is what they looked like after ice dyeing. The fabric on the right was one of the fabrics placed under the grid for dyeing.
These are some commercial fabrics I wanted to experiment with.
After dyeing...
This is a flour-paste resist piece before dyeing.
This is after dyeing. This fabric was in one of the small round containers. I used fire engine red, rust orange, and bronze dyes.
Another piece of flour-paste resist before...
And after... This fabric was in one of the small round containers. I used rust, bronze, pumpkin spice, and golden yellow dyes.
This is the only "plain" piece I dyed. It was one of the fabrics under the grid.
I like the results, but I didn't get that "crystal" effect I like so much. I think there are a couple of reasons for that. I wanted to see what difference it would make to use dry fabric to start with, so I used fabric I had preciously soda soaked and dried. The other reason might be that the ice I used was not really small. There were big chunks of ice rather than small cubes. (I think I read somewhere that that might make a difference.)

Tuesday, February 12, 2013

Scrunch and Snow

I thought I would take advantage of Judy's scrunch dyeing technique this month and use it for some snow-dyeing.  

Most of the snow-dying I have seen involves setting up a rack and screen for the snow and dye to drip through the fabric.  I've never done that -- I just let the fabric sit in the soup of melted snow and dye and I have always achieved really interesting fabrics that way.  But I hate wasting dye.  So I thought: what if I folded up fabric and put it under the scrunched fabric to act as a kind of rack and absorb some of the melted snow and dye?  I figured I would get some pastel coordinating fabrics to go with my snow-dyes.  

So I scrunched up fabric on top of the folded fabric (all of it was soda-soaked), added a layer of the powdery dry snow from my front garden, and poured on dye concentrate.  

I brought all of the containers inside to batch overnight.


Of course, I got beautiful snow-dyes.


But the real surprise was underneath.  No pale coordinating fabrics here.  I got some great stuff with light and dark areas.  I think that some of these will benefit from further over-dyeing to really bring the colors together.

I also tried sprinkling some dye powder directly on top of the packed snow.


I really like the results.  And it was much quicker than mixing up the dyes into concentrate, then pouring them on the snow.  I think that the best color is achieved by the folding and/or scrunching of the fabric before adding the snow.  The one in the middle has a nice effect because I loosely folded the fabric in a fan shape, then scrunched the ends.  So for "school nights," when I am pressed for time, this is a great option for me.

Friday, February 8, 2013

Projects using scrunch dyed fabrics

Now that we have scrunch dyed some fabrics, what do we do with it?  Well, I thought I would share a few projects I have made using my scrunch dyed fabrics.  Most of the time, the project comes to mind after the fabrics are dyed, but I do have one Landscape Quilt I created several years ago, where I specifically dyed the fabrics to use in making the quilt:


I used a photograph I took of some rocks as my inspiration, but needed to enhance the design with color.  I had a lot of fun experimenting with various colors to come up with the right combinations!
For the fabrics I dyed for my earlier posts, I did not have any specific ideas about what I would do with them ahead of time.  I was more interested in comparing the different variations to see what results I would get.  Once I finished the dyeing, I had to go through a period of mulling over what I thought might be a good project that would showcase the fabrics in an interesting way.  I actually came up with a couple of ideas, and I'm in the process of pursuing one based on Rayna Gillman's book, "create your own free-form quilts.  If you are unfamiliar with Rayna or her techniques, you can see posts here in the January 2012 archives, or visit Rayna's blog here for more info.  
Here are some pictures of stripsets and blocks I have created so far using my scrunch dyed fabrics, other hand dyed fabrics and  commercial fabrics all from my stash:


Needless to say, I have just begun, but already I'm caught up in ways I can use these fabrics in what will probably end up an abstract wall hanging.  I hope to use a couple of larger pieces to showcase the designs that I got with the scrunching technique.  I will post more as I go along, and I hope to see posts or links from others this month showing your dyeing experiments as well as projects where you use the fabrics you dyed!

Tuesday, February 5, 2013

Scrunch Dyeing - Part 3


SNOW DYEING

This is only my second try at snow dyeing… my first, done a few years back, was not great.  But since my friend Wendy has had such great results, I decided this would be a good time to revisit this method of dyeing.  By the way, you can see Wendy’s snow dyeing experiments here.
A note here – many dyers recommend doing ice cube and snow dyeing on a grid, to allow the melted ice or snow to drip through into a container and avoid having the fabric sit in a puddle.  I decided to try both methods in this experiment, so first I dyed in a bucket without using a grid.  I covered my scrunched fabric with snow, then I sprinkled dye powders over the snow.  I let it batch until the snow melted, about 2 hours or so.  Here is how it came out:


I like the results, but wanted to try the 2x dye concentrate as well.
Here is the 2x result:


How interesting!  The colors are much more intense than the powdered dye version, which must mean I would need to use more dye powder to get the same intensity.  But I also love the crisper markings I got using 2x dye concentrate!  Both were batched about the same amount of time, so I’m not sure why the results came out so differently.
Here is a side by side comparison of the two:


So after doing those 2 pieces, I decided to try one using the grid method:


Here is my fabric scrunched, setting on the grid, with snow packed on top


Next, I poured small amounts of the 2x dyes over the snow.  Looks like a velvety
sno-cone, doesn’t it?


After batching for several hours, here is the result.  Again it has softer markings and more muted colors than the regular low water immersion, but it still has some visual interest.
 FROZEN DYES

My last experiment was to mix dyes and freeze them in ice cube trays, then cover a pre-soda soaked piece of scrunched fabric with the ice cubes.  One thing I noticed was that the cubes didn’t totally freeze the way just water does, even after 24 hours! 
I used the same 3 dye colors – Orchid, Lilac and Avocado, although I didn’t have a lot of lilac.  And I just randomly placed the ice cubes on the fabric, but as you can see below, I didn’t get as much color blending with this method:


I think this piece will make a great background for a landscape quilt.  Which reminds me, I hope to have at least one project finished using some of this fabric before the end of the month, and will add a post then!    Questions?  Post them in the comments section, and we'll get a discussion going.  I know I'm not the only one of this group who has dyeing experience, and I'd love to hear other methods for scrunching!  Meanwhile, I hope you will find something here that will inspire you to pull out your dyes and play with these techniques. Be sure to let us know if you do, either by linking to a blog post, or you can send me an e-mail with pictures if you don’t blog, and I will post about your experiments here!  Happy scrunching!

Friday, February 1, 2013

Scrunch Dyeing variations - Part 1


OVERVIEW
One of my favorite dyeing methods is “scrunch dyeing”, where you literally scrunch up fabric that has been pre-soaked in soda ash solution, and add dyes to create wonderful organic patterns and color combinations.  I struggled for awhile in the beginning to come up with the look I was striving for, but once I finally ‘got’ it, I have 
been happily scrunching ever since!  Somewhere along the way, I started doing a little experimenting with alternates to the standard Low Water Immersion dyeing method, and I found I could get some pretty interesting results, so I thought I would do a little ‘compare and contrast’ demo here to let you see what the different methods look like, side by side.  But first, a little ‘housekeeping’.

SAFETY FIRST

If you are an experienced dyer, you already know the safety guidelines for dyeing, but if you are new to dyeing, please use the following guidelines:
Only use tools that are dedicated to your dyeing, not to be re-used for food preparation. 
To ensure you do not ruin your work area, it is advised that you cover your surfaces with plastic before working with dyes or the auxiliary chemicals associated with dyeing, or have an area set up that you can easily wipe down after a dye session.  I work in my laundry room, so I can use rags to wipe up after myself. 
When mixing dyes, it is suggested that you use a mask or ventilator to prevent inhalation of dye powders, especially if you have pulmonary issues such as asthma or allergies.
Always wear rubber gloves when you dye, to prevent staining your hands, and wear old clothing that will not be ruined by dye splatter.
Keep rags or paper towels handy to wipe up spills.
If you need basic 'how to' information on dyeing, I can recommend Dharma Trading Compay, where I buy my Procion MX dyes and other supplies.  They are great, have an online store, as well as lots of experienced folk to help you on your way.  
OKAY, ON TO THE DYEING!
For all of the following examples, I pre-soaked the fabric pieces in soda ash solution (1 cup soda ash powder stirred into 1 gallon hot water prior to starting my project; any unused solution can be stored in a covered container indefinitely).
First off, I tore 4 pieces of cotton muslin into fat quarters; then I numbered them 1 – 4, so I could keep track of which dye variation I applied on each


Then I mixed the dyes.  I chose one of my favorite color combinations: Orchid, Lilac and Avocado.  I mixed them at medium strength – 2 tsp dye powder per 1 cup of water.  I don’t use urea, salt or any other additives.


.


I like to store my mixed dyes in Spaghetti Sauce jars – they have measurements on the side to help me make the proper amount.  With a few exceptions, I can store my mixed dyes for at least several months in a refrigerator out in the garage without them losing their strength.  I have noticed that yellows and blues tend to lose their strength sooner than other colors.  I also try to remember to agitate the dyes a little when they have been sitting for awhile, to mix any solids that have separated and migrated to the bottom of the container.
Below is the soda ash container, with the fabric soaking.  I also stir the soda ash to dissolve any solids that have settled to the bottom.  I pre-soak the fabric (which was pre-washed to prepare for dyeing) for about 15 minutes.  Then I squeeze out the excess solution and prepare to scrunch the fabric for dyeing. 


Next, I spread the fabric on the top of my washer for scrunching: 


Then I scrunch the fabric, trying to keep the ‘peaks and valleys’ pretty even:


Once I have the fabric scrunched to my liking, I place it in my container:


Now it’s time to dye!

1)      Standard Scrunch dyeing
I pour a small amount of my first color into a measuring cup with a spout, then I pour randomly over the scrunched fabric:


Then I repeat with the remaining colors, usually working lightest to darkest.  Below is the first piece with all 3 colors applied.  I batched for about an hour before I rinsed and laundered.  I rinse first in cold water with a few drops of Synthrapol textile detergent; then I wash with hot water and more Synthrapol, and finally I rinse 2-3 times in warm water.  If you do a large batch of dyes, you can do the wash/rinse in your washing machine.  Then I dry and press.  


Here is the first piece:


One reason I love scrunch dyeing is that I am able to achieve light and dark, and I love the fractured patterns that frequently occur.
In my next post, we will explore a couple of variations that I have experimented with, and compare the results to standard scrunch dyeing.  Stay tuned!