
WEEK 3 - STITCHED SHIBORI - PARALLEL LINES
I tried a variety of things this week. I may have
misinterpreted the concept of
"parallel" lines. Some of my stitches are sewen on the fold, others are
simply repeated lines of parallel stitching.
All in all a good variety of parallel line results.
For this
week's posting I had fun using an old friend to prepare shibori stitches for
dyeing.
I dug out
my old smocking pleater that I used for making little garments for the young
ones in my life. It draws up perfectly even rows that can be stitched over to
create beautiful designs. I drew up samples on the straight of grain and on the
bias. I drew up and removed some of the stitching lines to change the spacing.
It created an exciting canvas to dye.

Top to
bottom I have:
a. diagonal
drawn work on raw silk
b. lightweight
cotton muslin
c. cotton
and linen blend
d. on
previously pre-dyes fabric
SAMPLE 1a:

While I
used a medium strength dye, It turned out rather wimpy with just an hour+ soak
in the dye bath.
SAMPLE 1b:
The
muslin flooded with the dye and left very little by way of markings.
I
refolded it in thirds and stitched it again using four horizontal lines and
parallel bias lines. The result of the two techniques gives a different feel to
the shibori. Rather undefined.


SAMPLE 1c:
This
sample was rather wimpy too!. The regular rows give an interesting pattern.
I used a
medium strength stormy gray. An hour was too short a time to dye the thicker
layers of fabric.

SAMPLE 1d:
The
dyeing of a pleated previously dyed fabric gave interesting patterning that
will make a nice background piece of fabric. This was my hands down favorite
piece of the lot.

SAMPLE 2:
This
sample was drawn up on rayon. Two evenly spaced rows with a larger space
between the rows.


SAMPLE
3:
Here is a case where I was in too
much of a hurry to draw up the piece. I never took a shot of the stitching. I
stitched upright rows as well as in two directions.
Pimatex
is a meaty fabric and should have produced more distinct results. Again, with
medium strength stormy gray, an hour was not long enough to let it linger in
the dye bath.


SAMPLE 4:
I made
curved parallel lines. These were created on a fold. I also did a drawn line of
stitching on each side of the fold.


SAMPLE 5:
Again my
enthusiasm galloped ahead and I neglected to take a photo of the stitched work
prior to drawing it up.
While it
is light, the lines show the double lines stitched on folded fabric.


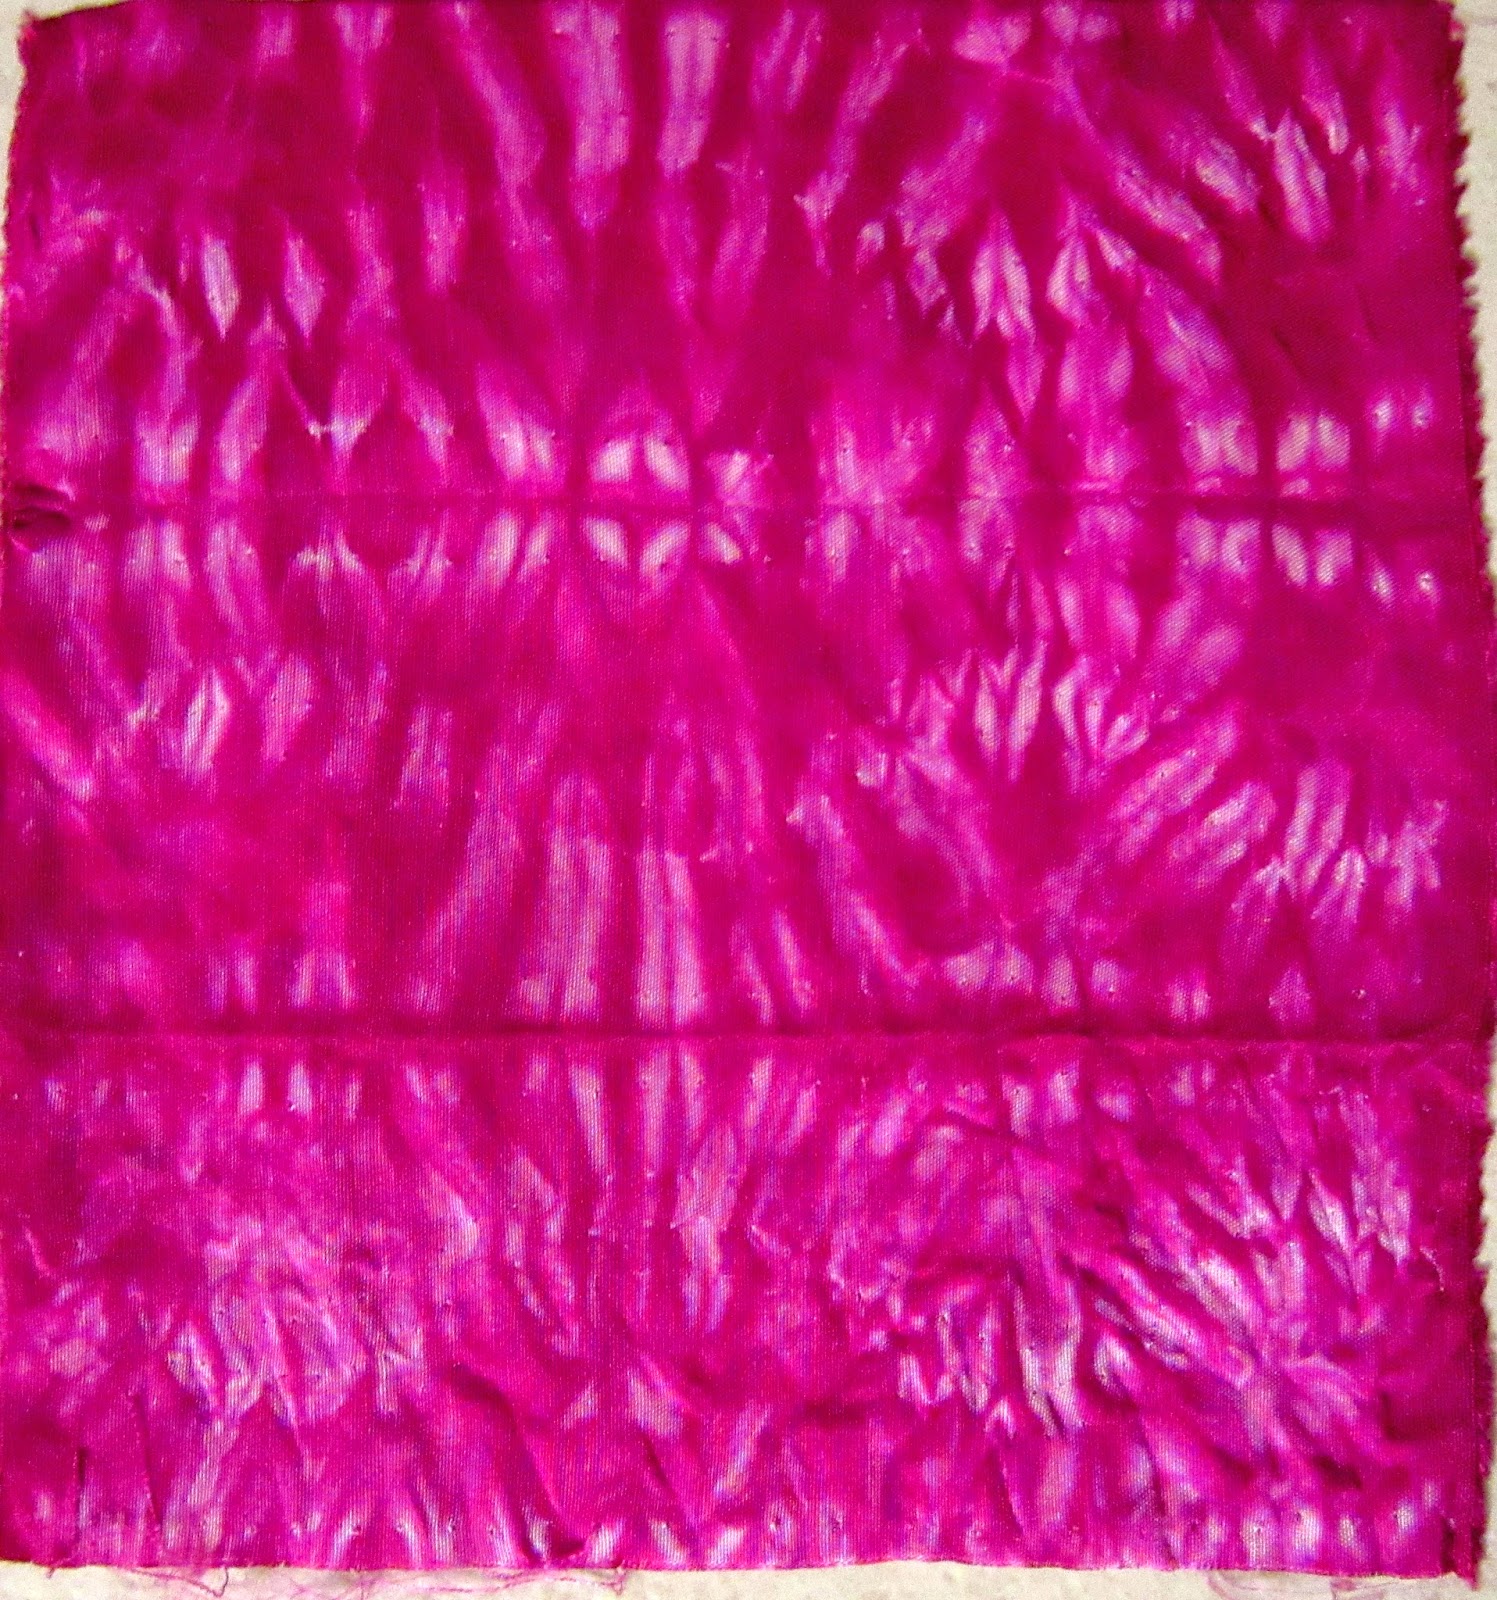
SAMPLE 6:
This
sample has a wild variety of whip stitch over a fold and running stitch along
the fold. This was repeated for the length of the fabric. The whip stitches were hard to draw up.


I forgot
to draw up the bottom line of stitches.
SAMPLE 7:
The
fabric was folded into thirds. This sample was one row stitched with running
stitch on the fold (top of sample) and one row of running stitch at the
opposite side. In the center are three rows of gently curved parallel lines.

SAMPLE 8:
This
sample is similar to an earlier sample with running stitches stitched on
the center diagonal fold. Running stitch rows were sewn through the
two layers of fabric and finally two single rows of running stitch were stitched over a fold on both sides of the fabric. Silk duplioni gives a nice result as it
accepted the dye really well.


LEARNINGS:
- · An hour soak is not enough for me using shibori techniques. It takes time to penetrate the thickly drawn up cloth.· Using the pleater is definitely an easy way to draw up the fabric for shibori ! It is also easy to remove the stitches.· Whip stitches are more difficult to remove. They give good visual impact.· Creating shibori on a piece of pre-dyed fabric adds interest.· When there are more than two folds of fabric, dye penetration is more limited.
Next week I will return with my last posting with enclosing shapes.
See you then.
Sheila
I love the idea of speedy pleating for shibori!
ReplyDeleteWhat kind of dye are you using that it takes more than an hour for intense colors? My experience is that the amount of dye concentration and using the right auxiliaries are more important than time when using MX dye - which "strikes" within 15 minutes. An hour wait after pouring on the soda ash is sufficient to set the dye, but the color is already apparent. Cloth always dries a few shades lighter, of course.
Ann Johnston's book and DVD are excellent resources.
Diane
Good idea to use different kind of fabrics. Do you see a lot if different in the results after dyeing?
ReplyDeleteCan you explain what the pleater is? I know what that is on a sewing machine, but you are hand stitching these, aren't ?
ReplyDeletelots of experimentation here...
ReplyDeleteI like the results of sample 5 with the crisscrossing and the diagonals in sample 2.
Gorgeous pink dye in sample 6. I did some of the whipstitching too for my post this week. I like that it is fast to sew up.
I have never heard of a smocking machine but it sounds like a great machine to use for parallel stitching- great results in sample 1 d!!
We learn so much this month, thanks again for sharing!!!
ReplyDeleteI just posted a photo of my pleater in
ReplyDeletea separate posting dated October 18th.
I find it a wonderful tool for my stitching life and now my dyeing life!
Sheila
In response to Diane's posting:
ReplyDeleteThe dye that gave me grief was MX Pro Chem Stormy Gray. It was a large jar and is not a new one. When I am home again, I plan to try dyeing a 10% concentration with it to see if it has lost its potency. I like to do quick dyeing as you described but something was "off" with my results. I have Ann Johnson's books but not her DVD...yet.
It is always a surprise when something does not work when dyeing with MX dyes, and often can be explained by operator error.
Sheila