
This is Eke again, for the fourth week and also my last Tuesday in this month with the stitch shibori project.
Last week I worked very hard to be able to present my last swatches today.
Area enclosing was the theme, and I didn't know exactly how to realise this.
So I taught that, when I made shapes in an area, they would automatic enclose each other, such as positive and negative images.
I started drawing circles and squares, and filled them, or the surroundings, up with stitches.
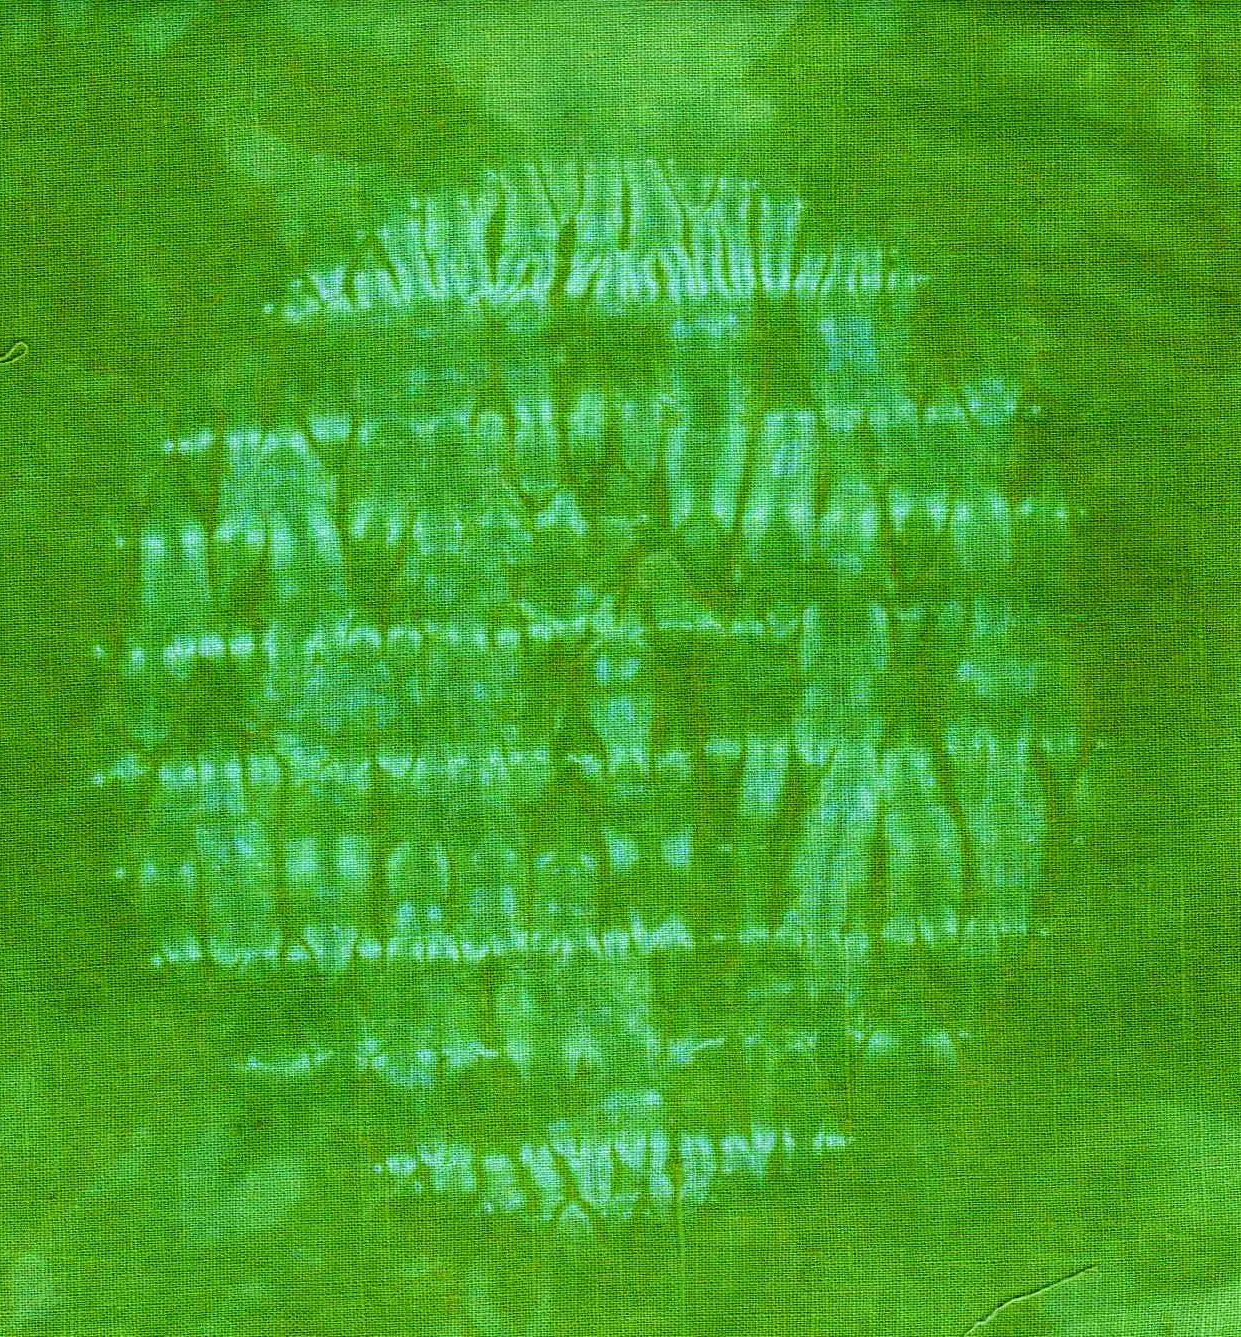
While I worked very hard, stitching and knotting, I forgot to take pictures of the parts after knotting and before dyeing.
At the end I saw, that I only made one photo with threads of the first swatch I made.

On this photo you can see my way of thinking for this week.
I made a shape, filled it up with lines, stitched with different sizes of stitches and different spaces between the lines. In this way, I made my six samples for this week and the bigger part for the middle of the quilt I want to make of all the swatches.


After I pulled out all the threads, I was a bit disappointed by the results.
My shapes were not as clear as I expected. Then I realized that it was, because of the dye bath I used. This time I used turquoise and amber in the combinations 30/70, 50/50 and 70/30%. I forgot that the turquoise is very strong and takes over the white parts and I realized that I used too little dye, made a mistake while calculating.
However, there was no time to do it again, so this is what it is.

For the big piece I used different techniques, a circle and a triangle which I stitched with lines. To minor circles, where I stitched the outlines and turned the thread around the fabric before knotting. And a square in which I used Nienkes technique with the pleats and stitching over it.
After that every piece was ready, I layed out all the pieces on my kitchen floor, to see how the quilt would become to look like.


And I used another technique from Nienke, to dye three strokes of fabric, which will be stitched between the squares. I looked for the post on Verfvirus, but couldn't find it. Nienke, if you read this, maybe you can share a link to your post in the comments? (PS Nienke here, do you mean this post: http://andthenwesetitonfire.blogspot.nl/2014/02/tray-dyeing-with-ann-johnston.html?)


And I sewed three squares together to give an idea how it will be.


This is the end of my participation on this blog.
I learned a lot of the shibori process.
In this last week I learned, that a lot of stitching not always gives the best result.
That the colour you dye with, is essential for the results.
And that my hands and thread work perfectly together after four weeks of stitch shibori.
Thank you Nienke, for giving me the chance to participate on this blog this month.
And thanks to all the other, who shared there experiments this month.
It was great fun.
my blog kleurdesign
After that every piece was ready, I layed out all the pieces on my kitchen floor, to see how the quilt would become to look like.
And I used another technique from Nienke, to dye three strokes of fabric, which will be stitched between the squares. I looked for the post on Verfvirus, but couldn't find it. Nienke, if you read this, maybe you can share a link to your post in the comments? (PS Nienke here, do you mean this post: http://andthenwesetitonfire.blogspot.nl/2014/02/tray-dyeing-with-ann-johnston.html?)
And I sewed three squares together to give an idea how it will be.
This is the end of my participation on this blog.
I learned a lot of the shibori process.
In this last week I learned, that a lot of stitching not always gives the best result.
That the colour you dye with, is essential for the results.
And that my hands and thread work perfectly together after four weeks of stitch shibori.
Thank you Nienke, for giving me the chance to participate on this blog this month.
And thanks to all the other, who shared there experiments this month.
It was great fun.
my blog kleurdesign
What a great idea. You used your fabrics for the blog posts and ended up with a quilt!. It is so funny because I was just thinking of Nienke's dyeing technique when I got up this morning so I will await the links. Great job!!
ReplyDeleteWhat a nice results Eke and I LOVE your piece with blocks, I have been thinking to do the same, but didn't decide yet how. To be continued. I enjoyed your inspirational company this month, a big thank you!
ReplyDeleteGreat results especially on the big piece. I like how you rotated the direction of stitching in the big circle.I also like how the white pops in the small circles and how abit of turquoise pops through too!
ReplyDelete