A TECHNIQUE DRIVEN Blog dedicated to mastery of surface design techniques. First we dye, overdye, paint, stitch, resist, tie, fold, silk screen, stamp, thermofax, batik, bejewel, stretch, shrink, sprinkle, Smooch, fuse, slice, dice, AND then we set it on fire using a variety of heat tools.

Friday, May 23, 2014

Elle  is our guest blogger today... again she has done a great job! She has taken  the concept of texture and ran with it. She how she has used texture to enhance her work... Check out

(noun) - Texture, an element of art, is used to describe either the way a three-dimensional work actually feels when touched, or the visual "feel" of a two-dimensional work.

 In the visual arts, texture is the perceived surface quality of a work of art. It is an element of two-dimensional and three-dimensional design and is distinguished by its perceived visual and physical properties. Use of texture, along with other elements of design, can convey a variety of messages and emotions.

 Texture refers to surface and is in fact surface. Everything that has surface has texture.  It can be 3-D, tactile, touchable.  It can be 2-D, visual, an illusion.  Texture makes things interesting.  Texture can be felt or it can be seen as light skims the surface revealing the texture.

I hope to use both kinds of texture as I work on my mothers and daughters memory pages and honour them as the princesses that they are.

Lutradur has texture.  It can be seen and felt.

Lutradur can be run through an embossing folder and die cut machine.  More texture.

An ink spray will not add texture because it soaks into the fibres that already show texture.

But paints lay on the surface and if applied thickly will add texture.  This example has a thin layer of paint that adds a matte texture because it obscures the fibres.

In keeping with flat techniques, foils add 2-D shine.  I tried double sided tape.  The first bit was an example of how not to apply foil.  The score tape holds VERY fast so there was no second try.  :O  I imagine that one could make their own washi tape or even Lutradur 'ribbons'!.

But then there are all the wonderful products that are actually formulated to add texture.  Tactile texture.  I have a small sampling of Golden products to try.

The dimensional paints are lightweight and grab the Lutradur easily when they are dotted on.

My wee bottle of  Puff Paint was old so I ended up spreading a glop of it through a fine stencil.  Then I used a heat gun on the front and on the back.  This produced a very cool (hot) happening because the close heat dissolved some of the light weight Lutradur  and added a lacy effect that isn't really showing in the photo. Another surprise was the how little actual weight there was to the finished product.

I coloured  fibre paste and used it through a stencil on some Lutradur that already had an image stenciled printed on it.  
The fibre paste enhanced the rough brick look. My sample jar of coarse pumice gel would have done something similar I imagine. The molding paste and the extra heavy gel would have been smoother.  Good for snow drifts or wedding cake icing.  :^) 

My first try with the clear tar gel revealed that it is a thick but runny substance.  I tried confining it to a stencil but it 'relaxes'.  It would make a good drawing substance, again like icing squeezed from a cake decorating tip.  I did sprinkle some glitter on before it dried.

Embossing products do the same thing but with a flatter effect.  Again I sprinkled glitter on.

This example uses both kinds of texture.  I used the leaf mask and over sprayed.   When it was dry I smeared the glass beads through the stencil.  Masks and stencils with the same motif more than double creative options!    These are from Joggles which is a GREAT source of techniques and products.

The texture gel, Glass Beads adds some weight to the finished fibre art.  I choose not to colour my beads.  I felt like I had it way too thick so I carefully laid the stencil back down and scraped some off.  It is pretty stiff stuff.  Micro beads and gel would likely produce a similar result.

I was most impressed by Lutradur's ability to support heavy materials.  I squeezed a lot of Glossy accents down on the Lutradur and piled lots of beads on top.  No problem!

And we can add texture with fabric, threads, beads, etc.  I had a large selection to choose from as I worked on my brides page.


I am feeling like I have leaped from kindergarten crayons to marrying straight out of school.  I kinda did but the learning curve usually has more steps in it.  Again I have a lot to put on one page.  Four generations.   I stenciled onto a sheer fabric for my background and then ironed it onto a thick base that had an adhesive on each side.  Four photos fit if I cropped and did ovals.  That took a week alone to figure out. :^)  I was all for lace and beads but this seemed to require a more subtle effect.  The size decreases and the frames are cardboard.  I tried to make them fit each bride's sensibilities.  The photos will be cut and added later because I am printing my own.  In the process I smeared one in my hurrying.  :( I may fiddle a bit more as I couldn't find a bit of velvet ribbon to represent my own dress.   I daren't linger overlong because there are ten more pages to prepare and if I tarry too long my granddaughter may find a nice groom!  lol

This page required some mindfulness as the palette is creamy white.  The interest must come from the texture but it also required an understated elegance.  The bride may look like a princess in frothy laces but I do believe most mothers manage to get some good solid stiffening into the bride's backbone and corset which supports the softer layers and shows off all that lovely texture. 

Lutradur is kinda like that as well. 

So when we lift the bubbly to toast the beautiful bride lets give a wink to the mothers, the teachers, the supporting cast that helped bring another princess into the kingdom to show off the textures that enhance our lives.

Wednesday, May 21, 2014

Mono Printing.... and Lutradur

Mono Printing.

Paint was layered on the printing plate . Then the marks were made in the paint. The Star shape was a metal cookie stamp on a handle. 

You can create a gelatin plate to do this or you can purchase a gelli plate by Gelli Arts. Or you can use a piece of acrylic or a glass plate. 

the frugal crafter has a video of how to do mono prints and she also has tested recipies on how to make your own gelli plate. 


The technique for mono printing is the same whether on glass, acrylic or a gelatin plate. 

Layer the paint onto your surface with a brush, brayer, squeegee, credit card. 

Make marks in the paint with stamps, roller stamps, brushes, even your fingers. 

Then take the Lutradur and lie in on top of the paint.

 Pat it down. Or use a clean dry brayer to roll over it. 

Then carefully peel the print off and set aside to dry. Pattern and colour at once!

Great texture when you use heavier acrylic paints.


or use less paint and get a lighter effect. I can't quite remember this may have been a second print when we had our play day  with my small group. 


This was done with roller stamps. 

One thing to remember when you mono print is the design will be a reverse image of what you have drawn. This becomes a problem when you use letters as they come out reversed.

Mono printing is endless fun. Each print is unique. Sometimes you can get a second lighter print.  

Grab your paints, stamps, string, mark makers of any kind. I am always on the look out for interesting potato mashers now.

You can use mono printing with paper of course or fabric but I like the way the lutradur holds structure or form and allows for the translucent of the lutradur. 

 The plates wipe clean quickly so you can create many prints in a short time to add to your stash for mixed media supplies or your art work. 

So try some mono printing the next time you feel the need to create! 

Have you used mono prints in your work? or tried it with Lutradur? 

Let us know your tricks, success or failures. 

Jo 
thesewinggeek.blogspot.ca


Sunday, May 18, 2014

1As I celebrate time Victoria Day weekend with my friends and family I thought it was time for another question and answer from Leslie Riley. 

Lesley inpires me as a artist. She wears many hats so she knows what busy is. Her blog, newsletter and website provides me with a lot of food for thought. So I asked her the following. 


      Jo: As an artist, writer and busy art coach do you have any thoughts how important it is or if it is to your art practice to explore different ideas like this blog presents?  

Leslie: I have always said that it’s important to explore EVERYTHING. It is in the doing, the playing, that the AHa! moments arise. Your biggest insight may be that you don’t like the material or techniques, and that’s OK! But you may find that it fires off little idea sparks for something else or a new way to use or do something. You never know where inspiration is going to come from.

What is most important is that you PLAY. Approaching new materials and techniques with a ‘what-if’ or ‘let’s play’ state of mind takes the pressure to succeed and excel off and allows for some pretty fantastic results.

Jo: Now some personal thoughts on what Leslie's response was. I have struggled with  what I want to do with this desire to create and learn. I belong to SAQA and attend our local regional meetings. There are many serious artist that I have met and admire. I am not there yet in my head or life. I create to learn and explore. 

Why do you create and explore..... 

Jo 

And since this does not have a technique I will share with you an picture of my place where I rest and rejuvenate
.... 


Saturday, May 17, 2014

Molding Paste, Glass Bead Paste and Lutradur....

 I found molding paste in a kit at my local craft store when I was looking for matte medium . 

Golden brand molding paste is described on the art supply web site dickblick as the following " Molding Pastes, also called Modeling Pastes, can be used to add textured relief to a painting. Create thick impasto layers, Mix them with other products, such as Golden Acrylic colors. Molding Pastes are water-based, formulated with 100% acrylic polymer emulsions. Non-toxic.


I know there are other products on the market but this is the one that I have tried. It is fun and easy to use  molding paste with your stencils. And it is molding paste gives a great relief onto many surfaces as well as Lutradur. 

I added some acrylic paint to the Golden molding paste. Start with a small amount. You can always add more to get the colour you wish to achieve.


Adding paint to the Golden Molding Paste


Mix Well and add more paint if desired


Apply with a old key card or with a palette knife 


Lift Stencil and let dry. Scrape leftover molding paste off of you stencil to reuse the excess. 
.
Here is a close up 


 You can also use glass bead medium to put paint in and then put through stencils.


 You could use the molding paste or glass bead without paint in it and use paint on top of it after.  I love the texture you get with the molding paste and the glass bead paste.


Here are a few more pictures of using molding paste painted. 


I am going to add some detail on top of the molding paste when I use it for my projects. And probably add colour washes to the background Lutradur. 

I really like this technique. 

Whats up next?  Mono Printing and Lutradur.... 

Don't for get to add comments to enter the giveaways. Check Thursday, May 15th to find out how. 

Its a long weekend in Canada starting today. Victoria Day celebrating Queen Victoria of Britain. 
So it is off to the cottage with me and part of my family. 
For everyone in Canada have a good and safe holiday. 

Jo

Thursday, May 15, 2014

Elle Has been playing again! With Lutradur

Elle has been hard at work... 

She asks "Mother, may I have some help?"


(But I don't think she needs any... )

Cards are thoughtful and wonderful happenings to give and receive.  I have often thought a stash of homemade cards would be the right thing to have.  This past week's Mother's Day  and an upcoming gathering of the clan to celebrate a cousin's 85th birthday were the impetus to do it.

I had a package of bought blank cards and matching envelopes.  I gathered my supplies.

The first card is a light weight Lutradur stamped with permanent ink.  I use a double sided tape (1/4 inch) to hold it down.  The coloured lines are stripes from card stock and again adhered with double sided tape (1/2 inch).

I did not use anything but the white card for the background as I kept the look simple.

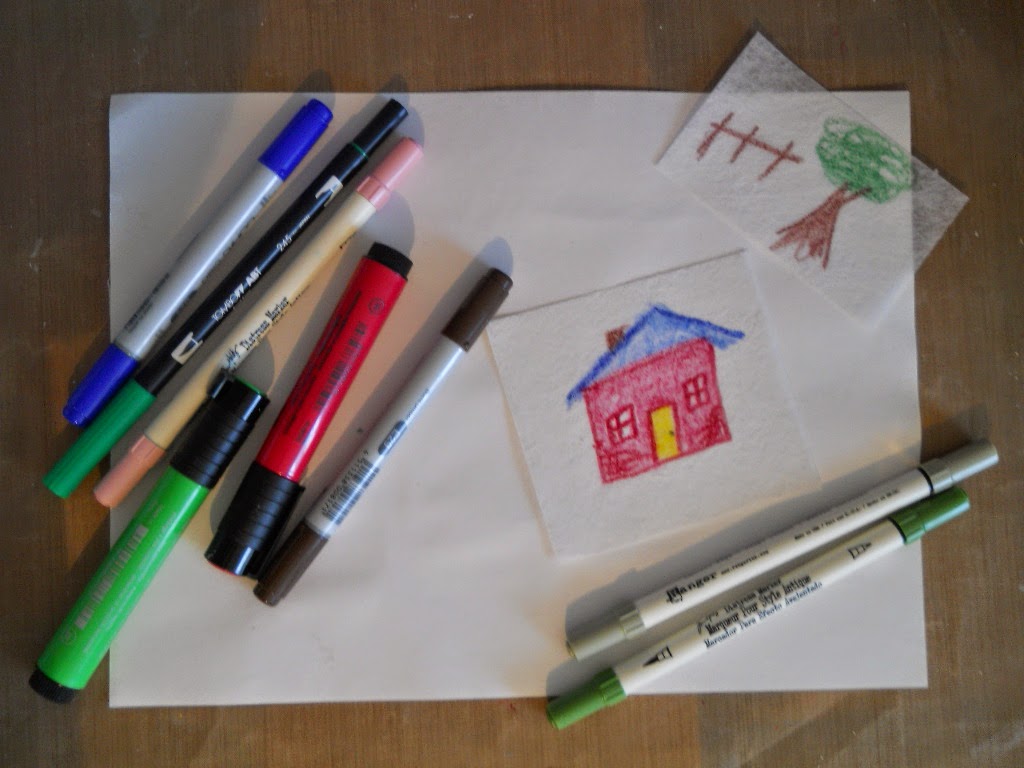
Next I used a scrap of Lutradur that I'd practiced drawing with crayons on.  The grand kiddies luv snail mail.  It needed to have the colours deepened and I used a variety of markers.
I would rather 'draw' on a scrap and then fiddle with placement later.  Takes the pressure away from that commitment to a blank white square, don't cha know!   ;}

 It looked a little forlorn in the centre of this card as the Lutrador didn't cover the whole surface so I added some washi tape borders.  Remember  when you fuss over the process that it is the thought that counts and the journey is progressive.  ;^)


I had a piece of medium weight Lutradur that I had embossed on the Bigshot.  I wet it and used Distress Paints to create a soft wash of colours.

 When it dried I positioned a stamp I'd prepared and cut out.

 This is more sophisticated and I think pop dots should hold the flower.  Very quick and satisfying.  


My thoughts turned to some dark Lutradur.  I wanted some glimmer.  The Radiant Rain nozzle was plugged so I just brushed some on.

 After it dried I ran it through the Bigshot.   I'm thinking I can get two cards with this particular process.

This is okay but...  I need to bump up the glimmer, perhaps a more opaque one.  Two works if the die is a bit smaller sized for the card and if I hadn't thrown away that wee bit between the branches.  ;)

 Next I stenciled a feather onto another piece of Lutradur that had a swipe of some kind of acrylic paint on it.

To show the translucence of the Lutradur I fixed it to patterned card stock.  Fun!


Lastly, I had another piece of Lutradur that had some spray on it and I masked off a flower and sprayed again.

A little addition of some washi tape and another card for the stash.  I try to keep them plain so I can use them for most occasions.  I could have done a few more but it was time to quit procrastinating and finish up the primary project for the week.  :)

Now I'm asking for help because the 12 inch square pages for the portfolio book each tell a story.  The current page is about helping with chores and needs to include past and present.  At some point I'll give a nod to the future. It also needs a wee bit of data.  Everything I put in as a purpose, at least to my mind.  But that is a lot for one page.  :O

 I started with a sheet of Lutradur that had photos printed on it.  They were too faint so I gessoed, painted, stenciled and sprayed the Lutradur.  The large piece wasn't going to do it so I divided it up, divided some more and spread them around to act as a corral for all the wildness in the middle.  Trimming and shuffling things around and taking stuff off and putting stuff back. ???  I thought about it while I fiddled with cards.

 "He who hesitates is lost.", to quote my dear ol' Dad!  It is what it is.

Ah, a final tweak.  I'll be adding a wee white "photograph' border around the page.  This one will finish 12 1/2 inches square.  Good enough.   Ten more to go.    Mother may need some more help!  :~)


Check out Elle at her blog... ellendacoop.blogspot.ca

Thank you once again Elle.... 

Jo 

Lutradur....and how to enter the draw.

I have been trying to think of a way to have people enter the draw for Leslie Riley's book. I don't want to be too complicated but I would like also to make it harder than just having you leave a comment. I guess it is the mother in me that wants my kids to work for something ...lol 

So I have decided that now until the end of the month that to be entered into the Give Away of Leslie's e-book 
Leslie Riley's e-book to be given away by C & T publishing
You get one entry for making a comment. (please make sure I can contact you via that comment) 

But in order to win what I call the Bonus prize 
 you have to work harder... 

You can only be entered into the Bonus Prize by

1. Having a tip that you have shared on the days topic

2. Tell me you have tried something as a result of this months post tips and what it was

3. If you have gone to my blog and become a follower.
(I don't want to coherence any one in becoming a follower of my blog so you can skip that one if you want to .... no pressure.)

So you can enter for Leslie's book by commenting any comment... (one entry per name) 

Or by doing #1, #2, and/or #3 for the Bonus Prize. 

As we go through the month I will add to the envelope with supplies we use..... (which will be a package of lutradur sample sheets, and things to try with lutradur that I will make up from my stash of cool supplies that I have at home here and I will send this package to anywhere in the world.)

Anyone who has commented or given me a tip etc before now is already entered... just fair. 

Great things in store... 

Jo


Wednesday, May 14, 2014

Paint Glorious Paint 2...


 Paints Glorious Paint Part 2

 Part 1 was all about showing samples of mostly acrylic paints on Lutradur. And any that I have tried have worked so far.


I thought I would show you next was watercolours and some of the ways to add colour with paints.

Water colours are a great way to add colour when you want to add colours that are translucent, soft and show the fibers off. Please remember that I am not a painter. So I am using inexpensive water colours. Either the dry paint cake pallet from the craft store or the tubes in a set from the craft store are what I have used.
Below are some of the results of my experiments used the same paints but different weights of Lutradur from the C & T package. The picture shows the heavier weight with denser fibres. I have plans for these two “landscapes” to show you later…..
Heavier weight Lutradur

Lighter weight Lutradur


What interests me so much about using paint is that it is easy to use and clean up. I use a plastic table cloth to cover my surface paint away and let dry. I either use a folding table I own and leave it overnight to dry or if I am in the kitchen I have some old trays that I leave them on and move them to somewhere to dry. In her book Leslie says she often paints in her yard and lets it dry on the grass. At my house the wind would blow it away or my dog would try to fetch it. I might get some interesting paw effects on it.
                                                                                                                                           
To apply the paint Leslie commented that she usually uses a foam paint brush. My favorite ways are to spritz it on with a mister or sprayer nozzle. You can control the coverage by how much you spritz, how dilute your paint is and whether your Lutradur is wet or dry when you apply.
Spritzing over a stamped image

Spritzing on black 

Close up of Spritzing on Black. Notice the great highlighting of the fibres with the light application of the spritzing.


You can use a tooth brush to fleck it on for texture and dots.
You can use a myriads of different brushes.
You can smoosh with cling wrap, paper, or other fibers.
You can stipple.
You can use leftover paint to mop up.

You can use paint on stamps
You can use stencils.
Water colour through a stencil. 


One thing I want to try is to see if you can do sun prints with the Seta colour on the Lutradur.Does anyone know?  I will have to try that the next sunny day I am home.  It has been rainy weather here in Southern Ontario Canada this week.

Whats up next? Molding paste and Glass bead paste on Lutradur 

Jo 
thesewinggeek.blogspot.ca