
A while ago (well since the first time I tried out this technique) I fell in love with rusting! The side of my house before we moved looked like some rusty junk yard! My favorite piece was a baby mattress with all the material ripped off and just the springs left. They rusted so nicely and made such a great pattern.
RUSTED BACKGROUNDS
I'm not going into detail on the process of rusting because so many of you probably know it. But for those of you who have never heard of this process or how to do it...
Here are the basics
Step 1
Select some fabric
A solid works best (I have always used 100% cotton). But why not try out some commercial fabrics!
Step 2
Select some rusted metal bits
If you don't have any, you can make them yourself in a few days.
Just put the metal bits you choose in a container and cover with vinegar. Trust me...you will WANT
to do this process outside. It does get a little funky smelling and looking by the end of the process.
HINT: Be sure the metal you choose is rustable. Galvanized for example won't work. Also, coated metals don't work unless you use an acid bath on them first from what I understand. After a couple of days check a piece or two to see if it has reach the level of rusting you desire. Rinse all the bits and you are ready to go. It is best also to let them air dry after rinsing.
Step 3
Soak your fabric in vinegar and put it in contact with the rusted bits
I've wrapped folded fabric around a rusty pipe, pushed it down into my baby mattress coils, layered it between rusted grids, wadded it up in the bottom of a rusted can, placed it in a rusted cast iron skillet....you get the idea.
Step 4
Cover it lightly with plastic wrap
Enough so it can get some air (which causes the oxidation) but also so it will help keep the fabric damp. You can also spray it with vinegar if it starts to get dry.
Step 5
Rinse, let air dry and enjoy the results!
When you have the color you want, take the fabric away from the rusted bits and rinse it well in salt water. Let it air dry and you are ready to find a million ways to use it!
Here are a couple of pieces I had on hand from previous rusting sessions.


Any way, hopefully that will inspire you to either get back to rusting or to give it your first try! The results can be amazing!...and very useful in backgrounds.
I also noticed there are a couple of "rusty" posts coming up in the next months! Keep an eye out for those!
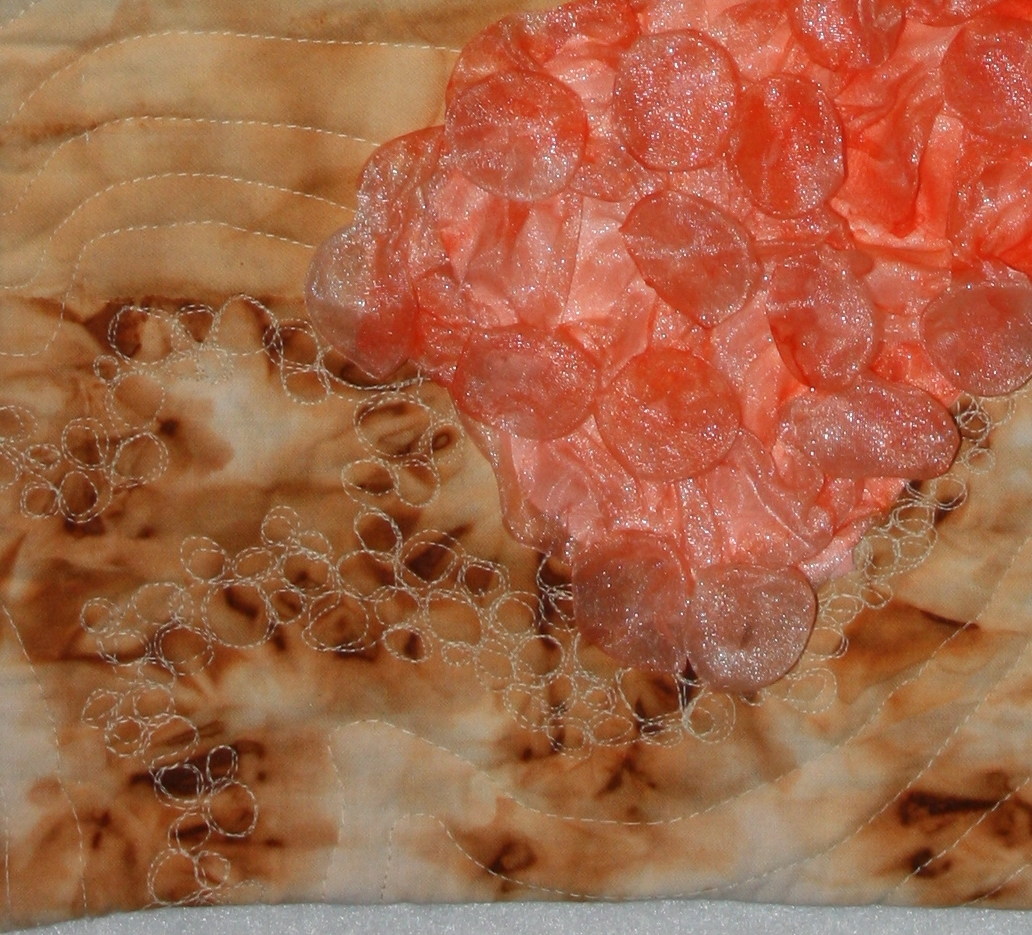
Here is rusted fabrics used in backgrounds of 4 pieces I recently completed. First a collage of the 4 pieces then detail photos of the rusted part. It is an underwater series and I used rusted fabrics for the ocean floor on these 4.


Here is another piece done years ago. You might remember half of it from the month I did last year on Art Quilting and Beyond. This is the whole piece before we halved it. You can see the rusted background better.


One short note for today. Especially if you hand quilt or stitch. The rust on the fabric does make it more difficult to hand stitch through. On a machine, no problem but you can hear a difference when stitiching through the rusted parts.
All for today! See you again on Wednesday!
Kelly L Hendrickson
RUSTED BACKGROUNDS
I'm not going into detail on the process of rusting because so many of you probably know it. But for those of you who have never heard of this process or how to do it...
Here are the basics
Step 1
Select some fabric
A solid works best (I have always used 100% cotton). But why not try out some commercial fabrics!
Step 2
Select some rusted metal bits
If you don't have any, you can make them yourself in a few days.
Just put the metal bits you choose in a container and cover with vinegar. Trust me...you will WANT
to do this process outside. It does get a little funky smelling and looking by the end of the process.
HINT: Be sure the metal you choose is rustable. Galvanized for example won't work. Also, coated metals don't work unless you use an acid bath on them first from what I understand. After a couple of days check a piece or two to see if it has reach the level of rusting you desire. Rinse all the bits and you are ready to go. It is best also to let them air dry after rinsing.
Step 3
Soak your fabric in vinegar and put it in contact with the rusted bits
I've wrapped folded fabric around a rusty pipe, pushed it down into my baby mattress coils, layered it between rusted grids, wadded it up in the bottom of a rusted can, placed it in a rusted cast iron skillet....you get the idea.
Step 4
Cover it lightly with plastic wrap
Enough so it can get some air (which causes the oxidation) but also so it will help keep the fabric damp. You can also spray it with vinegar if it starts to get dry.
Step 5
Rinse, let air dry and enjoy the results!
When you have the color you want, take the fabric away from the rusted bits and rinse it well in salt water. Let it air dry and you are ready to find a million ways to use it!
Here are a couple of pieces I had on hand from previous rusting sessions.
Baby Mattress Springs

L- Crumpled in Rusty Skillet, R- no clue!

I also noticed there are a couple of "rusty" posts coming up in the next months! Keep an eye out for those!
Here is rusted fabrics used in backgrounds of 4 pieces I recently completed. First a collage of the 4 pieces then detail photos of the rusted part. It is an underwater series and I used rusted fabrics for the ocean floor on these 4.


Here is another piece done years ago. You might remember half of it from the month I did last year on Art Quilting and Beyond. This is the whole piece before we halved it. You can see the rusted background better.

I totally love when Serendipity happens (more about that later) But this piece has a rusted background with blue down the center. To this day I have no idea how it got there. It happend after it was rusted is all I can tell you. We must have been dyeing with blue on that same day or something.
Anyway, I LOVE the way it turned out. I don't have a photo of the rusted fabric on its own but here it is in the finished piece.
RUST AND FOUND

Rust and Found - Detail
One short note for today. Especially if you hand quilt or stitch. The rust on the fabric does make it more difficult to hand stitch through. On a machine, no problem but you can hear a difference when stitiching through the rusted parts.
All for today! See you again on Wednesday!
Kelly L Hendrickson
Interesting pieces! I did have trouble stitching thru it on the machine. The thread kept breaking and breaking. Any suggestions?
ReplyDeleteI love to rust things! I am always stopping to pick up rusty bits from the ground, yards, streets.....now I wish I had married a machine shop guy!
ReplyDeleteHi Norma. I have sewn and quilted rusted fabric many times and have never had the thread break. Just a different sound coming from my Janome! I don't use any special thread...just whatever Gutterman thread I happen to have in the color I need. I do also use a new needle if I'm doing a lot of stitchhing in rusted fabric. Perhaps some other rusters might have some additional insights.
ReplyDeleteOh I LOVE to collect rusty bits too!! I have been known to risk life and limb to retrieve a rusted washer from the middle of an intersection!
ReplyDeleteI've found that using a new needle for Jeans/Denim worked best when stitching rusted fabric, the thread didn't seem to matter.
ReplyDeleteJust LOVE that rusted fabric
ReplyDelete