A TECHNIQUE DRIVEN Blog dedicated to mastery of surface design techniques. First we dye, overdye, paint, stitch, resist, tie, fold, silk screen, stamp, thermofax, batik, bejewel, stretch, shrink, sprinkle, Smooch, fuse, slice, dice, AND then we set it on fire using a variety of heat tools.

Thursday, April 9, 2015

Monoprinting

I am glad to have the chance to publish some of my experiences on  The Fireblog. I follow this blog for a long time and I appreciate your works, they inspire me.

Thanks Beth for this opportunity!


My name is Carmina Plosceanu and I live in Bucharest, Romania. Ten years ago I discovered textile art on the internet, but I started working only in 2008, after I joined the Yahoo group called "Peticelul Romanesc" (Romanian Patch) which gathered together some Romanian ladies from Europe, who loved textile art. The Group has completed the work in 2011 and then I enrolled in Milliande Art Commnunity, where I participated in many artistic exchanges and I had much to learn.

I am self-taught, I learned to work by studying of different techniques on the internet. After I experienced various textile art techniques, I started doing something else, textile collages, paper collage, textile dyeing, painting, plastic fusing, surface design, paper or textile beads, tyvek,  monoprinting, etc.


Today I want to present some monoprintings. First I tried to do monoprinting with acrylic on a ceramic plate. The things have not really successful, perhaps because I have not chosen the best color consistency.


For this, I supplemented by adding a few lines of drawing and the result is this ...


Then I made myself a gelliplate, a little one...


In this case, things went easier....


Then I tried to monoprint by using a plastic sheet...hum, could be better, acrylic dries too quickly!!
Finally, I had to add some corrections, color effects, on the monoprinted sheet.


From all this, I was able to draw a conclusion: it is true that, working with gelliplate, things are going better.


Carmina


Wednesday, April 8, 2015

Guestblogger Joke Hardenbol part 3


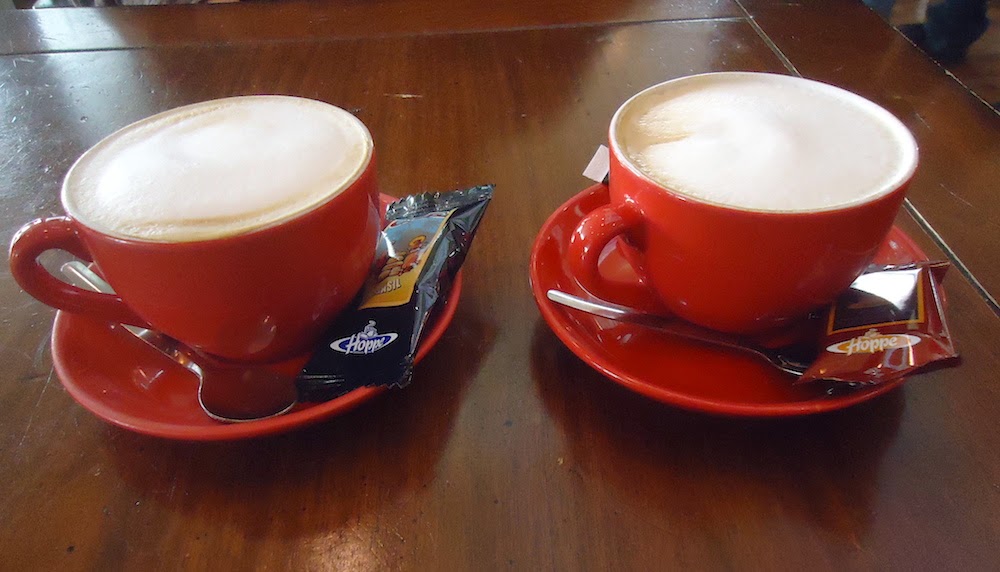
The Dutch word ‘gezellig’ is difficult to translate. Most of the time it is translated as ‘cosy’, which is not completely correct . We find it ‘gezellig’ if everybody is having a good time. We have a cup of coffee or tea ‘gezellig’ together. And with the coffee we like to eat a cookie. When you order coffee at a restaurant/coffeeshop you get a cookie with it. Most of the time a pre-wrapped one. And those wrapping can be nice. I am always inspired by waste, my husband and I open these wrappings carefully and take them home with us. That was the inspiration for this wall hanging.

The fabric for the background is colored by placing used tea bags on it and let them drip. 

This fabric is torn into small pieces which are stitched together with the aid of water soluble fleece. Next step was to empty the tea bags and stitched these on top of the squares with a strip of organza behind them. On top of the tea bags I placed some gold colored gauze and some shiny thread and stitched this together.
On top of that the pictures a cut out of the cookie wrappings are zigzagged. There is one exception. In stead of a square there are two rectangles with a Tyvek bead and some gold colored embellishment.

The intension was to hang it like that, but when I had the fabric in front of a brown piece of fabric the image was much stronger. So now  there is a brown velvet type of fabric behind it. It is attached to a paper mache cup and saucer wich is not yet finished.

This was my last blogpost as guest. I hope that you all enjoyed reading them and that it was inspiring.
Joke
 http://waterleliedesign.blogspot.nl/

Tuesday, April 7, 2015

Guestblogger Joke Hardenbol part 2


The work shown on above photo is made from fabric paper. I love gel printing and when I have done a demo  I have a whole bunch of printed paper by the end of the day. Most of the time I use old news papers (preferable Chinese or Arab) or used pattern paper (I am fond of recycling). Both types of paper are thin enough to make fabric paper. I do this on a regular base, for instance for book covers (see photo below).

In this case I glued big pieces of fabric  paper and cut these into strips. These strips I have woven and stitched with straight and decorative stitches.
Added Hobbs as a batting and made ‘applications’. These I used  as a background for further decoration. Amongst others Tyvek beads and, metal rings on which I used alcohol ink and other materials.
In case you know my work, you know that my theme has been Goddesses for a number of years. That is my (small) contribution to increase the female energy on this earth. So Goddesses here as well. Made with a home made stamp, based upon images of ancient Goddess statues, stamped upon a piece of fabric, colored, stitched and filled. Under the Goddess a ‘pillow’ with a quote about the three stages of a woman’s life:  the virgin, the mother and the crone.
Finally stamped a gold colored spiral on it, symbol of eternal life. 
When the collages were done, the main problem was: what do I do with them?
It cannot be framed, but it also is too fragile to leave them like that. My first solution was to add a it to a painted canvas about 8 inches bigger than the work, but I was not really happy with that. 


Discussions with other artists did not lead to an adequate solution, so the work remained like that for some time. Then one day while I was working on something else, by coincidence I held the baroque gold colored frame in my hands and placed this for a moment on the work. The light bulb went on J. It needed a bigger background and then in a baroque gold colored frame.

 
But when I inquired for the price of such a frame, I was told that would be at least € 250,- (US$ 270). Unfortunately that gold colored frame will be a virtual one.


Monday, April 6, 2015

Guestblogger Joke Hardenbol part 1


Hello , I am Joke Hardenbol. 
Beth asked me if I was willing to write 3 blogpost as a guest this month and although I felt honored by this invitation my first response was to turn it down as I don’t feel my English is good enough for this. But when she offered to have my post translated by Wil Opio Oguta I accepted the invitation.
This first post is about a piece of art which Beth loves. My wall hanging  ‘Blue Silence’. There is a story behind this title. I had lost this wall hanging for a month and finally found it again in the garden where I had hung it on the barn wall to take a picture. I took the camera indoors but forgot to bring the wall hanging in. When I am indoors I cannot see this wall and during  winter I do not go into this part of the garden so it was left there for a month. Luckily it survived without any harm done. Because of this month of silence and an embellishment which is  about silence it got the name ‘Blue Silence’.
I wanted to create a piece that consisted out of separate pieces connected by embroidery. That was my starting point. Plus I wanted to work with texture. I started with a white piece of fabric backed by Hobbs and stitched and glued several  different materials on it, all with a texture, amongst them were mulberry bark, handmade paper and cheese cloth. When I felt that I had enough texture, I put everything in a dye bath. A mixture of red and turquoise that gave a lovely blue/purple color. With discharge paste and a spiral stamp made by me I did the mint green spirals. No idea what would happen as I had never worked with discharge paste, but I got an awesome contrasting color.


Based upon the texture I used a rotary cutter and cut the fabric into separate pieces. Stitched these together again using different type of stitches.


The next step was to make embellishments out of Tyvek. I made several beads wrapped them with seed beads and flowers. A number of them have been embroidered with sequins. Embroidery followed and I added some text using foam and stamps. Final touch was to add a bit of gold colored shoeshine with my fingers so that only the higher areas were touched by it.

Friday, April 3, 2015

Momigami

April 3, 2015
Joanne Weis

Over the last couple of days we have looked at the Japanese aesthetic of Wabi Sabi, focusing on its expression in Momigami - the process of making wrinkled, leathery paper. Now what do you do with that paper?
Centuries ago, the Japanese developed these processes to make paper suitable for clothing.  What we are doing here is not that strong or pliable but certainly has features that make it useable to the artist.
It is quite adaptable.  I have run it through my computer printer with text or images.  I have also printed using India or other permanent ink:


You can paint or dye the surface before beginning the process:


Or paint it after the process, even immersion dyeing if that is something you want to do.  Note how the oil gives the dye a mottled look:


Because of its adaptability, you can embellish this paper in numerous ways.  Once "decorated", because of its strength, this paper makes excellent covers for handmade books, gift wrapping or gift bags, etc.


One feature I like as a textile artist is the pliability of the paper once it has been processed using the Momigami technique. It is almost as soft as fabric and can be used as such.  In the sample I am following below, I wanted some brilliant red/violet flowers. While I could have done this on fabric, the texture of momigami paper was appealing.
Using mulberry paper and after oiling and rolling and pressing the paper, I prepared a thickened dye.  I then used the thickened dye to monoprint the paper.  I simply painted the thickened dye onto the top of a plastic food container, drew flower lines into the dye and "stamped" that onto the paper.  I then cured the paper as if it were fabric. (Sorry I forgot to take pictures when I was doing the printing.)
This paper is very strong and it washes up beautifully in the kitchen sink with soap and sponge. (For this kind of cleaning, I make a concentrate of 1 part Wisk laundry detergent and 1 part Simple Green.  I then dilute for use in a spray bottle.)


I then cut out the flowers, bonded them to the piece (I use Misty Fuse) and prepared it for embroidery later.  Paper can be bonded to fabric very successfully but you often get a resulting stiffness.  I find that the Momigami paper, pliable as it is, feels almost like the textile itself, plus it has an appealing texture


.
Thanks for the opportunity to share with you and if anything, I hope that I have given you some creative ideas that allow you to play as well as be productive.

Joanne

Thursday, April 2, 2015

Momigami


April 2, 2015
Joanne Weis
In my reading on Wabi Sabi, I discovered information on a revival of an ancient Japanese technique: Momigami - kneaded,. flexible, strong and wrinkled paper.
The ancient process of momigami was to gather paper made from the mulberry tree, manipulate it to create a leather like paper and, with the paper,  make clothing. Traditionally the paper was treated with "Konnyaku", the root of the "devil’s tongue" plant, which makes the paper pliable and able to withstand the process of preparing the paper then making substantial clothing. The process and products I use are an adaptation of what I have read and I hope will inspire you to play and discover uses for the paper.
Any strong paper is suitable.  I have used a variety of papers including tissue, baking parchment, typing paper, water color and true Japanese Mulberry paper. For the blog, I photographed doing this process using a piece of mulberry paper, roughly 9" X 11".


While a variety of products are used in the various directions given on line, in books or articles, I use a product available at your local hardware/home improvement store, Howard Feed-N-Wax wood conditioner.  This is a great combination of beeswax and lemon oil, very effective, environmentally safe, affordable and with a wonderful fragrance.


I put a glob of the wax/oil onto the paper.


Spread it across the paper:


In many of the directions, you are advised to then fold the four corners of the paper toward the center.  You can do this if you choose but it seems that this is to prevent the corners from tearing.  I have found that what you need to do is gradually gather the entire piece of paper into a wad:


Then roll it tightly into a ball. 


Now just roll it around in your palm for a few minutes then unroll it, spread it out on the table and smooth it out.


Repeat this at least four times, adding more oil to the paper or your hands if needed.
Now comes the part that is truly more modern than the 17th century process.  When finished with all this wadding up and rolling into a tight ball, I place the oiled paper between sheets of newsprint or newspaper and simply iron it. I will iron it until almost no oil is showing up on the paper.  Below you see a sample of the newsprint with oil absorbed into it.  I generally need to press the oiled paper between newsprint replacing it about four times with clean newsprint.


Now you have some wonderfully soft, "wrinkled" and pliable paper. Tomorrow I will share some ways that I have used it.  

Wednesday, April 1, 2015

Momigami


Joanne Weis
April 1, 2015
I agreed to share with you a technique I have begun to play with - Momigami.  While I haven't totally explored all the processes and possibilities, what I have played with I like. Before I plunge into my interpretation of an ancient Asian technique, though, I want to share a little background. 
One of the aspects of Japanese and Chinese art that I find most appealing is its pure simplicity. What at first may look accidental or erroneous may, in fact, be the core element of the piece.  The guiding principles are ancient and are only recently becoming part of our contemporary art  in an approach that you may have heard of or be familiar with: Wabi Sabi.
These are actually two sets of values that combine into a powerful approach to art, life and spirituality.  I stumbled onto Momigami through some reading on Wabi Sabi.  With that, I would like to share some aspects of Wabi Sabi today and tomorrow begin looking at Momigami.

WABI

Originally Wabi referred to the isolation of the hermit but in later centuries focused on the benefits of solitude.  Silence, simplicity, non-dependence on material goods, all of these were features embraced by a culture, including the artists. You may be familiar with Boro, an example shown here.  Scraps of dyed indigo discarded fabric was collected by the peasants as far back as 17th century Japan. The scraps would be stitched and woven together in beautiful patters and used to construct their daily garments, repaired often and frequently passed on to the next generation.  This is a perfect example of Wabi.


SABI:
Sabi is the application of simplicity and naturalness to the aesthetic.  It implies natural process by being uneven, irregular, and unpretentious.  There is often a flow to the piece that draws you in, and encourages reflection, the core of Wabi.  While much of this art is asymmetrical, there is a peacefulness that can be found in simply experiencing the art.

One contemporary textile artist who espouses Wabi Sabi is Cas Holmes.  In samples such as the one seen below, you can see these feature of irregularity, spontaneity and flow.


WABI-SABI:
A number of books and articles have been recently written on the subject of Wabi Sabi.  While I am not an expert, I have enjoyed some of this reading.  One of my strongest memories of a visit to Japan a few years ago was sitting in a bamboo grove, on a bench, listening to silence with a number of other people, participating in a tea ceremony.  I can still hear, feel, see and taste the experience because it was so simple but so profound.  I made a piece of textile art at that time, celebrating the role of food in ritual.  Inadvertently, I think I applied the concepts of Wabi-Sabi.


Momigami is a Japanese technique that truly fits into these values.  I felt it was important to put it into this frame of reference before jumping into my way of making this wonderful paper.