A TECHNIQUE DRIVEN Blog dedicated to mastery of surface design techniques. First we dye, overdye, paint, stitch, resist, tie, fold, silk screen, stamp, thermofax, batik, bejewel, stretch, shrink, sprinkle, Smooch, fuse, slice, dice, AND then we set it on fire using a variety of heat tools.

Saturday, May 10, 2014

Colouring Lutradur With Paint Glorious Paint!

Paints,
 Glorious Paints….

Wow this is a big subject! Lutradur takes paints beautifully... It can be soft and delicate or more solid and opaque. 
Same colour of paint from Seta. Different ways of applying make a difference to how it looks. 
 Using paints is fun way to get instant colour on to Lutradur. It goes quick and is a jumping off point form many projects.  Different brand paints provide different looks. Types of paints,  manufacturers, properties and uses of the paints make a difference. Play potential is endless so lets see what happens. 

The best way to learn with paints is to start with what you have….and research. 

Coming from a sewing background not a painting background. My exposure to paint was limited acrylic craft paint, finger paint and water colour paint. Mainly from my kids, and girl club activity painting. I have rudimentary drawing skills from my grade school days – in fact I never even could get past basic folk art painting.

But I can handle putting colour to fabric. Again I pulled out what I have…. And doing a bit of research  going to basic principles then you can figure out what will work.

A Bit About Paints... 

Most people will know most of this information but this is a brief explanation of paint as I understand it and some places to learn more if  you want...

Solvent vs water based paints. 
Solvent or Oil paints have to be cleaned up with a solvent cleaner. Water-based products (in theory) are cleaned up with water. 

Solvent paints cannot have water based products added to them. So if you use an oil based product you can’t put a water based product in it or have a water base product to stay on top of the oil . Oil can be used on top because it is heavier bodied and has the oil binders in it.  

This is my simple explanation and please correct me if I am wrong.  Oil does not mix with water….

Opaque vs. transparent.

The amount of solutes, what it is and how it incorporates into the liquid used to suspend them in the paint determines the opacity of paint.  Chemistry was also about 30 + years ago. (Again correct me if I am not quite right on this.

An opaque paint is hard to see through. Transparent is … easier to see through. This is a great visual to refer to. 
Link to two minute you tube clip from Interweave re: opaque vs transparent paint

Different paints looks different… For instance water based acrylics depending on the viscosity, pigments added and other chemical secrets from manufacturer's all look different. 
The same goes for water colours. 

For some better explanations about paint and their properties etc. Dick Blick’s have some great video’s too…

http://www.dickblick.com/categories/fabricdecoration/

And some other links for more information...

http://painting.about.com/od/colourtheory/ss/color_theory_9.htm


And one of my favorite "you tube" channels to watch is the Colouricious you tube channel
and their web site colouricious.com 

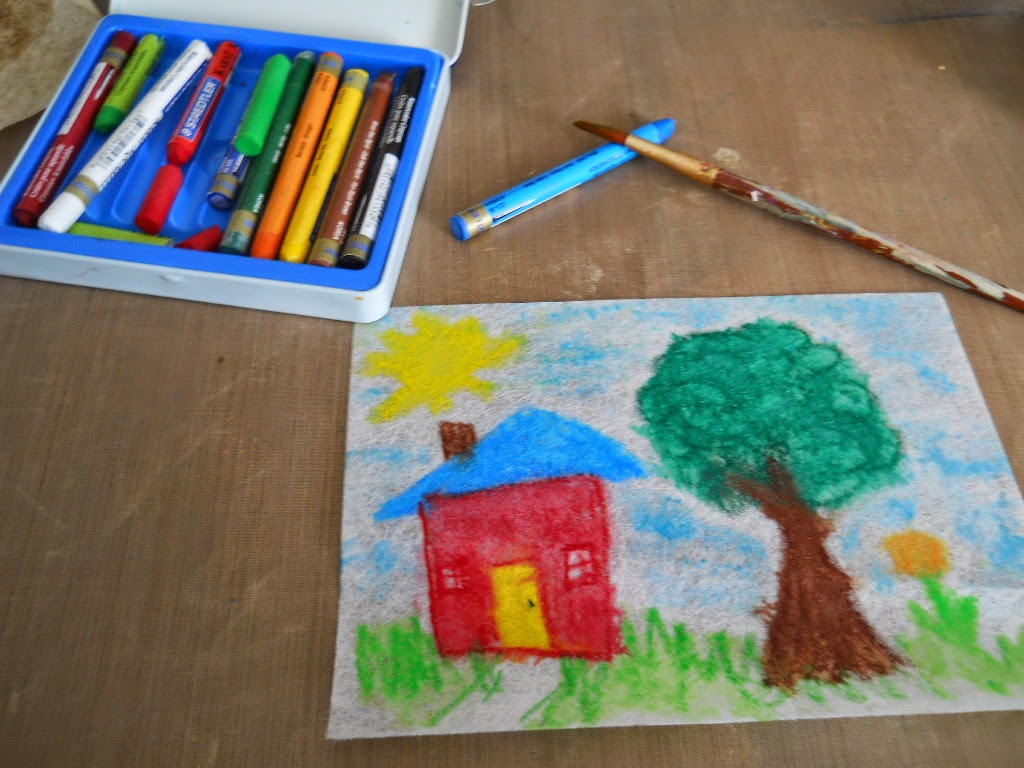
In fact Ineke Berlyn  has done a DVD for Colouricious on Lutradur and you can check it out on either the you tube channel or at their web site. The clip on you tube shows a misting technique to paint a landscape picture.... 

I am going to split my samples into two posts because this one is a bit long already. 
but here are few ways I have used paint. 
Using up paint that was stuck to my covered surface after I hung my lutradur up to dry. Waste not want not.... 

Peblo Seta Colour on dry lutradur

Dry Lutradur on left and wet on right. 

I wish I had done the colours in a row to line up. But you can see the differences. These were all Seta Colour primary paints. Left piece was misted with a sprayer. Middle was made wet by a paint brush with water before applying paint. and the third was painted with straight paint. 

Mixed colours on dry lutradur - yellow and green Seta Colour

Acrylic craft paint from the dollar store. On the top the Lutradur was wet and the bottom is dry. Much deeper saturation of colour. 

Acrylic craft paint from the dollar store. 

Venetian Gold Metallic acrylic paint Deco Art. 

Wicking of paint applied to wet Lutradur. Creates great look of decaying leaves..... 


Lesley Riley gives her tip on paint.

Hint from Lesley...

 When I apply the colour to the Lutradur with various paints with the fabric dry I don’t get an even colour. Is there a trick of what brush to use or other hint that you can give me and the blog readers?


I always wet my Lutradur before I paint it. I love blended colors. Since it is literally a spun web, a lot of the wet color seeps through. I’ll go back in with a wet brush on damp Lutradur to add deeper, darker colors before it dries completely. I always use a foam brush too - no reason behind that, it’s just what I prefer.


By Lesley Riley To show transparency.

Notice the colour of the paint in the right picture the background is a pale pink that has a lovely soft wash of colour. I bet she created it by using wet lutradur with paint on top. 
I won't be back until Monday night with a post. We are off to clean at the cottage so we can go with the family next weekend. I want to take some pictures of the trees with no leaves on to make some prints for my lutradur transfers... that we will be covering in the near future. 

Whats Up Next? More colouring with water colours and more. 

Jo 
thesewinggeek.blogspot.ca

Friday, May 9, 2014

Guest Post by Elle ...Elle has been colouring...

Elle has been Colouring!!!!

I met Elle by reading her blog. We have never met in person  but we have corresponded back a forth via our blogs.

What I know about Elle is she is always learning ... and eager to learn. She also is a loving grandma, likes to decorate, always has a project or to on the go and generous. So I asked her if she would play along and help me out this month. Just like any other busy person she said Yes! And I am so thankful she did.

I hope you enjoy Elle's post. You can find her blog at http://ellendacoop.blogspot.ca/ it is a great read and she is a fun person....

Mother, may I colour...


There seems to be some artistic genes in my mother's gene pool.  She, herself, didn't draw or paint although I have this red parrot.  The parrot is actually painted on the glass, perhaps with the outline traced. The gold background is a paper. 

I do have a very vivid memory of my mum using pencil crayons on colour by number pages. The pictures looked just like the paint by number kits and were pretty involved.  I also remember her putting crayon pictures between wax paper and ironing them onto fabric. 

Crayons aren't just for the kindergarten crowd.  There are some serious artists using crayons as their preferred medium, adding them as highlights or even using the simple wax crayon as a final layer to watercolours, gouache or acrylics.  This makes sense when you realize what wax crayons are.

"Oil pastels and wax crayons are serious media in the arts and not only a toy for children. Oil pastels and wax crayons are names for basically the same type of medium. However wax crayon is usually the label for a cheaper qualities and children toys. This misconception probably is the reason why these media are not as popular as soft pastels or traditional oil color in the art world. There is a difference in the quality of the pigments and the binders that are used in the production of artists grades and more simple grades. Oil pastels and wax crayons are a very versatile and exciting media that allow creating unique artwork. Many illustrators use them in their mixed media work for special effects. Only if you want to create artwork for permanent display I would commend not to use less light fast,cheaper,wax crayons."  quoted from here

The options for colouring on Lutrador are pretty extensive.

Lutradur is transparent, even the heavier weight. Using a permanent marker I can choose which side and I don't need to worry about mirror imaging if there is no writing.
I used an old newspaper article featuring a Ruby Kim block of the week that my grandmother and my mother had saved.  Not wanting to mark on the old newsprint I  photocopied it, outlined the lines with a black marker and then placed it under Lutradur and copied the lines.

I used the original crayon colours that were in my crayon box way back when.  The sky is one layer of blue and I heat set it face down on printer paper with my iron.

The green is two layers, each heat set.  The bark is three layers as are the apples.  An interesting bonus is positioning the lutradur on the printer paper so that the image continues to be ironed in the same place.

I had done some water soluble crayons but a 12 x12 background only has so much room. :O

Then I was ready to try melting wax crayons.

I was surprised that different brands of crayons melt differently and the large child's crayon was really hard to melt and dripped the slowest.  Controlling the drips takes some practice.  In hindsight I can see that a non porous surface would produce better shaped dots if high round dots were desired.

Then I put the heat gun to the Lutradur with the wax drips.  The Lutradur melted without reheating the drips unduly.  That was a cool hot technique!

I prepared a background on white scrapbook paper, using gesso, paper images, gel medium and acrylics.

I began to arrange my story.   I am relatively new to mixed media and I must admit I was a trifle boggled by how this would all work out. The mind is an amazing creative tool.  As I began with the first thing- a commitment to explore crayons and lutradur and a few memories;  thoughts began to suggest themselves and I pursued hotly!  lol  The idea to frame my crayon drawing brought to mind the crayon box colours.  My image is a bit big so do I need all of it on the page?  How then should I treat the edge?  How can I colour things to represent past, present and future?  Gosh,  I hate covering goodness up!  lol  Layers!  I need to see covering up as necessary for layers.  Some tulle should dull the colours a bit and some stitching should add some pizazz.  And then there are those great splatters that pull everything together.

I need to spend more time developing layers and achieving depth.  In the end I didn't use the tulle.   The lovely concise wax dots got melted when I ironed from the back in preparation for putting the back scrapbook paper on for strength and to hide any stitches, brads, etc. :(  So I covered it with another try on mulberry paper.  Not as good but...  This was a good page to start with because I expect my pages to improve as I go along just as colouring inside the lines improves with the doing!

Some things that didn't make the time crunch:

-melting wax crayons between wax paper to make skins which are cut into shapes
-melting wax crayons and using a tjanting tool
-buffing wax crayon work, especially metallic crayons
-dripping melting crayons from the top of the page
-notching crayons and scraping them across paper
-using a texture plate
-using crayons as a resist with paint, even faux batik
-crayons used to antique brown paper bags
-etching


I'm so glad I asked if I could could color!!!

Thank you Elle what a great post! Elle is going to come every week around Thursday to tell us what she has been up to with Lutradur.

Whats up next... Paint Glorious Paint.
Jo

Tuesday, May 6, 2014

Colouring with Inks and Lutradur...

Colouring with Ink.

The world of inks still confuses me at time.  There are so  many different kinds, brands and characteristics of each. Water based, pigment, acrylic, archival, dye based, acrylic ink, India ink, alcohol inks, distress inks, embossable inks etc.  I rubber stamped years ago and own a collection of various stamps. I have collected some ink pads. I also have some alcohol inks. I have some embossing powder. So how to use all these things and what different looks can we get with them?

First thing you need to consider are the properties of the inks.  Are they waterproof or not? Can your ink be used for embossing? Is your ink archival or does it matter? And what is your ink manufactured for?

These questions make a difference. As the product used may create a difference in your project. Or you may not worry about it too much and just experiment with it. Check the labels of your inks. Check the manufacturer’s web sites for information regarding their products. I get so much information from the web sites of manufacturers. They often have tutorials, projects and more. Another place to find information is the online art, craft and fabric stores. If they have it there is usually an explanation of the inks uses.

“Dye ink… saturates the spun fibres… acrylic inks which are made of pigments, behave like paints….” (Acrylic paints stays more on top of the fabric and you see less of the lacy structure. )  Leslie Riley.  
So pull out your inks….

Ink pads, refills, sprays, and alcohol inks and play. I am sure you may have different products than myself. So please let me know what you have and if you have tried it on Lutradur.

Here is what happened with the inks that I applied to the fabric. 

Pinta Alcohol Ink applied to dry Lutradur

Pinta Alcohol Ink applied to Lutradur that was damp. 


Pinta Ink applied to damp Lutradur with blending solution added to the ink. 
All samples were the exact same ink. You can see that different methods get different results.


Then I used some stamping ink ....
This first picture is the the two types of ink on just plain untreated lutradur. 

This picture is the same inks but the Lutradur was treated with a coating of soft matte medium. 
The image of the stamp is clearer on the matte medium treated Lutradur but you lose some of the lacy look of the fabric. 


Untreated Lutradur

Matte Medium treated lutradur

Same Staz On permanent black ink. The second image treated with the matte medium is crisper but once again you can see that the lacyness of the fabric is lost somewhat. How much matte medium you apply does make an effect of how much of the lacyness is hidden. 
And finally today
This is a picture of a piece of Lutradur painted with metallic paint. Stamped on with Staz On permanent ink with Pearl Ex powder added and then a "Lacing" technique that we will play with in the up coming month. 

Stamping with inks on Lutradur can be really versatile to use in Mix Media projects and Art Journals. 

What is your experience with inks? 

Jo 


Please check out my friend Elle. She agreed to play along this month with me. She has done her first post over at the coop (as she calls her blog) She is a talented lady! ellendacoop.blogspot.ca


Saturday, May 3, 2014

Colouring Lutradur 101

Colouring

This a subject that we all learned early in our life. In fact I would think that almost all who read this blog are intrigued and drawn to colour. While we spend a long time learning colour theory or exploring it, we all love colour.
 

There are so many ways to add colour to your work. Most work with Lutradur. You can try them all remembering that this is a polyester fabric and is translucent with fibers visible. It doesn't hurt to experiment even if the result is not what you were expecting. Creative design changes.... abound. 

Adding colour to Lutradur is a bit like a "dyeing day" Plan to cover your surfaces with plastic. Have somewhere for items to dry if you are using wet mediums. Create a bunch of coloured surfaces and make a few notes on paper, use your digital camera, use a sharpie marker to write on samples what you did. or doing. (Especially do this before you add colour if it is different paints you are trying. You won't remember... believe me... ) 

So what do you have around the house? And can you use it? 
Crayons? Yes
Inks? Yes
Oil Pastels? Yes
Paints? Yes
Dyes? Some
Patinas? Possibly

*For specific processes with Dyes and Patina’s you will have to check into Leslie’s book to find out the specifics because I haven’t played with any of them. So I can’t show any successes or failures. And there is certain products you can and can not use. 

Crayons…

Until I read this book I knew there were two kinds of crayons. The kind my kids used and I still like to use and fabric crayons which I had make tee shirts with 20 years ago. These are still the only kind I own.
Our regular old wax crayons will work. You can colour  an area… draw a picture… and highlight or maybe drip melted crayon on to the surface. 

To get some of the wax out and set, iron the Lutradur with the crayon side down with clean paper towel or paper underneath until there is no more wax transfer. I would use a warm iron. But too hot - above 400 degrees Pellon Corp tells us the fabric will melt totally. Or you may just melt it a bit and like it. Since the fabric is porous I would also use the paper towel on top to prevent transfer to your iron. Create a paper towel sandwich with the lutradur in the middle. 

Fabric crayons do not have the wax that the regular crayons come in. But they are heat set in the same way.
Let see how this works out…
Regular "Crayola" brand crayons out of the box. 
Regular wax crayons through a stencil then enhance with crayons. 


If you have other types of crayons try them. Crayola Twistable crayons.

And then childrens pastel crayons.

I also took a picture of one of my flowers and printed that on Lutradur. Then I took the crayons, twistable crayons and the pan pastels and highlighted the picture.
Here is the before picture

Here is the after...
After crayons, twistable crayons and childrens pastels added. This is shot on white paper...

And this is me holding the crayoned picture up in the air... 

I also tried using all three - crayons, twistable crayons and the childrens pastels through a stencil. 
First I used  pastels. 

Then I added details with the pastels, crayons and twistables. I also used a permenant black marker to highlight. I like this better than the plain pastels above. 
Stenciled using childrens pastels on black Lutradur adding highlights with crayons and twistables and then using a black permanent marker to do a bit of outlining and dots. 


If you have Caran d’Ache Neocolour and Metallic artist crayons and Caran d’Ache Aquarelle water soluble wax pastels can be used too. The water soluble crayons allow colour to be blended with water for softer effect. Has anyone out there tried these products on Lutradur? Let me know what you think of them. 

Note: The oil based crayons and the regular crayons will not blend. (More directions ----in the book page 8)

Oil Pastels.

Oil Pastels can be water based such as Portfolio Oil Pastels which are made to be mixed with water and can be blended with water. I have not experimented with these yet so I am curious if others have? 


Or with Shiva Paint Sticks (Markel Sticks) which are oil based solvent paint in stick form. These can’t be blended with water and need to be cleaned up with a solvent cleaner. If you have ever worked with Shiva/Markel sticks you know that they have to dry before heat setting to be permanent. The heavier you apply the longer to dry.

A great book to read about Shiva Paint sticks and how to use them is  Shelley Stokes' Paintsticks on Fabrics. Check out Cedar Canyon Textiles Inc site to find out more information about Paintsticks and more. Cedar Canyon Textiles

Below are some of my samples of applying the Oil based paint sticks to Lutradur.

Using Shiva (Markal) Paint sticks through a stencil. Here I mixed a few colours and added a heavy coat of the paint sticks. I did this to add depth and texture  to the piece. 

I put the lutradur over a rubbing plate and used two colours of  paint sticks. The reason I used two colours was that I did not secure the lutradur and rubbing plate and it shifted. But this makes a different kind of leaf. 

In this sample I wanted to see the difference between colouring on plain untreated Lutradur (on the left) and Lutradur that was treated with a coating of matt medium. I used Golden Matte Medium in this case. The coverage with the treated side is much heavier. 
For me I think that I would use the paint sticks mostly with using the lutradur coated with matt medium or through a stencil as in the first picture. Another way I would use them is to highlight which you will see in a later experiment. 

Leslie notes how fibres can be raised by pressing to hard and you can clip them or leave them. I found that a light hand was needed. I have a hard time with the smell of the oil paint sticks. It is a strong smell if used in a closed area. So you might want to make sure you have a window open. 

This is just two ways to add colour I have tried.

How have your experiences using crayons, pastels, paint sticks worked? Do you use it as a main colouring technique or highlight?

Next Up...  Colouring with Inks.....

Friday, May 2, 2014

Exploring Lutradur with the Experts....

In my area it was a long cold snowy winter. Our spring flowers are starting to bloom in some areas. I love Spring!Somehow it brings a sense of renewal and gives me more energy. Energy to do new things and stop hibernating! 

So let’s get started with talking about the properties of Lutradur. Heading to the manufacturer seems a pretty good place to start.  The Pellon Corporation the manufacturer of Lutradur website gives a good description. http://www.pellonprojects.com/products/lutradur-100g/
“Lutradur® is a cross between fabric and paper. It is the perfect medium for many crafting, sewing, quilting, scrap-booking & three-dimensional wall art projects. Lutradur® absorbs both paint and ink. It can be heat set up to 400˚F. It has amazing body, retains its shape, and is incredibly strong yet delicate & lightweight. It will never fray or unravel. It can be melted, singed, or cut into with a heat tool to create extraordinary antique effects. It can also be used for a base for embellishments and embroidery. Lutradur® is really a ‘must-have’ for all your artistic endeavors!
·         20″ by-the-yard width
·         100% Heavyweight (100g) Spun-Bonded Polyester
·         Machine wash warm. Tumble dry low or dry clean. No bleach.
·         Inkjet printer and sewing machine safe    Available in White & Black”
100 g Heavy weight by the yard
70 g weight by the yard. Notice the difference in the transparency


C & T publishing describes Lutradur from their 10 sheet – 8 ½ x 11” package as “A Versatile Cross Between Fabric & Paper
–Revolutionary new material for sewing, crafting and mixed media arts. –
- Ultra-strong sheets are easy to print, fold, cut, stitch, distress, and embellish
- Perfect for ink-jet printers or all-in-ones
 -Create delicate translucent effects with paints, inks, dyes, and stamps
-Use for art quilts, scrapbooks, ATCs, bookmaking, altered arts and more
-Acid Free”
Mixed package of 70 g and 100 g Great for putting though your printer. 

My description is to sewers that it looks like non-woven interfacing. The other descriptions are much better.

Keep the above descriptions in mind as we explore some of my favorite of the 27 ways that Leslie Riley writes about in her book.

When I agreed to present this topic I wanted Leslie to know that I had used her book and was going to use her book as a basis for my experiments. I asked her if she would be willing to answer some questions and she generously said yes! I sent Leslie 10 questions about working as an artist and with Lutradur. She replied with the answers to the questions, some photos, and her bio. So I am going to put up the questions as they become relevant to the conversations we have this month as “Hints from Leslie.”
Today’s "Hints from Leslie" are to share her bio and the first three questions I asked.

Bio


Lesley Riley wears many hats. She is an internationally known artist, art quilter, teacher, writer and Artist Success coach and mentor who turned her initial passion for photos, color and the written word into a dream occupassion.

Her art and articles have appeared in too many places to keep count. As former Contributing Editor of Cloth Paper Scissors magazine, Lesley developed a passion for showcasing new talent in mixed media art. Her first book, Quilted Memories, brought new ideas and techniques to quilting and preserving memories. A second, Fabric Memory Books, combined fabric and innovative ideas with the art of bookmaking. Two more books, Fabulous Fabric Art with Lutradur
and Create with Transfer Artist Paper, introduced versatile new materials to the quilt and mixed media art world. A fifth book  Creative Image Transfer will debut late summer 2014. Her 2013 self-published, Amazon best seller, Quotes Illustrated, will be expanded and republished November 2014 by F&W Publications as Inspiring Quotes Illustrated.

In an ongoing effort to find the best ways for quilters and mixed media artists to get permanent photos on fabric, Lesley introduced Transfer Artist Paper™, named the Craft & Hobby Association (CHA) 2011 Most Innovative new product.

Lesley is the former host of BlogTalk Radio’s Art & Soul show, recording over 75 podcasts on art and the creative process through in-depth interviews with contemporary artists. Her passion and desire to help every artist reach their creative dreams and potential has led to a growing specialty as an Artist Success coach and mentor where she draws from her own experience, insight, and a knack for seeing the potential in everyone to provide guidance and solutions for artists of all levels.

Lesley creates her magic on an idyllic horse farm in Frederick, MD, where she lives with her high-school sweetheart husband and two of her six children. You’ll find her in her studio from sunup to sundown unless, of course, any of her seven granddaughters come to visit.

Stay connected and inspired! Sign up for Lesley’s free bi-weekly dose of inspiration and motivation at lesleyriley.com

Then the first three questions.

1. Can you explain a bit about how you became a fabric artist?

When I was pregnant with my first child the wife of my husband’s college baseball coach took me under her wing and introduced me to quilting. It was also the beginning of the art quilt movement. I was hooked and fell in love with fabric, quilting and expressing myself with fabric.

It wasn’t until 1999 when, after a long interruption (and 5 more children), that I found my voice creating small fabric collages with photos and quotes. I called them Fragments because they were made with fragments of fabric in small fragments of time. It was the beginning of my career as a fiber and mixed media artist.

2. Beth Berman (resident artist of the “and then we set it on fire” blog) would like to know
     how you learned about Lutradur and all the properties of the fabric?

I discovered Lutradur through a bookmaking article quilter Virginia Spiegel wrote for the 2004 inaugural issue (#1) of Cloth Paper Scissors magazine. I fancied myself a “natural fibers” snob but this spun polymer “fabric” caught my attention. I had to check it out.

3. For those who have never used Lutradur, could you explain what are your favourite properties of this product?

As Virginia showed in her article, you can create beautiful organic shapes by melting Lutradur with heat. A heat gun held to it will create what I call a lace effect. A heat tool (think soldering iron) will melt edges resulting in a beautiful organic, irregular
 edge.


**Just to note that the material and things that I am presenting has been largely based on the work and book of Leslie Riley author of Fabulous Fabric Art with Lutradur. C&T Publishing c.2009

Other books I own have also influenced my experiments and will be noted in a bibliography available on my blog Jo' Blog. As I go through the month I will add suggestions from those sent in and the ones I use.

What’s up next?  Gather your colouring tools. For the next few posts we will be looking at putting colour on our Lutradur. 
Created at a play day by one of my friends. 

Thursday, May 1, 2014

Welcome To Lutradur.


Welcome to May and Playing with Lutradur….


I am very excited and a bit nervous to be guest hosting on such a great blog. I have enjoyed following the adventures of all the artists! This month probably won’t be a “finished product showing” month.  But this month I hope to take you with me through my experiments with working with Lutradur. 

I don’t know why I became so interested in playing with this product. I can’t remember seeing it and saying “oh cool I want to play with that”. Probably my first time seeing how to use Lutradur was watching a clip on YouTube from Interweave of Leslie Riley from Quilting Arts on Lutradur. The things I saw interested me so much that I bought the DVD. Then that led to a package of Lutradur. Then came her book to read… which led to offering to do a program night for my Fibre Arts Guild. Nothing gets you to know how to do something than having to prepare it to teach to others. Out came the supplies … things I had in the house from other projects. I started a binder with my experiments using the methods and ideas Leslie used in her book and her DVD.
Having your own binder of experiments reminds you of what worked or didn't. What you need to create one is blank pages and a sharpie or other permanent marker and a way to secure your work to the pages. So you could use a journal,binder or scrapbook. One guest has used her lutradur samples in a very clever way... wait until you see.  I use a binder so I can take things out and move them around. I also use page protectors so I can easily slip items in and to protect them. 

So now I have continued to play with Lutradur. I still haven’t covered all the techniques from the book. So shout out and send me an email or a comment with something you have tried as we go through the month. 

When I offered and accepted to do the blog for the month I wondered what I had agreed to and did not want to tell my husband. It was not because he is mean but because I often over extend myself. But he has encouraged me to play in the basement because he knows that creating and learning makes me happy. So now you know bit about me. I am curious, love learning, into new ideas and volunteer. I love to sew and have since I was a child. I knit and embroider/cross stitch and bead. I learned to quilt 30 years ago. Making some quilts for friends and then not again for some years as my children grew. Now I love to quilt, do fibre and mixed media art.

I have found working with Lutradur such an interesting experience as it is a very versatile product. It’s translucent and woven property can make a urethral look. Its strong durable structure can add stability to a project. It can also be made into a container or vessel. It is easy to sew with a regular sewing machine or with hand sewing. It takes colour well. It can be printed on and more.

I have asked some friends from my small group – Robynne, Karen and Al -to contribute some pieces from the samples they made on a play day at my house. A fun way to try new things we play off of each others knowledge. 

I have asked my blogging friend Elle to join in with a project she is working on. On her blog she plays with a lot of journal techniques. I am not so good with a journal.


A member of the group I did the workshop for Judy  just emailed me with her samples she made from the workshop and further experiments. 

And I asked Leslie Riley if she would answer some questions on Lutradur and she graciously said “Yes”! She has some great comments and pictures. 

And sometime this month we will be giving away a digital copy of Leslie’s book on Lutradur via C & T publishing.

So today think about following along for the month. Send me your questions, thoughts and pictures on what you have made. Since I have only been a casual blogger before now this month is a leap of faith for me. So join me in the journey of exploring Lutradur.

Join in the adventure….
Jo

Just to note that the material and things that I am presenting has been largely based on the work and book of Leslie Riley author of Fabulous Fabric Art with Lutradur. C&T Publishing c.2009

Other people have also influenced my experiments and will be noted.

A bibliography or resource list I will place on my blog in the next few days that I compiled so far of books, DVD’s and sites.

What’s up next?  Properties of Lutradur and then gather your colouring 
 tools and supplies. Then for the next few posts we will be looking at putting colour on our Lutradur.