
One of the simplest ways to get a design onto vilene interfacing is to paint it with acrylic paint. This creates a resist so that the design is left as a void when printing. I have done geometric designs in the past but, this time, decided to take a look in my sketchbook for something that might be suitable and found some work I had done using nigella seed heads.

Cut a piece of interfacing that will cover the bottom of your screen, again leaving extra for taping to the screen. Make sure that you know the outer limits of the area that will print - you don't want your design to be cut off. For this method, choose a colour of paint that will show up against the interfacing.You don't have to but it will make life a lot easier if you do!
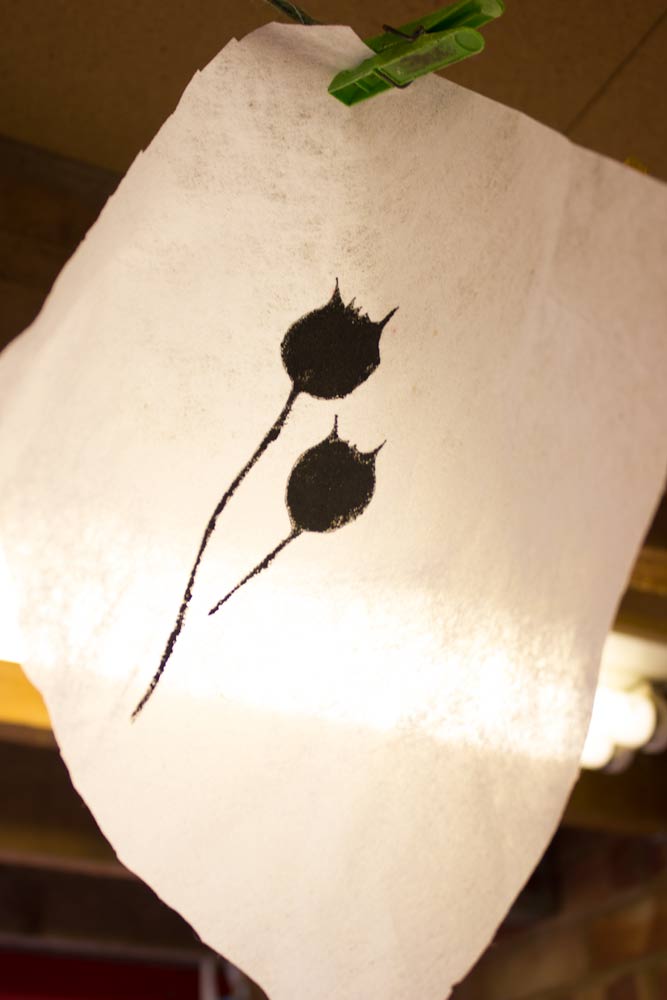
Paint your design onto the interfacing, be generous as you want good coverage. When you have painted the design, turn over the interfacing and you will be able to see where there has not been a good coverage. See the fuzzy edges below? The dye will print through them if they are left like this.

When the first side is dry, paint the reverse side of the interfacing, making sure that you get a good coverage on all the edges - unless you are aiming for fuzzy of course. The easiest way to check how good the coverage is, is to hold the interfacing up to the light. That will reveal any missed spots. I could se that there were still some areas that needed more paint.
Once you are happy with the coverage, leave the interfacing to dry completely and then heat set the design. Put the interfacing between baking parchment and press well with a hot, dry iron on both sides. Don't use stream for this. Your interfacing will now be ready to use.
Tape it to the bottom of the screen as usual, making sure that your design sits within the area that will print. This is mine ready to print over a previously dyed piece of cotton.

The interfacing will behave in the same way as the one that I did without any design on it so you can use more than one colour and let them blend. I used magenta and chestnut brown to overprint.

Wash your interfacing out in the normal way and save for another time. Because you heat set the acrylic paint it will be permanent.
A short post next time on how to add a little more interest to your design.
I do like this! thanks
ReplyDeleteGreat process photos. Thanks!
ReplyDeleteDiane
I shall have to give this a try. Hadn't thought of using acrylic as a resist. Thanks Maggi. x
ReplyDeleteAhhh ... great idea to try ! thanks !
ReplyDeleteGreat technique and process post. Thanks!
ReplyDeleteCatching up again on your process posts. I love this idea, so simple and easy to have everything on hand. Thanks for more great ideas!
ReplyDeletesuper cool
ReplyDeleteOK, I just went to Joanne's and bought some light weight pellon!
ReplyDelete