Guess what came in the mail today! OH, I am so excited! I received a copy of Rebekah Meier's new book, More Fabric Art Collage: 64 new techniques for mixed media, surface design, & embellishment. Here is a review of her book. Rebekah Meier has agreed to be a guest artist on the Fire blog for May. C&T Publishing provided us with a free copy of her book that we will be giving away to one lucky reader. THAT is what came in the mail today! Now I bet you are excited too! LOL
Stay tuned for details about the two give-aways, one for Rebekah's new book and a second give-away of a piece of unique fabric designed by Rebekah herself!
Judith

A TECHNIQUE DRIVEN Blog dedicated to mastery of surface design techniques. First we dye, overdye, paint, stitch, resist, tie, fold, silk screen, stamp, thermofax, batik, bejewel, stretch, shrink, sprinkle, Smooch, fuse, slice, dice, AND then we set it on fire using a variety of heat tools.
Wednesday, April 25, 2012
Sunday, April 22, 2012
More gelatine print
I learned that the gelatine gets more interesting, when left for a week or so. But no one told me about the smell... but I overcame my resistance ;-) and placed new pieces of fabric on the painted gelatine... didn´t work out, I qualify them as quite boring...


With the left-overs of thickened dyes, I made some nice cloth just by working with templates from Stewart Gill:

Will get rid of the gelatine and wait for my gelli plate to arrive ;-).
Did you see this blogpost, many more possibilities with the gelliplate/gelatin:
http://gelliarts.blogspot.com/2012/04/are-we-there-yet.html


The only one I liked, is the one with the orange net:

Will get rid of the gelatine and wait for my gelli plate to arrive ;-).
Did you see this blogpost, many more possibilities with the gelliplate/gelatin:
http://gelliarts.blogspot.com/2012/04/are-we-there-yet.html
Wednesday, April 18, 2012
And now for something completely different...

After reading Karen´s blogpost, and her search for marbling effects, I got permission from one of my best dye-friends Marrie-Jette (who is always playing with dye and fabric and gets the most beautifull results) to share her tutorial on dyeing ´soapflowers´ here:
First of all, you need to make handmade olive soapsolution. Take a piece of olive soap, grate 20 grams from it, put it in a bucket and pour 1 liter of very hot water over it. Leave it overnight, with occasionally stirring.Then mix 100 ml. of this soapsolution with 2 grams procion powder dye and you have your thickened paint ready!

Put a piece of dry fabric on a large piece of plastic and put a scope of the handmade olivesoapsolution on top of it, spread it out. The cloth should be wet by the added soap.
Now take your dye-soap in an tipped bottle, and draw on the fabric. Use a stick to get the marble-effect and add extra soappaint when you feel like it:

When you´re happy with the results, sprinkle the soda-ash on top of your fabric (ofcourse you can add it to the soappaint as well, but then it can only be used for another 4 hours).

Leave it for a couple of hours, the paint will spread, so keep it horizontal!
The next day you can rinse the fabric in order to remove all the soap.

Isn´t that gorgeous? Marrie-jette also tried to use liquid detergent, but it is too thin to her opinion to work well.
Look how she created a nice dress with these flowers:

Thanks Marrie-jette for sharing your wonderful experiment with us!!
Monday, April 16, 2012
Judith's great adventure part 2
Soon into our monotyping adventure, my camera battery died so the remaining pictures I took were out of focus because there seems to be something wrong with my "purse camera". That said, here is a brief view of what transpired.


 This was MY contribution - occasionally holding Judith yarn while she replenished the dye paste.
 Best picture of the day. A tub of print paste with a scoop of emerald green (ProChem) dye powder. Could I turn this into a quilt?

This is Judith using a credit card to spread the thickened dye on to the gelatin

These are first layer photos. You can see which one I took with the "purse" camera - sigh.


These are photos of the second layer going on.


Great picture of Judith is action


More multiple layer photos

Judith using netting and a dollie to print and as a colograpgh. Not sure I spelled dollie correctly.

Sunday, April 15, 2012
Gelatin Monotypes
Beth and I got together yesterday and played with gelatin monotypes. Beth had the camera and took the process pictures so I will let her tell the process and procedures. Too keep this post from being too long, I will only show one type of print I made. I'll post a second type of print later.
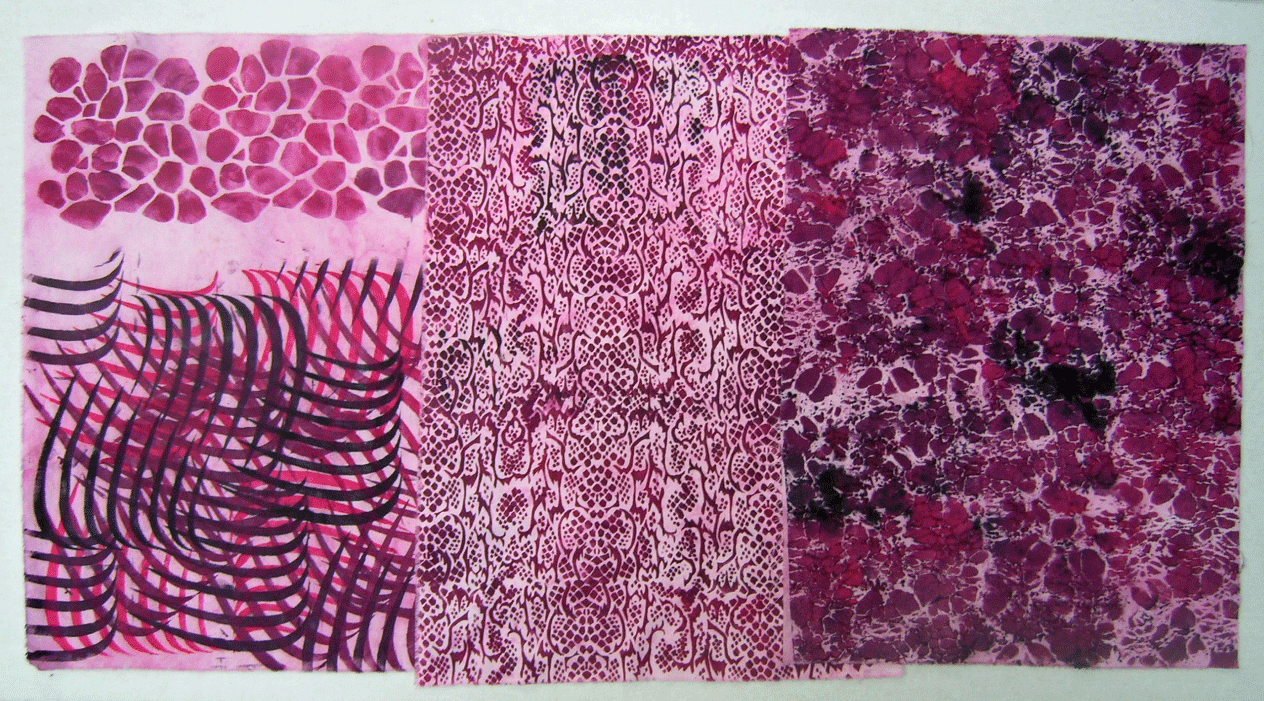
For these prints I worked from light to dark and used Orange Rust, Fuchsia, and Navy Blue dyes. To create designs, I used template plastic cut into squares and rectangles and some fancy "yarn." I will happily show you the best of these prints.


 What I learned:
1. First I tried rolling the dye onto the gelatin plate but it was too thin of a layer to print well. After that we used a credit card to spread the dye. The "best" thickness took some experimentation.
2. Beth and I had different thicknesses of dye paste. We found the thicker dye paste gave us better results.
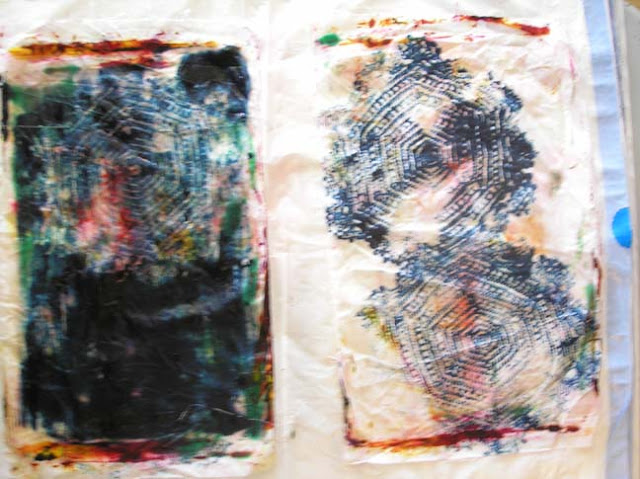
3. The size of the bubble patch is important. Our gelatin plate had two huge sections of bubbles. Therefore, all of our prints have areas that are really heavy with dye. (see above) If I were to make another gelatin plate, I would separate the bubbles into smaller groupings.
4. If you are careful about laying down the fabric, you can get shadows of the bubble blobs in the different colors used on the plate. I kinda like the look. Here is a close-up. Notice the orange and fuchsia shadows of the navy.

5. The thickness of the dye over the bubble section is really critical. Those bubbles can hold tons of dye and can saturate the fabric with dye leaving great blobs. However if the bubbles are carefully scrapped leaving less dye, you can get great patterns. Here are the good, bad, and ugly pictures of bubbles.


For these prints I worked from light to dark and used Orange Rust, Fuchsia, and Navy Blue dyes. To create designs, I used template plastic cut into squares and rectangles and some fancy "yarn." I will happily show you the best of these prints.


1. First I tried rolling the dye onto the gelatin plate but it was too thin of a layer to print well. After that we used a credit card to spread the dye. The "best" thickness took some experimentation.
2. Beth and I had different thicknesses of dye paste. We found the thicker dye paste gave us better results.
3. The size of the bubble patch is important. Our gelatin plate had two huge sections of bubbles. Therefore, all of our prints have areas that are really heavy with dye. (see above) If I were to make another gelatin plate, I would separate the bubbles into smaller groupings.
4. If you are careful about laying down the fabric, you can get shadows of the bubble blobs in the different colors used on the plate. I kinda like the look. Here is a close-up. Notice the orange and fuchsia shadows of the navy.

5. The thickness of the dye over the bubble section is really critical. Those bubbles can hold tons of dye and can saturate the fabric with dye leaving great blobs. However if the bubbles are carefully scrapped leaving less dye, you can get great patterns. Here are the good, bad, and ugly pictures of bubbles.


Saturday, April 14, 2012
Printing on Plastic


So I didn't scratch my brand-new piece of plastic, I got the plastic combs from my marbling supplies for combing through the dyes.

But as soon as I laid the fabric down, the intricate fine lines were smashed and lost. So I found that if I laid down a layer of plain thickener and then dropped on the thickened dyes and combed through, there was more of that lovely patterning.


Monday, April 9, 2012
My first gelatine prints
As a new member of this blog, I´m happy to join the monthly theme.
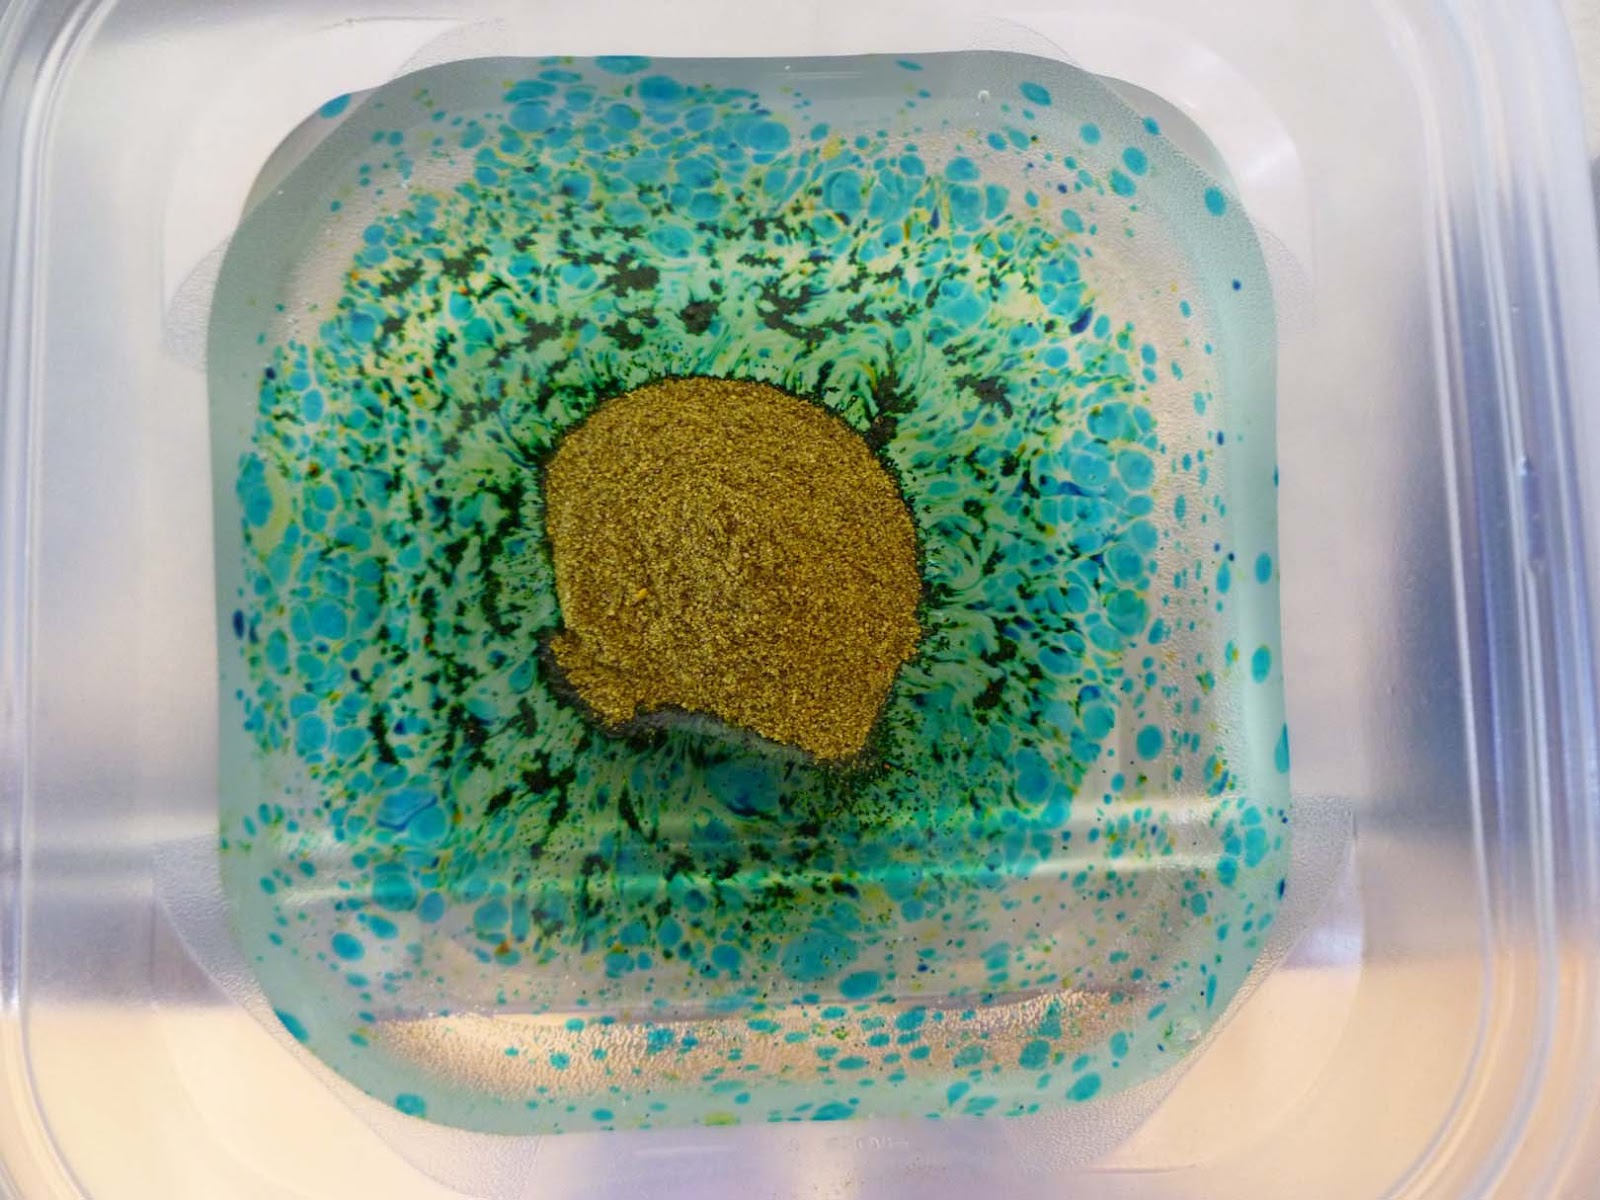
Well there is a gelliplate on its way to me but I didn´t want to wait. So an old sachet gelatine powder with a pint of water will do for now, I made a bowl full of it, small but fine for a first try.


Well there is a gelliplate on its way to me but I didn´t want to wait. So an old sachet gelatine powder with a pint of water will do for now, I made a bowl full of it, small but fine for a first try.

I have deliberately not removed the foam layer, because I ´ve seen in Quilting Arts pretty prints of bubbles through this layer. But it didn´t work out for me ;-) so I think the next time I need some more air into the mass.
I used thickened procion dyes on soda soaked cotton:
Nice but a bit boring, these solid patches. So following the first blog I added a string on the surface. I painted it with thickened procion , so it not only works as a resist but also as a printmatter:


By playing with the string you get some nice effects of multiple layers. I also played with a dragonfly sticker but that's not my ´cup of tea´:

Nice experiment, it definetely wants to be repeated! Could there be a start of a modern quilt in it or is it more touching the artquilt-corner? I hate to make choices on forehand so let´s see where it ends up.
If you want to read this in dutch, please check my personal blog: http://verfvirus.blogspot.com/2012/04/gelatine-printen.html
Tuesday, April 3, 2012
New Resident Artist
Nienke Smit (pronounced Neen'-kah) is our newest resident artist. She has graciously agreed to come on board and bring her fiber art know-how with her. Just this month, Nienke had one of her art quilts accepted into the annual Dutch quilt show, and is co-founder of the Dutch Modern Quilt Guild, a group of 300 women exploring new ways in quilting.

She lives in the Netherlands and is a successful business woman in addition to being an art quilter extraordinaire. Her blog, Verfvirus, which translated means Paint virus or Dye virus can be easily translated with her "Translate" gadget although she usually has a synopsis of her posts in impeccable English.. She certainly has caught the virus and is always involved in some new permutation of fiber art experimentation. She will be joining us in the fall as the artist of the month but will start right in working along with our other resident artists and blogging.
Welcome to "And then we set it on fire", Nienke.
Sunday, April 1, 2012
April: Fooling Around With Monoprinting
I have always wanted to try monoprinting on gelatin. But the surface seemed so small and, while I do use paints and acrylic inks, I really wanted to try it with thickened dyes. So last month, in preparation for this month, I started playing around with various thicknesses of thickeners to see what would work best for me. I'm still playing (and I intend to play around with paints later this month), but these are my findings so far.
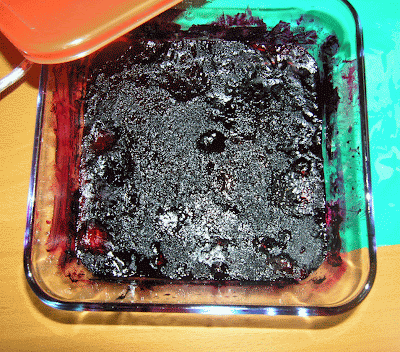
 First, I needed a gelatin surface. I rejected pie plates as too small and the sheet pan I wanted to buy from my local restaurant supply as too large (with the early spring, my "drive-in cooler" is way too warm to chill the gelatin) and settled on an old glass 8.5" by 13" dish. This dish can no longer be used for brownies now that it has found its way into the dye studio, but I really don't need those calories (and in a pinch, I can always purchase ready-made brownies).
 I did a little research and discovered that one tablespoon of powdered gelatin to one cup of water is about right for optimum wiggle vs. solid. I filled the glass dish with water to determine the amount needed (8 cups) and poured a little less than half that of cold water into my studio mixing bowl (again, we don't want to mix up the studio stuff with the kitchen stuff). I sprinkled in the 8 tablespoons of gelatin. I mixed it with a whisk and let it soften while I boiled additional water. I then added the boiling water to the 8 cup line and stirred it with the whisk. While the gelatin cooled a bit, I sprayed the glass dish with Pam so that the gelatin would pop out easily.

I poured the gelatin into the glass dish, covered it with plastic wrap and let it refrigerate overnight. I didn't try to skim the bubbles or anything because I planned to use the other side for my prints.

The next morning it was set and and I inverted the dish on top of the plastic wrap so I could use the wrap to put it back into the dish when I was finished for the day. I did find that sometimes I had to help it out of the dish with a plastic fork, but generally it popped out easily -- especially after it had been used once or twice. When it started coming out of the dish in pieces, I just pushed them together and used it anyway, but replaced it soon after that.
 I tried various degrees of thickened dyes -- I have a lot of really thick dye thickener from last month's experiments -- but found that when I added liquid dye concentrate it was globby and made my prints blobby. I kind of liked the effect, but I really wanted to use smooth dyes. I found that mixing the thickener as for dye painting and then mixing the dye powder directly with the thickener worked best.
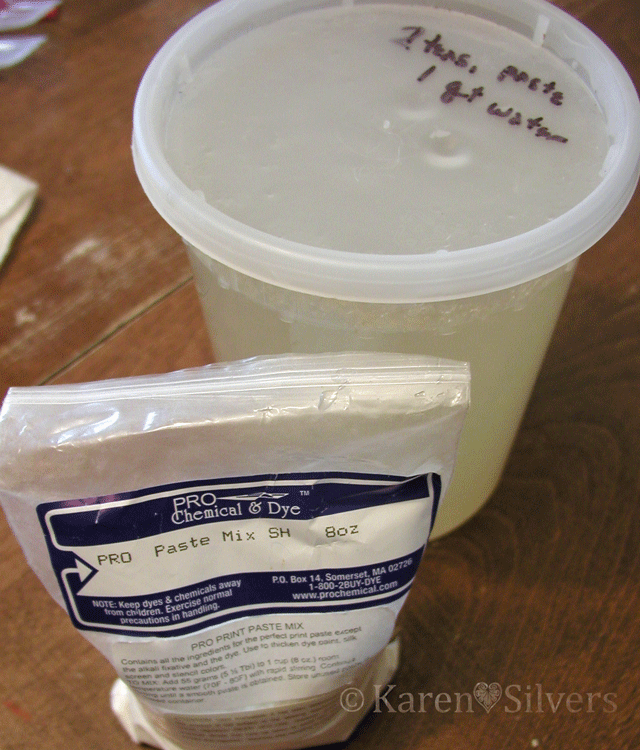
The measurements that I used were as follows: for one quart water, two teaspoons of thickener. Then add to that mixture one tablespoon dye powder for each cup of thickener.
I don't have a blender that I can donate to my studio right now (it's still needed for those pestos and certain summer drinks) so I found that if I sprinkle the thickener powder into the water while whisking, I can get a mostly lump-free liquid. Let it hang out in the fridge over night and it's perfect. Just stir it up before measuring it out for the dye.
 After it's been used a bit, the gelatin takes on some nice color, but if it's wiped off, the color doesn't seem to transfer to subsequent prints.
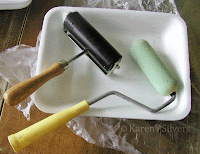 I put the thickened dye in a plastic tray (I use these a lot for paint palettes) and spread it on the gelatin with the hard rubber brayer. It seemed to work the best, the spongy one absorbed the dye and didn't lay the dye down on the gelatin.
 I arranged some "stuff" to act as a resist. I discovered that flatter is better for "stuff" because I like crisp edges. The plastic lid stuck up too high and I used a cutout circle of thin cardboard for later prints.
 I laid a soda-soaked piece of fabric over and used the spongy brayer to smooth it down. I need to get another hard rubber one because the spongy one absorbed dye and left it in places where I didn't really want it, although it worked well to smooth the fabric over the less-flat "stuff." I soak my fabric in soda and spin the excess out in my washer -- I did use some pieces that were still damp and it didn't seem to matter much.

After peeling the print off, I removed the resist "stuff," put down another piece of fabric and got some lovely negative prints. I laid the prints in a single layer on thin plastic garbage bags that I had cut open; then I folded them up and let them batch overnight.

Some of the negative prints were less interesting and I put them on a pile to "overprint" later. Below are more "finished" prints.


 This last one is my favorite. The strings were pretty saturated with dye and left lovely "ghost" marks on this one. Also, I moved the fabric around on the gelatin so that the dye covered the edges.
I plan to do more with this -- I'd like to experiment with warm colors. Also, I want to play around with acrylic paints and inks. But I'm really liking it so far...
 First, I needed a gelatin surface. I rejected pie plates as too small and the sheet pan I wanted to buy from my local restaurant supply as too large (with the early spring, my "drive-in cooler" is way too warm to chill the gelatin) and settled on an old glass 8.5" by 13" dish. This dish can no longer be used for brownies now that it has found its way into the dye studio, but I really don't need those calories (and in a pinch, I can always purchase ready-made brownies).

I poured the gelatin into the glass dish, covered it with plastic wrap and let it refrigerate overnight. I didn't try to skim the bubbles or anything because I planned to use the other side for my prints.

The next morning it was set and and I inverted the dish on top of the plastic wrap so I could use the wrap to put it back into the dish when I was finished for the day. I did find that sometimes I had to help it out of the dish with a plastic fork, but generally it popped out easily -- especially after it had been used once or twice. When it started coming out of the dish in pieces, I just pushed them together and used it anyway, but replaced it soon after that.
 |
| Blobby dyes -- ok, but not what I was after |
The measurements that I used were as follows: for one quart water, two teaspoons of thickener. Then add to that mixture one tablespoon dye powder for each cup of thickener.
I don't have a blender that I can donate to my studio right now (it's still needed for those pestos and certain summer drinks) so I found that if I sprinkle the thickener powder into the water while whisking, I can get a mostly lump-free liquid. Let it hang out in the fridge over night and it's perfect. Just stir it up before measuring it out for the dye.
 After it's been used a bit, the gelatin takes on some nice color, but if it's wiped off, the color doesn't seem to transfer to subsequent prints.


After peeling the print off, I removed the resist "stuff," put down another piece of fabric and got some lovely negative prints. I laid the prints in a single layer on thin plastic garbage bags that I had cut open; then I folded them up and let them batch overnight.

Some of the negative prints were less interesting and I put them on a pile to "overprint" later. Below are more "finished" prints.


I plan to do more with this -- I'd like to experiment with warm colors. Also, I want to play around with acrylic paints and inks. But I'm really liking it so far...
Subscribe to:
Posts (Atom)