I have decided I am going to use this coming month of monoprints to make some prayer flags. Want to join me? Let me know!
Judith

A TECHNIQUE DRIVEN Blog dedicated to mastery of surface design techniques. First we dye, overdye, paint, stitch, resist, tie, fold, silk screen, stamp, thermofax, batik, bejewel, stretch, shrink, sprinkle, Smooch, fuse, slice, dice, AND then we set it on fire using a variety of heat tools.
Thursday, June 30, 2011
Wednesday, June 29, 2011
And another artist showing off monoprints
And another artist showing off her monoprints! Can you believe it? Check out Judi Hurwitt's stacked journaling (stacked journaling means she writes letters of words on top of each other so she knows what she is writing but you can't really read it).
Tuesday, June 28, 2011
Monoprints from JaneVille
Don't you love it when a plan comes together? In July we are doing monoprints and Jane LaFazio at JaneVille shows the prayer flags she is making with monoprints. How cool is that??!
If you are interested in making some prayer flags (monoprints or whatever), here is the link for that project. Yours could be exhibited as part of a show!
If you are interested in making some prayer flags (monoprints or whatever), here is the link for that project. Yours could be exhibited as part of a show!
Monday, June 27, 2011
A little more screen printing
During my last trip to Goodwill I found 6 beautiful brocade napkins in perfect condition for $2.
![]() I had wanted to do some screen printing with some leaves from the backyard and I immediately thought these napkins were just the fabric. This is only the first layer but what do you think of the six of them?
I had wanted to do some screen printing with some leaves from the backyard and I immediately thought these napkins were just the fabric. This is only the first layer but what do you think of the six of them?
![]()


Friday, June 24, 2011
Technique for July
The technique for July that I'd like to explore is Monoprinting. Technically, monoprinting is a method of making one image, with only one print taken from the inked/painted surface, although you can actually sometimes get 2-3 prints.
Monoprinting can be done in several different ways, like squirting paint on a piece of glass and swirling it around, or by making a gelatin plate and using that for your printing surface, using a carved linoleum block, even using a piece of bubble wrap, a carved potato or a sponge. Resists can be created with paper, or by adding leaves, stems, or other organic material.
Here are some links to examples of monoprinting:
http://www.joggles.com/bubble-printing-tutorial.htm
The link below gives a good explanation of gelatin printing, and also tells how to make the gelatin plate.
http://harborview-arts.com/kathleen_garner/gelatin_printing.html
Monoprinting can be done in several different ways, like squirting paint on a piece of glass and swirling it around, or by making a gelatin plate and using that for your printing surface, using a carved linoleum block, even using a piece of bubble wrap, a carved potato or a sponge. Resists can be created with paper, or by adding leaves, stems, or other organic material.
Here are some links to examples of monoprinting:
http://www.joggles.com/bubble-printing-tutorial.htm
http://www.youtube.com/watch?v=8lW3aPDQ4tk
http://www.youtube.com/watch?v=dvr6YqyyfUY
http://www.youtube.com/watch?v=uaO2Ylye6tc&feature=related
The link below gives a good explanation of gelatin printing, and also tells how to make the gelatin plate.
http://harborview-arts.com/kathleen_garner/gelatin_printing.html
Monday, June 20, 2011
Screen printing
This weekend I finally had time to try the screen printing, mostly I guess what would be considered Deconstructed Screen Printing. This is some fabric I started with (I had made it, but wasn't ever really thrilled with it).

I made several screens with thickened dye paste and a navy blue dye powder. The first one I used was several horizontal strips, which I then used a lemon-lime dye powder in the release paste.

This is the piece after hitting it with the screen until my screen ran out of thickened dye on it.

Then, I took a second screen that I had made circles on, and pulled some tangerine colored release paste over that.

I love the contrast -- the tangerine actually printed out as brown because of mixing with navy blue.

This is a piece of my finished product.

I then tried this process with a new screen on another piece of fabric that I had batiked last summer. I think the color I used here was purple--this is when it's still wet, you can see how dark it still is.


Again, it wasn't too interesting, so I took some fuchsia dye power and mixed w/the release paste and used this screen after the piece had dried for a while.

With the fuchsia--

One more little piece with a single screen print on it--I'll have to do another one on top of it.

I learned that this process is really pretty easy--and the results are definitely a surprise. When it's hot and dry, like it has been here in NC, you can make several sets of screens a day, as they dry very quickly. As with any process, you get some attempts turning out better than others. I'll definitely use this technique again! I'd also like to learn more about making stencils and templates for the screens, as I didn't try that yet.
Friday, June 17, 2011
Round Robin picture
This is the piece of fabric sent to me by Beth From Maine -- it looks a lot different now! It will be on it's way to Jenny first thing next week (she works at the same place I do, so I just have to walk it across campus).


Tuesday, June 14, 2011
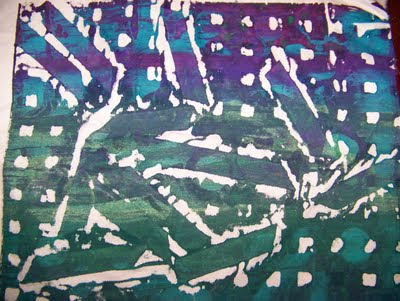
Low Relief Screen Printing
Beth Berman found this link for Low Relief Screen Printing. Since we had no idea what it was, we thought we should give it a try. Our first efforts turned out...well, let's just say they did not look like the examples in the post.
Here is the process that we started with. First we had a padded surface which we covered with plastic. I added another layer of cloth just to act as a drop cloth. Next we put down the low relief items we wanted to print THEN we put the cloth we wanted to screen OVER them. Last comes the screen laid directly on the fabric( over the stuff, over the drop cloth, over the plastic, over the padded surface.) Got that? Then you screen the fabric paint pressing hard with your squeegee. Here are my results.
 Hard to see but this among the printed wrinkles of the drop cloth but this is a vine. See the vine coming from the right edge of the picture? It is the pink line with the white edges.
 This one is wrinkles from the drop cloth, some yarn circled up in the top right corner, and the circles are my Vitamin D gummy drops. They printed well.
 This one is a print of the wrinkled drop cloth and pieces of flat belting material. This is the first one I kinda like.

 These last two are prints of the belting material on top of a plastic drain mat for the sink. I have had that mat for some time but this is the first time I have used it. I knew it would print great. The little circles are the bottom print are a carry over from the Vitamin D gummy drops.
At this point we stopped because we were not getting the prints we expected. I went back and re-read the directions and decided we were missing a stage. I tried again the next day and here are the results.
 This one is the direct print. I made it just as you would expect--padded surface, plastic, cloth I want to print on, a couple of ferns, the screen, and then paint squeegeed on.

This one is the shadow print. This time I placed the screen from the direct print onto a new piece of fabric. There was still paint on the screen. There was nothing between the screen and the new piece of fabric. I squeegeed the screen with a clear textile medium and the paint left on the screen where the fern was printed on the fabric. You can see it best on the top left. It would have shown up better if I had been careful about the wrinkles and had used a darker color on the direct print. This is like the image we saw posted on the link.
 This one is the reverse print where I put the ferns down on the fabric and pressed them just to get the paint off of them. That gives me three prints.
Now here is what I learned. Both those techniques are interesting. The first technique is really easy. I might try that again. The second technique which is really the low relief screen printing method (I think) is very nice but is a lot of work. The direct print requires a dark paint. The shadow print requires you to remove any extra paint from the well of the screen so that you can screen with the clear textile medium. And you need to do it quickly so the thin layer of paint on the screen does not dry on your screen and ruin it. THEN you need remove the clean medium so that won't dilute the paint for your next direct print. I think I can get the same results from a monoprint without having to worry about ruining my screen or having to keep cleaning it.
My two cents. I would love to hear if you have tried the technique
Here is the process that we started with. First we had a padded surface which we covered with plastic. I added another layer of cloth just to act as a drop cloth. Next we put down the low relief items we wanted to print THEN we put the cloth we wanted to screen OVER them. Last comes the screen laid directly on the fabric( over the stuff, over the drop cloth, over the plastic, over the padded surface.) Got that? Then you screen the fabric paint pressing hard with your squeegee. Here are my results.


At this point we stopped because we were not getting the prints we expected. I went back and re-read the directions and decided we were missing a stage. I tried again the next day and here are the results.


This one is the shadow print. This time I placed the screen from the direct print onto a new piece of fabric. There was still paint on the screen. There was nothing between the screen and the new piece of fabric. I squeegeed the screen with a clear textile medium and the paint left on the screen where the fern was printed on the fabric. You can see it best on the top left. It would have shown up better if I had been careful about the wrinkles and had used a darker color on the direct print. This is like the image we saw posted on the link.

Now here is what I learned. Both those techniques are interesting. The first technique is really easy. I might try that again. The second technique which is really the low relief screen printing method (I think) is very nice but is a lot of work. The direct print requires a dark paint. The shadow print requires you to remove any extra paint from the well of the screen so that you can screen with the clear textile medium. And you need to do it quickly so the thin layer of paint on the screen does not dry on your screen and ruin it. THEN you need remove the clean medium so that won't dilute the paint for your next direct print. I think I can get the same results from a monoprint without having to worry about ruining my screen or having to keep cleaning it.
My two cents. I would love to hear if you have tried the technique
Surface Design Round Robin--Marti's report

This is the piece I sent to Judi.  I snow dyed it this last winter.  I am
working on Suzi's piece now - it took me a couple of weeks to get up the
nerve.  It is very pretty and didn't want to ruin it!
Marti
Sunday, June 12, 2011
Screen Printing--A Bit of Success and Dismal Failure/Quilter Beth
I did get a little screen printing practice and thought I'd share those results with you. First I screen printed using paint and a freezer stencil. Those results weren't bad. I cut the stencil from freezer paper and ironed it to the screen. Jane Dunnewold suggests ironing from the front (not the flat side) of the screen. I tried that, but I kept running into my duct tape (which wanted to melt when the iron touched it). I ended up ironing from both sides. I definitely got better contact between the screen and the freezer paper when I did it Jane's way. I wasn't very careful when I cut the stencil and made it a bit too big for this screen. Oooops!


 I thought these turned out okay, and it is pretty easy to do.
Now for the dismal failure...I thought I'd try something different. I colored a picture on my fabric using pastels (Alphacolor by Weber Costello) for the background along with watercolor pencils (Karat Aquarell by Staedtler) and watersoluble ink pencils (Inktense by Kerwent). I tried binding that to the fabric using ProChem's base extender (PROfab Textile Paint).


 Next, I colored directly onto the screen with the pastels and screened the base extender onto the fabric (hoping to bind the color to the fabric). This is what it looked like after the base extender had been screened over it.
 This is what it looked like after washing! I know, I know, you think I took a picture of an untreated piece of fabric...NO...this is actually what it looked like. Now there are a number of reasons this little experiment could have failed.

This is a view of the freezer paper stencil from the back of the screen.

Here is what it looked like when I was getting ready to add the ink to the well.

Here is the result. I added some blue to the red paint on the last print.

Here is a close up.

Now for the dismal failure...I thought I'd try something different. I colored a picture on my fabric using pastels (Alphacolor by Weber Costello) for the background along with watercolor pencils (Karat Aquarell by Staedtler) and watersoluble ink pencils (Inktense by Kerwent). I tried binding that to the fabric using ProChem's base extender (PROfab Textile Paint).
Here is what it looked like after coloring.

Here is what it looked like after screening the base extender over it.

Here is what it looked like after washing! (The light was different when I took the picture, but I think you get the idea.) You can see the area at the bottom left where I didn't screen enough extender on to save any of the color at all.


It could be that I didn't use enough extender. The way it was, though, the fabric is a bit stiff. I'm not sure I would like the hand of the fabric if more extender is what it would take to keep the color. It could be that the fabric was just to crappy. I used an inexpensive muslin to practice on. If the pastels were oil-based pastels rather than water-based, that could cause the problem. (The pastels box didn't say whether they were oil or water-based, but I'm thinking because of the way the dust came off of the screen after I colored on it they were water-based.)
Hopefully, I'll have time to try some more screening before the month is up. I'm planning on making a quilt that will have words screened over it. I want to use flour paste on the screen to do that. (I tried that when I was in Jane Dunnewold's class. The words come out nicely when etched from the right side of the frame with a wooden skewer.) If I don't have time this month to get that done, I'll post pics of it whenever it happens.
Friday, June 10, 2011
One more surface design swap
How are you all doing with your swaps?
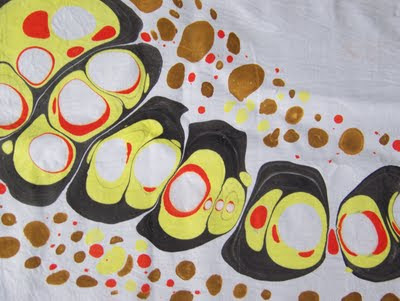
I have passed along my burning sun fabric and now have a new piece to work on. I am so into my fugitive/immigrant medium that I started right away. Here is the fabric as it came to me.
 The entire piece is about 1/2 yard wide and the full width of the fabric. Hard to take a picture of the whole thing so I am showing sections since it is the same pattern over all. The piece was originally the mottled orange. The next person did a soy wax stamp on it and dyed it green. The next person put painted fusible circles between the doily shapes. They appear white because the backing has not been taken off yet. I left the backing on while I worked to keep the fusible clean.
 For my addition I wanted to knock back the green a bit and play up the orange. It did that by using charcoal around the edges of the doilies and inside a few of the doily holes and then using orange and yellow chalk on the doily shapes. To make the immigrant medium permanent , I painted the cloth with Pro Chem base extender, let it dry, and then ironed it.
 THEN I held my breath, and threw it in the washer. The charcoal and chalks were permanent (huge sigh of relief), the hand of the fabric is still pretty soft, and the backing has been removed from the circles. It is now ready to go to the next person.
I have passed along my burning sun fabric and now have a new piece to work on. I am so into my fugitive/immigrant medium that I started right away. Here is the fabric as it came to me.


Thursday, June 9, 2011
Preparing to Screen Print--Quilter Beth
I decided today was the day to work with my screens. I went to my studio to set up some tables and this happened to me...

 Let me explain...I had to get into my closet downstairs to get my extra table, and I got a little sidetracked. I found all kinds of clothes I needed to get rid of, to wash and possibly wear, to take to St. Vincent's, or to cut up and use in my quilts. Does that ever happen to you?
I FINALLY got focused on screen printing. I have three screens from previous classes I've taken. I wanted to just "get my feet wet" today, so I got out some old muslin fabric and decided to do a couple of prints. Then I remembered I needed to tape two of my frames. I took pictures as I did it and followed Jane Dunnewold's instructions on how to do it efficiently. I thought I'd share it with you.
First you should know that you need to use duct tape to tape it. Jane says she has had good luck using Gorilla brand duct tape, because you don't have to let it cure for 24 hours. Regular duct tape needs to cure for 24 hours or the water will make it release from the frame. (I didn't remember this, so I only had one screen to work with today.) Anyway, this is how you do the taping.
Step 1--Start with the back of the frame (flat side) facing you. Line the tape up with the inside edge of the frame. Tape all four sides.

 Step 2--Now, turn the frame over and run the tape from side to side. Continue for all four sides.


 Step 4--Cut the tape to the measurement of the inside. I give myself about an inch onto the mesh to use as a well for the paint or dye. Lay the tape on the mesh first, and work your way back to the frame.


I FINALLY got focused on screen printing. I have three screens from previous classes I've taken. I wanted to just "get my feet wet" today, so I got out some old muslin fabric and decided to do a couple of prints. Then I remembered I needed to tape two of my frames. I took pictures as I did it and followed Jane Dunnewold's instructions on how to do it efficiently. I thought I'd share it with you.
First you should know that you need to use duct tape to tape it. Jane says she has had good luck using Gorilla brand duct tape, because you don't have to let it cure for 24 hours. Regular duct tape needs to cure for 24 hours or the water will make it release from the frame. (I didn't remember this, so I only had one screen to work with today.) Anyway, this is how you do the taping.
Step 1--Start with the back of the frame (flat side) facing you. Line the tape up with the inside edge of the frame. Tape all four sides.


Step 3--If any wood is left exposed on the sides, it is a good idea to cover these at this point. Jane says, "It is good housekeeping." I have a big frame, so mine had a lot of exposed wood that needed to be taped.


Here, I have all four sides done. I don't know if you can tell from this picture, but I still had some wood exposed on the inside of the frame, so I had to add some more tape to cover that up.

Here is my finished frame. I now have it curing. Remember to let it cure for 24 hours if you use "regular" duct tape.

If this is the first time you have used this screen (or if you have just rescreened a frame), you need to wash the screen using Ajax or Comet--a grainy cleanser. Use a brush or sponge (I personally find a brush does a better job.), to clean it. I use a nail (manicure) brush. Do not use an oily-based dishwashing liquid, because the oil can interfere with the printing later. After washing, Jane says to rinse, rinse, rinse. Towel it dry and let it set for awhile to completely dry before using.
I did do a little screening, but I'll save that for another post.
Tuesday, June 7, 2011
A silk screened image

Here is an easy way to use a silk screen. I printed a picture of a crow from my computer onto copy paper and cut out the image. I placed a piece of previously hand dyed fabric down, put the paper (cut out) image on top, laid the silk screen down on top of everything and screened the image with thickened dyes. I covered with plastic, rolled it up and batched. This image was done on plain white fabric. OK so I'm not a great documenter.

Later I used fabric paint in a plastic applicator to “attempt to” draw another crow next to the screened crow image after the fabric had been washed and dried. The lines came out too thickly for my taste so I stopped and used free motion to finish the “sketch”. I also free motioned details on to first screened image. I added some text and quilted.

The last of the marbling
Remember I told you that I had created even better marbled fabric at Rosalita's? I now have them back and can show them to you.


 I didn't post the pictures in order. I did the orange/blue/brown one first and then the other three. See how I moved from just trying to cover the surface to trying to make a more specific pattern on the surface? I thought that was showing some added sophistication in my rudimentary technique. I want to try marbling again but use some fabric that I have already dyed once and see if I can get the marbling and the dye patterns to coordinate some. Anyone try that?
Judith


Judith
Subscribe to:
Posts (Atom)