A TECHNIQUE DRIVEN Blog dedicated to mastery of surface design techniques. First we dye, overdye, paint, stitch, resist, tie, fold, silk screen, stamp, thermofax, batik, bejewel, stretch, shrink, sprinkle, Smooch, fuse, slice, dice, AND then we set it on fire using a variety of heat tools.

Showing posts with label Surface Design techniques. Show all posts

Monday, June 12, 2017

Thanks for Firing me up!


I don’t remember exactly when I found the “Fire” blog, but it was several years ago.  I was immediately inspired and excited by all the fabulous posts about various surface design techniques from the folks who shared their projects and experiments!  I had not been using many of the techniques for long, and really wanted to learn and try them for myself, so I eagerly devoured each post, and tried many over the years.  Then I was blessed to be asked to share some of my experiments here, which was a distinct honor! 
From time to time, I have gone back into the archives to re-visit various posts, and love that the wealth of wonderful information is right at my fingertips, as if I had a whole library in my home to cull through.
While I am sorry to see that the “Fire” blog is no longer going to be adding posts, I know that I will be able to continue referring back to it, and that is a comfort.
Thanks to Judith and Beth, the founders of this great, fun place, for keeping the blog going for so long!  You have done a great service to your fellow fiber artists!  I hope you will continue experimenting and pushing the envelope in your artwork, and I will try to do the same, armed with such a wonderful array of tools found right here on the “Fire” blog! 


Monday, June 24, 2013

Gelli Printing With Wood Masher

Lynda here again with a short post about gelli printing with another one of my kitchen tools - a wood masher.


For this design, I covered the gelli plate with blue paint. I then dipped the masher into red paint and proceeded to stamp it on the plate. I also made sure to push down on the masher to remove some of the blue paint so the white fabric would show through.


And here is that print.  That white line on the right is from a string that was on the plate.  I planned to cut this up so it didn’t make any difference.


I thought this piece would make a great fabric bracelet. 
I cut out a piece 1½ inches wide and long enough to fit around my wrist, and backed it with felt. I then hand stitched it including the blanket stitch around the entire piece, added a button, and stretchy wire for closure.


Gelli printing is so much fun and so easy.  I hope these posts have encouraged you to try this. It's really quite addicting!

Saturday, June 22, 2013

Gelli Printing With Kitchen Tools


Hi! Lynda Heines here from Bloombakecreate
I love to shop thrift stores where I’m always on the lookout for stuff I can use in my art from white shirts to dye to kitchen tools for printing.
 For this post I am using three different kitchen tools to play with my gelli plate.

But before I get started I wanted to give you some tips I learned from working with this printing plate on fabric.
  1.  Any cheap craft paint work.
  2. Since craft paints dry too fast, I add Golden Open Acrylic Medium to slow down the drying time. This gives me time to play with my designs.
  3. Less is more – paint, that is.
  4. For any tools like these (except the one that makes lines) you have to push down into the plate to get an indentation. The line tool didn’t require any pressure. In fact, I wanted to be careful so I didn’t poke a hole into the plate.

So let’s get started.
I begin by putting dots of paint on the gelli plate.


Then I add the Open Acrylic Medium.


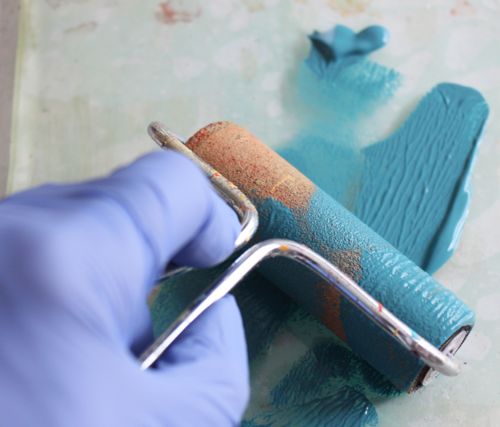
Next I spread the paint on the gelli plate with my roller.


Then I took this tool (have no idea what it was used for) and made some cool lines.


 Next I pressed the fabric into the plate. I love how I can see the pattern through the back of the fabric.


 Here is the finished lined piece, but I’m not done.


Let’s add a different color and this big potato masher.  


Then some circles with the whisk.


And then add lines vertically.


 And here is the finished print.


 Here is another piece without the lines.


 I just had to show you a closeup of that one.


The next two I cheated using a commercial batik as the base fabric.  I only used one paint color on this first one.


 This is the same batik fabric with a blue print using the potato masher and a yellow print with the line tool.


Since this was my favorite piece, I made a small wall hanging. I backed it with felt, hand stitched, machine stitched the edges, and then attached it to canvas I painted gold.


 So much fun! But there is more. I’ll be posting a little more later using some of my other kitchen tools.


A Stroll Through History

Well...the rather recent history on FIRE anyway.

A while back there was a technique introduced (at least to me) on this blog called "Smacking." While I was concerned when first seeing the title, the realization of what it meant for artists was exciting!

In the interest of trying very hard to catch up with all I've wanted to do, try out, experiment with, etc....I finally got to do some of this technique!!  (Better late than never, right?)

I had plexi and a "smack handle" but I would have had to walk all the way out to the barn to cut the plexi because it was too big.  In the meantime, I had gotten from FreeCycle a bunch of those clear plastic photo/sign holders. Figured they would work just as well so I was off and playing.

Below is the process I used and the result of my work.  I used a few colors of acrylic paint, a piece of my hand-dyed fabric that needed something else done to it, the sheet of plexi and the plastic frame.  You can follow the process in the photo collage below (starting top left and going clockwise).  I "smacked" the plexi with the paint-covered frame, then put the fabric down onto the "smacked" surface and pressed it down.


I'm very happy with the results (this piece will be going into my box of fabrics chosen for my "Pecan" series.  And yes...I'll be doing it again!! Now on to my next experiment.........

Tuesday, December 4, 2012

Day 4 Book Review and Giveaway


Review of “Create your own hand-printed cloth” by Rayna Gillman


I love to dye fabric and clothing!  I began my tie-dye business in 1998, and spent several years focused on just dyeing clothing.  But in 2007, I took a class in Surface Design techniques, and my direction shifted to include fabric, primarily for art and landscape quilts.  I was intrigued by the various aspects of Surface Design, and when Rayna Gillman’s book “Create your own hand-printed cloth” came out in 2008, I ordered a copy from her and it has become one of my primary reference books.  Rayna was not the first author to write a book of this type, and she won’t be the last, I’m sure.  But she has created a thorough, interesting and inspiring book that I never tire of browsing for ideas and information.  Rayna covers such topics as stamping and stenciling with found objects, soy wax batik and screen printing with thickened dyes, among others.  Thanks to her recipes, I have finally learned how to mix sodium alginate so that it is not full of lumps, and my thickened dyes come out with much better color intensity than I was getting before. 
Rayna has produced a collection of instructions that covers the basics of each technique in an easy to follow, step-by-step description, combined with photos that work with the text to help the reader to see the process clearly.  I highly recommend “Create your own hand-printed cloth” for anyone who is new to Surface Design, but also for those for more experienced in the techniques to use as a  frequent resource.   Rayna’s book can be found at amazon.com and C&T Publishers.


Leave a comment here and you will be eligible to win a copy of Rayna’s book compliments of C & T Publishing!  I will put all participating names in a basket and draw the winner on December 11th.  Then I will post the winner’s name  here so you can contact me with your mailing info.  
Be sure to come back tomorrow for Judith's Book Review and Giveaway!