A TECHNIQUE DRIVEN Blog dedicated to mastery of surface design techniques. First we dye, overdye, paint, stitch, resist, tie, fold, silk screen, stamp, thermofax, batik, bejewel, stretch, shrink, sprinkle, Smooch, fuse, slice, dice, AND then we set it on fire using a variety of heat tools.

Monday, May 30, 2016

Bubble wrap and shower mat

Some sink mats or shower mats have real interesting surfaces. This one I got from Bed, Bath and Beyond. You can use the whole mat, but I decided to cut off a part and use that as a stamp.


The original shower mat is transparent. I took this picture after I used it as a stamp. Besides this shower mat I used bubble wrap in 2 different sizes.


First I used the bubble wrap. Paint was applied with a brayer. After that I used the shower mat. This is how it turned out:


I hope you had fun with the stamping this month. Did I make it difficult for you to throw away potential stamping material?
The examples I showed you this month are by no means all the items you can stamp with. For instance potato mashers, grids, placemats. In other words, everything which is flat and has a nice pattern or texture can be used. And don't forget most of the stamps I talked about this month can be used not only with paint, but also with discharge, soy wax or thickened dye.

Friday, May 27, 2016

Spounges

For this I used a natural spounge, but any spounge with holes in it is usable.


Place your fabric on your printing board. Apply paint to your spounge using a foam roller or brayer - you do not want to clog the holes, so a foam brush is not suitable. Press your stamp onto your fabric.


And repeat this till you are satisfied with the result.


At the moment the background is still white, but I intend to give it a light  dye bath.


Wednesday, May 25, 2016

Erasers

Another item I found at the dollar store are erasers. Consider them a small and cheaper version of a lino cut. With the same type of tools you create lino cuts, you can make your own unique stamps using erasers. Be careful when you cut, those tools are sharp! If you want to explore this on a bigger scale, lino cutting is your technique then.  Dick Blick is one of my favorite suppliers for lino material. As this month is not about 'official' stamps I will not explore it further this month.

Here are two erasers stamps I made:


Each stamp is 1"x2". Well, by now you know the drill :-). Place a piece of fabric on your printing board and apply the paint with a brayer, foam roller or foam brush to your stamp. Place the stamp on your fabric and repeat till you are satisfied with the result. Here is my sample:


Monday, May 23, 2016

Tile spacers

Another place where you can find interesting stamping material are shops like Home Depot. Just take your time and wander a bit through the aisles. I came home with tile spacers, washers and O-rings.


They come in different sizes, so you can play with this on your stamps as well. I placed double sided cellotape on my picture frame and placed the tile spacers at random on it. Placed my fabric on my printing board and applied the paint with a brayer. This is how my fabric looked like when I was done:


Friday, May 20, 2016

Foamboard

The nice thing about the picture frams I used for my stamp blocks is that you can see through them. Today I am showing you how to use them with sticky foam board and stamping in different colors.


On one picture frame I glued rectangular strips of foam board - leaving gaps in between - and on the other picture frame I glued circles. The circles are positioned in such a way that they fill the gaps of the other stamp:


Place your fabric on the printing board and put 2 different colors of paint on 2 plastic plates. Apply one color of paint on a stamp using a foam brush (roller or brayer) and place the stamp where you want it on the fabric. Repeat this process till you are satisfied.
Now it is time for the second stamp and the other color of paint. Again apply the paint to the stamp and position your stamp in such a way, that the painted objects will be on the still blank fabric. The endresult looked like this:


I also did a sample with a tree shape. Again the foam board was glued to 2 different picture frames.


I used 2 different colors of paint, here is the first one:


And the second one:


Wednesday, May 18, 2016

Rubber bands

Rubber bands come in different sizes and thicknessess and can be used in different ways as stamps. This is how I used them today. I prepared my picture frame with double sided cellotape and placed some rubber bands on top of it. I was not paying attention to the thickness of the bands, so my first set up was like this:


I placed my fabric on my printing board. Applied paint with a brayer or foam roller and placed the stamp on the fabric. This was the moment that I realised that not all the bands had the same thickness. As you can see in this picture, not all the shapes are well defined.


So I replaced some rubber bands with others ones:


And printed again. This time with better results:


For me it is not compulsary that each and every shape should be as well defined as the other, after all the irregularities make the fabric more interesting. The first fabric certainly has its use, but I wanted to show you the difference as well.

Monday, May 16, 2016

Circles or trash

There are many items you can use to stamp circles with, think toilet paper rolls, lids of milk bottles, interesting bottoms of plastic bottles, cans, swimming pool noodles or insulation tubes. Shopping might take more time than it used to take :-). And cleaning your kitchen will result in a bag of goodies for your studio and a (small) bag of real trash.

Collect a number of different sized ones.Place your fabric on the printing board. Put some paint on a plate and apply the paint with a brayer, foam roller or foam brush to your stamping object. When you use a brush, make certain that you do not apply too much paint. You can use a single object for the whole piece of fabric, or combine them.
For this sample I used different yoghurt cups, swimming pool noodles, glas jar, lipgloss stick and washers.


Friday, May 13, 2016

Trays

When you buy chocolate, cookies or cake, have you ever really had a good look at the bottom of the trays? Some have really interesting designs. Of course you have to eat the goodies before you can stamp with the trays :-).


Place your fabric on your printing board. Put some paint on a plastic plate and apply the paint with a foam roller to the textured side of the tray. Place the tray on the fabric. Don't press too hard, you only want the raised parts of the tray printed.
Here are some examples of how the fabric looked after the printing:


The styrofoam trays of pizza's can also be used as stamps. With an empty ballpoint I pressed circles into a pizza tray. By pressing the styrofoam compresses a bit and creates a slight heigt difference. The tray is thin, so I needed something like a handle to lift it from the fabric. For this I folded a piece of cellotape partly double and pressed this to the back of the tray.


I placed my fabric on the printing board and applied the paint with a foam roller. I pressed the tray onto the fabric and repeated this. This is the result:


Wednesday, May 11, 2016

Card board

Wrapping material can also be used as stamps. Today I am showing you what I did with corrugated cardboard. I cut a box into squares and rectangulars and removed most of the top paper. On purpose I left some behind as it gives an extra effect to the stamp.


 With a brayer I applied the paint. If you use a foam brush make certain that no paint pools in the lower areas of your stamp. Pin your fabric on your printing board and place the stamp on it.


You can do this in an organised way, but of course also at random.
As usual I used a combination of textile and acrylic paints, as I am more interested in the colors that I can combine, than sticking to the same brand.
When you are satisfied with the result, let the paint dry and heatset it by ironing from the back.


Monday, May 9, 2016

Pasta, rice, lentils, beans etc.

There are still more goodies to find at the supermarket. Let's check out the pasta and rice aisles.

For stamping block I like these transparent picture frames, the dollar store is one of the places where you can buy them, they come in different sizes.


I covered the top with double sided cellotape.


And placed the macaroni on it in the shape of a circle.


Using a brayer I covered the macaroni with paint. Pressed this onto the fabric.


And repeated this till I was satisfied with the result.


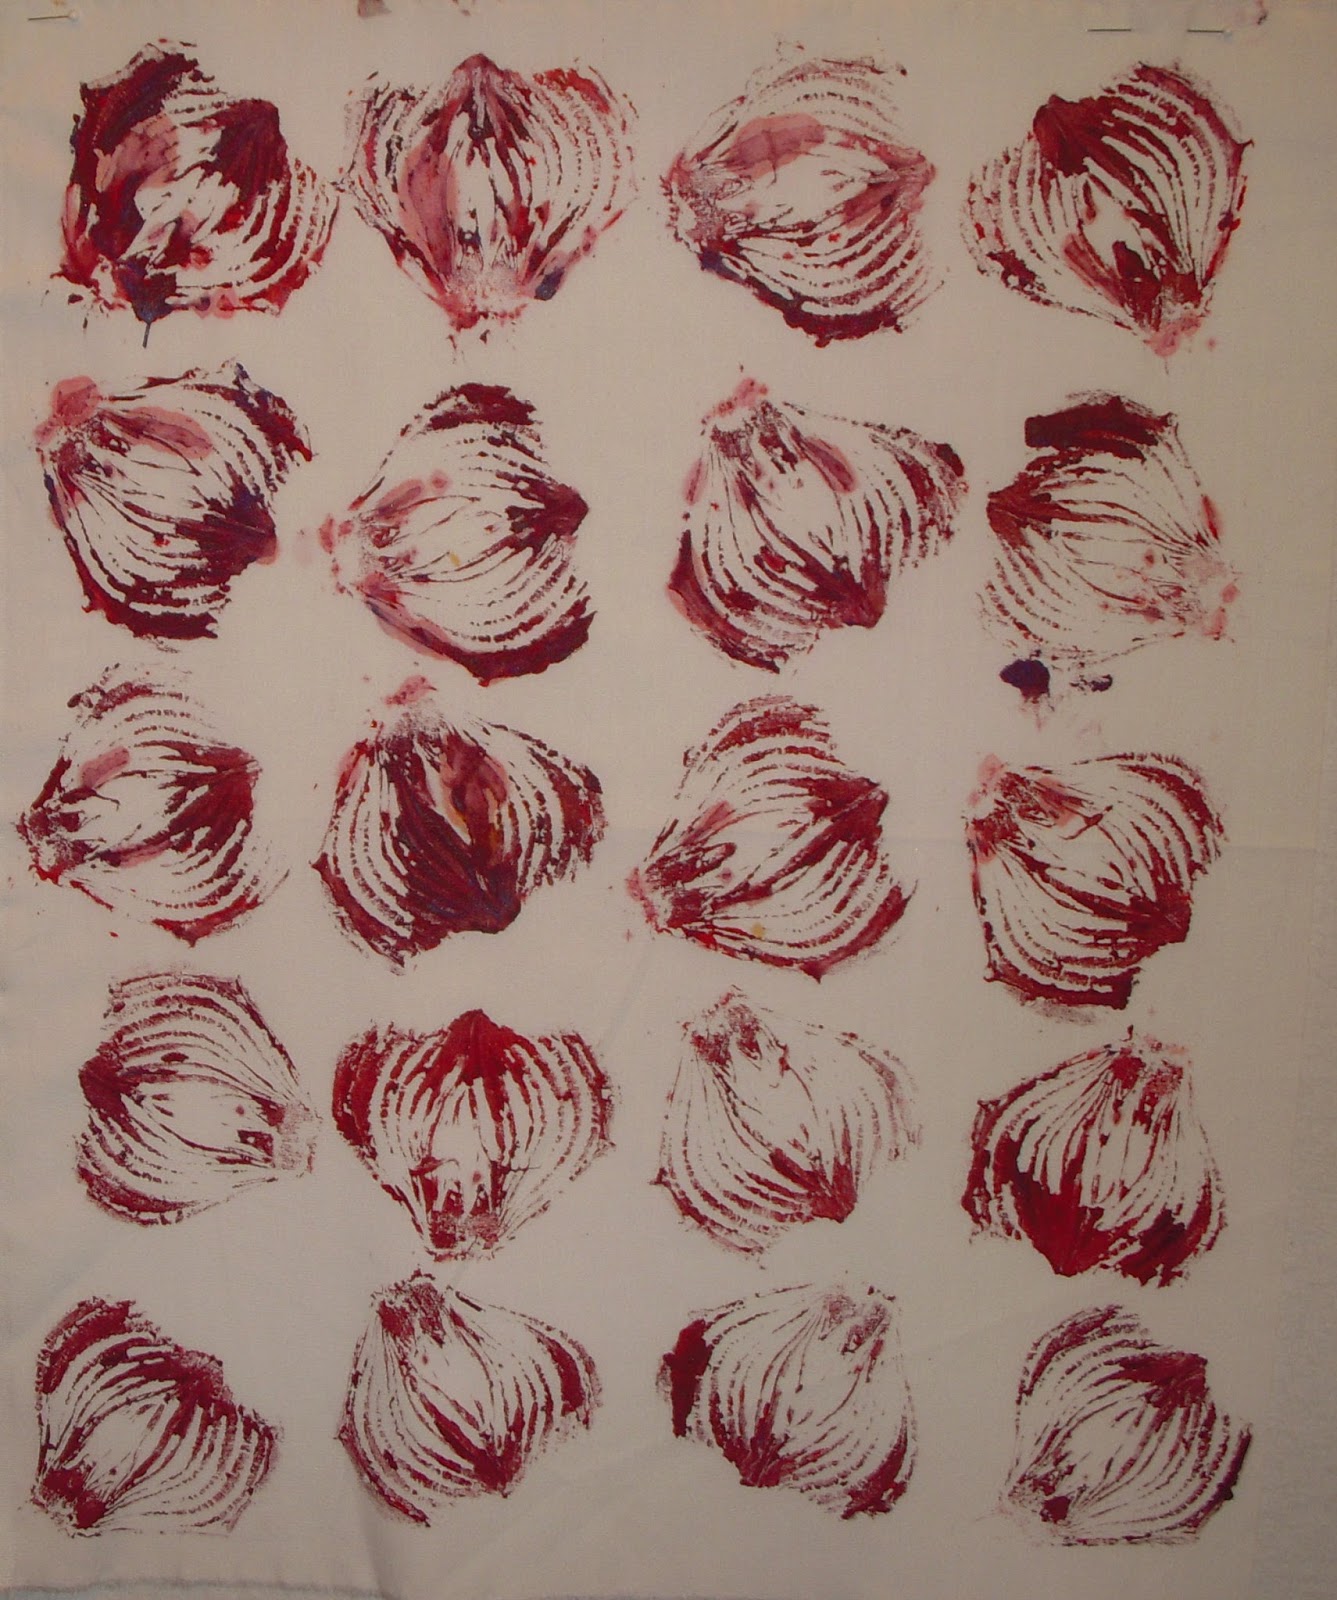
Next step was to repeat this process using a different color. This is how it looked like when I was done:


I used different brands of acrylic paint. I let the fabric dry and heat set it by ironing from the back. Afterwards I overdyed it with a pale blue.


Instead of using macaroni, rice, lentils or dried beans can be used as well to get a similar effect. My next sample was done using spaghetti. As usual I applied double sided cellotape to my picture frame stamp and place the spaghetti on it. In this stamp I placed the spaghetti next to each other, but of course you can play with different distances between the spaghetti.


Place your fabric on your printing board and put some paint on a plastic plate. Apply the paint to your stamp with a brayer and place your stamp on the fabric. You can position your stamp in a neat order, or just at random. Here is my result:


Friday, May 6, 2016

Peppers

Last post of this week requires another visit to the vegetable department. This time we need peppers, bell pepper and red chili pepper.


Slice the peppers and dab them dry. Place your fabric on your printing board and apply paint with a foam brush or brayer. Press the pepper on to the fabric.


Repeat this process till you are satisfied with the result. For this sample I used Lumiere halo pink gold, Jacquard textile orange and Neopaque gold yellow. As you see the shape of the sliced peppers is roughly the same, but the size varies. This creates a more interesting pattern.


Besides the vegetables I showed you this week, there are lots of other ones you can use as well. Think of potatoes, carrots, apples, star fruit.

Wednesday, May 4, 2016

Onion and celery

We stay at the vegetable department and this time we get an onion and celery. Let us play with the onion first. Slice it and let it dry for a couple of days. It does not matter which way you slice the onion, both ways give a nice effect. All the samples I am showing you this month, can be made on either fabric or paper.


Just like I described in the previous post I placed the fabric on my printing board. Applied the paint with a foam brush, but you can also use a brayer or a foam roller, and press the onion down on the fabric.
Here are two examples of how the prints turned out:


 In the quilt shown here, I had pieced the background before I printed with the onion.

Next item we will be using is celery. You can either stamp with the whole celery or just with a single stalk.


For this sample I started with a sunprint which needed a bit more and I used a single celery stalk and black paint:


And this is how it looks when you use the whole celery:


Don't they look like flowers?

Monday, May 2, 2016

Stamps and stamping - cabbage

Hi, I am Wil Opio Oguta and this month I will be talking about stamps and stamping. You can buy your stamps at the art/craft shop, but I think it is much more fun to make your own stamps. We will go shopping at the local supermarket, the hardware store, dollar store or just go through your trash :-).

Today we start at the vegetable department of the supermarket to buy a cabbage. It does not matter which type of cabbage.  Slice it and let it dry for 1-2 days. This way you get a better definition between the folded leaves of the cabbage.
I prefer to use different brand of paints, but this can be done with thickened dye as well. For this sample I used Pebeo Setacolors and a foam brush.


For printing surface I use a piece of styrofoam covered with felt. Both are white, so it is a bit difficult to see on this picture:


The fabric is placed on top of the felt and it is time to start stamping. With the foam brush I applied the paint: on the cabbage.

And placed the cabbage on the fabric:


First print is done:


After I covered the fabric with yellow cabbage prints, it was time to switch colors.


Let the fabric dry and iron it. You can leave it like that, but I decided to give it a colorwash by dyeing it.