A TECHNIQUE DRIVEN Blog dedicated to mastery of surface design techniques. First we dye, overdye, paint, stitch, resist, tie, fold, silk screen, stamp, thermofax, batik, bejewel, stretch, shrink, sprinkle, Smooch, fuse, slice, dice, AND then we set it on fire using a variety of heat tools.

Wednesday, November 28, 2012

So True!!


I'm busy working away on about 4 projects today in the studio but I just had to take a break to post something.  As for many of you...this is the season for mountains of mail-order catalogs.  While I seldom order anything...they keep coming.  I have to admit, I do enjoy looking through them anyway.  Daydreaming perhaps. In one yesterday, I saw this saying on a T-shirt for purchase.  I think it bears sharing. (My apologies to those who also get catalogs and have seen this a bazillion times - this was my first.)

Earth without ART is just "Eh"

I love it! Short, sweet and to the point. I couldn't agree more! 

Sunday, November 25, 2012

Meet Beata Keller-Kerchner, our last new Resident Artist


I have been working with fabrics for about 25 years and started to quilt in 2003.
I came to quilting through a chance. I've promised my, at that time 3 yrs old son, to
make him a good-night -picture, a kind of "dream-catcher". At that time I had been
working with textiles – sewing, felting, screen printing - but I had decided to try out
something new, and make a quilt.
It fascinated me, captured my imagination and right away I knew with absolute
certainty, that I had found the medium I wanted to work with in the future, the medium
I can express my feelings and thoughts.
I consider quilting a very feminine craft and not because it is mostly practiced by
women but because the softness of the textiles, the fineness of the lines, the freedom
of the colors appear to me as reflections of feminine attitude.

I was very lucky in my teacher. I was looking for new examples and inspirations
and soon I became acquainted with the work of Nancy Crow. Here again I had this
absolute certainty of being on the right way in finding my own voice. Nancy's work
had showed me the endless possibilities to be found in a traditional craft when
interpreted by an artistic approach. Again, chance was on my side and soon after
having started to quilt I could participate her workshop in Switzerland. I have been
attending several of her workshops since and her way of working has influenced
mine deeply. I learned the significance of the good workmanship which goes hand
in hand with the artistic sensibility and creativity. I learned to accept myself as a
complex person, I learned about artistic humility and the search – sometimes almost
a desperate one – for the right way to express myself. All above I learned that at
the end it is my responsibility how much and on which way I use my own artistic
potential.

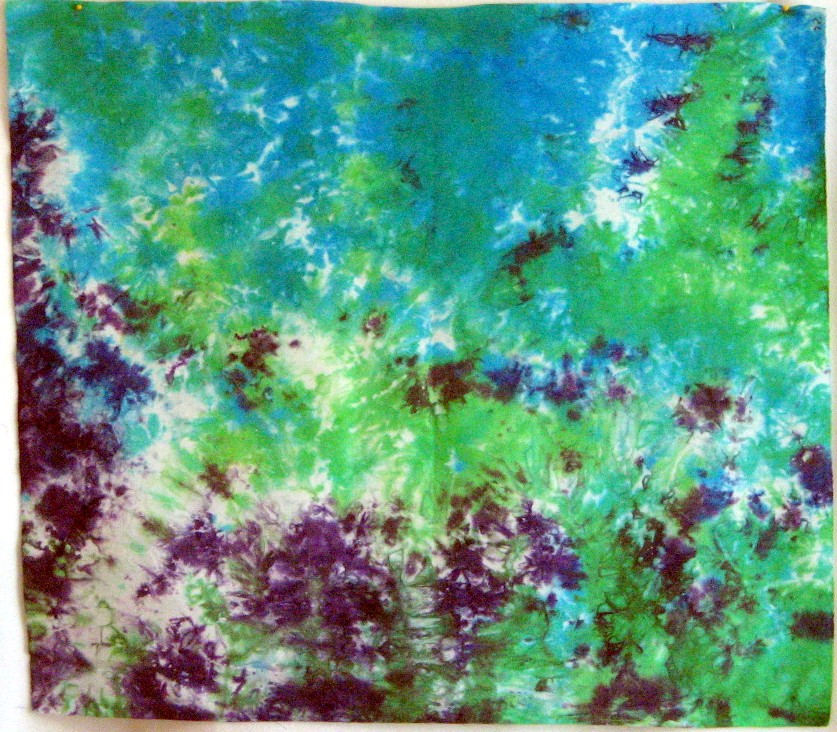
Rapidly I've started to dye my own fabric. I invest lot of time and energy to have a
broad choice of colors and I never stop before I reach the right hue I had imagined.
My colors have to glow and illuminate from inside so they can bring the forms to
define their own place in the space. I aim to create dynamic and independent forms
in an organic surrounding, with lots of freedom and without conformity.

My understanding of "good art" is similar that of Le Corbusier, the architect: "You
employ stone, wood and concrete, and with these materials you build houses and

palaces. That is construction. Ingenuity is at work. But suddenly you touch my heart,
you do me good, I am happy and I say: "This is beautiful." That is Architecture. Art
enters in." (Le Corbusier: Vers une Architecture, 1923)

My art is the expression my deepest feelings. I don't want to show anything new but
try to make my surrounding apparent and visible in a way I see it.
I'm content when my works, the forms and colors not only express something and
result in a good visual picture, but when they "return" to me and broaden my own
horizon and perceptions.

Usually I work on several series at the same time, several, because life is dynamic
and never monotonous, series because they allow me to work on the same theme
from different point of views and with different techniques. My most important series
are the Color Compositions and the Cityscapes. I machine-piece my tops, I use
experimental screen-printing and other surface design techniques.

I am Hungarian but have been living in Switzerland since 1988. (24 years) Both of
these countries have formed my views of life. I am the impulsive Hungarian and the
contemplative Swiss at the same time. My world is never black and white. It is full of
colors and nuances.

I have a university degree in Architecture.
Recently I am working as a high school teacher for art and maths.

For more about my works, ideas, musings, experiences and influences, read my
blog: http://keller-kerchner.blogspot.com

Saturday, November 24, 2012

An introduction to Ann Vanherle

I thought I might whet your appetite a bit and show you the blog posts that really caught me eye and made me think, "Boy, this woman would be a great addition to the FIRE blog".
I think I found the link to Ann's blog on a Nederlanders blog. Sometimes I just go through the list of blogs a person I follow likes or follows themselves looking for something or someone new and interesting. This was the post that really had me hooked. These have been translated by Google and are a bit stilted but you get the general idea.


SUNDAY, NOVEMBER 4, 2012

Finished

My work I started with Leslie Gabrielse am I finally finished. The ladies of easy virtue their plumes go in all directions and make it work now into a whole.

Meanwhile, a first jewel created. Is quite large and made with silver plated wire and natural pearls.
Friday was a high day and everyone who knows a little work of BĂ©jart, certainly recognizes this picture. The end of "The Rite" a work in 1959 for the first time in Brussels was danced. Now as beautiful as ever.Meanwhile, for the following year in Tilburg still dance booked.

By the way, with Google Chrome, the blogs in foreign languages are automatically translated into English or whatever language you choose.

Wednesday, November 21, 2012

An introduction to Kelly Hendrickson

Kelly had me hooked on the first post I read. I think I found her because she left a comment on my blog????? Any way, I became a fan when I saw this experiment.  Very clever and unique.

Weekly Creativity - Week 6 - Large Screen Prints

While I have a "regular" sized screen for printing, I was excited when I read somewhere about how to make large screens...especially for more organic forms.  I so wish I could remember where I saw it so I could give credit to the person from whom I learned this technique.  If you know...please post it in Comments below!

The "screen" is made from organza taped at the edges.  Lesson for next time:  It is pretty much a two people job...at least for me it would have helped to have an extra pair of hands!  The organza shifted at a breath and the duck tape has a very permanent stickiness!!  But I kept on and finally got a fairly workable screen.

The completed "screen"

I then got out my Golden Matte Medium to spread in a rather haphazard manner onto the screen.  I put it all on top of some packing paper so I could just throw that away when it was done.  Lesson for next time: Don't even TRY to use a plastic spoon!  The sturdy wooden one worked MUCH better.

The medium

With the gel medium spread onto the organza screen, it needed to dry very well. I hung it up to dry overnight.

Drying the screen

When it was very very dry, the medium is quite sturdy...at least so far.  I used the duck tape again to lace a spare piece of  fabric down onto my painting surface. It needs to be very stable I think.  The first printing was made with light blue acrylic paint applied with a squeegie thingie.  Lesson for next time: It does take a good bit of acrylic to cover this size.  I had to get out another small bottle. 

First painted layer print

I then removed the screen to see just how the printing went.

Screen removed

Mainly because I used acrylic paints, the screen had to be rinsed right away. I just filled my sink enough to cover it and soaked it for a minute, then used the sink sprayer to get all the paint off.

Screen Rinsing

I then repeated the printing process with two different colors of green.  I rather like the effect.....kind of like peeling paint.  I especially like the part over the clocks.  

Printing completed with second layer of two greens

Clock detail

And the screen is very much usable again! I'm not sure how many times it will last but it has already been worth the effort.  Now I want to try making a large screen like this but use a more regular pattern or form stamped with the gel medium.  


I have made small screens with cardboard "frames" but THIS was a whole new adventure!! Welcome to the FIRE blog Kelly. This is going to be an exciting year.

Tuesday, November 20, 2012

Extreme Texture--Quilter Beth

I have really enjoyed working with Judith's technique of the month--extreme texture. As I stated earlier, I started with a piece of fabric approximately 17" X 28". I put the hand-dyed gauze on top of the hand-dyed fabric and added the little stuffed balls first. (I like the added texture of the gauze.)

I have to apologize for the different colors that show up in these pictures. Some were taken during the daytime (when I had good light) and some were taken at night in much lower light. The last picture is the closest to the true colors of the piece.

Next, I ironed wrinkles into the fabric and pinned them down.

I looked through my threads and thought I'd free-motion quilt the piece with a pearlescent thread--BIG MISTAKE! I HATED the way it looked.

The above picture is a close up. That pearlescent thread just looked "nasty," so I had to rip it out--not fun.

I ended up using a purple thread on the blue fabric (which didn't show up as much and that I liked MUCH better) and quilted a spikey design. I used a yellow green on the dyed cheesecloth and quilted circles onto it. In the following picture, I have also added cording underneath the fabric.

Then, I started adding some handwork. I added yellow green yoyos and put a sequin and bead in the center of each one along with some embroidery over the top, a black washer embroidered with a buttonhole stitch with a sequin and a bead added to the center, and some plastic gutter guard from Home Depot (I used the grid of the gutter guard to keep lines of embroidered running stitches straight.). The green "dots" on the blue background are French knots, I embroidered around the inside of each circle, and I couched down sari yarn which I ran from each "little puff" (as Judith calls them). When I was deciding where to couch the sari yarn, I thought about how each little puff was isolated; I wanted to connect them. I thought about how we all are connected in some way--six degrees of separation.

You may notice some reddish "dots" on the lower left-hand side; I'm beginning to add some beads. I plan on adding many more over the entire piece. I'm also planning on adding some bead stacks on the "little puffs." I already have the beads picked out. I don't think I'll get that finished before the month is up, though, so I thought I'd go ahead and post.

My Experiment with Extreme Texture


 I finally got some time this week to play with Judith’s techniques for Extreme Texture.  I confess I didn’t have any idea of what I would do other than try the different methods she described.
First off, I auditioned several pieces of fabric I had in my stash.  I finally settled on this one:


This was a good size, and it had some interesting patterns… kind of reminds me of being under water.
Next, I did some of the puffs:


After creating several of them, I could see where scrunching was going to make the piece even more interesting:


I scrunched, then pressed the piece.  Then I cut the batting and pinned the fabric to hold the scrunches in place.  Next was the stitching:


I used white thread, which doesn’t show up as well as I would like, but I have some ideas about what to do later to enhance the stitching.  From the very first puff I stitched around, I envisioned dancing jellyfish or sea anemones, so the working title is “Dance of the Jellyfish”!  I’ll see if my finished piece looks like what I have in mind.
Once I finished stitching around the puffs, I set to thinking about how I wanted to use cord.  My vision is to have seaweed floating somewhere in the composition.  I dug through my stash and found some cheesecloth and cotton cord, and tried dyeing them.  However, I think I got a little impatient and rinsed them too soon.  The cord came out very pale, and the cheesecloth came out more blue than green.  So I switched gears:  dark green netting and undyed cord that I zigzagged in place:
 
 Here’s the cord – I zigzagged twice – once to anchor the cord, the next time to cover more thoroughly with a closer stitch.  


Next, I ripped some pieces of the netting, pressed them into clumps, and hand stitched to anchor them onto the piece around the ‘stem’ created by the cord:

I have lots more I need to do to this piece before I’ll call it ‘done’, but I wanted to share what I have completed so far.  More to come!

Monday, November 19, 2012

Texture to "Finish" a Piece


I made this little art quilt from paint, Mul-tex, thread and batting.  But it was missing something.  It has texture from the gel medium and the threads, but it's still a little blah.


Enter Extreme Texture Technique!  I took some of my hand-dyed cheesecloth and wadded it up and draped it across the bottom.  Then I used my walking foot and a zigzag stitch to stitch it down.

I left some of it hanging over the binding.  Much better!

Sunday, November 18, 2012

An introduction of three new resident Artists

We are so pleased to introduce three new resident artists for 2013.  They are in alphabetical order, Ann Vanherle from Belgium, Beth Brennan from Southern Illinois, and Kelly Hendrickson from Minnesota. They each have their own voices and experiences to bring to the blog and I am eager to see what they have in store for us. Their names and links to their blogs are on the list of resident artists in the right column.

Just to start you all off, this is some of the work done by Beth Brennan (Beth #3) on the extreme texture technique. You can check out her blog and see how she started this process.


Monday, November 12, 2012

My work with texture


Even before Judith shared her tutorial on extreme texture, it was a subject I have been very interested in. I really loved her piece and reflected back on a piece I did a few years ago and thought I'd share that with you.


This started out as a large piece of hand dyed scrim over cotton. I couched silk sari yarn and used rope under both layers with top stitching pulled tightly to create the corded bits. I used two sizes of rope. I also used beads.


You may recognize "Collateral Damage". This was a piece I made to show the destruction of forest land for housing developments on huge lots.


The "leaves" are small bits of hand dyed scrim that were stitched in place.


I drew these "Roots" and had thermofax screens made from the sketches. The roots are growing into the "blood" of all the animals who lost their homes so people could have huge lawns for their McMansions.


This is the forest floor and rocky layers underneath using raffia, tied balls of thread, flat rocks, hair mats from my dogs fur and sari yarn to represent rocks.


This area has sari yarn, rock, and dyed silk chiffon filled with stuffing to represent the rocks. The subsurface is made with tucks of dyed rayon fabric.

Tuesday, November 6, 2012

Extreme Texture--More Techniques from Readers

If I had been familiar with Sandy Snowden before now, I may well have asked her to be a Guest Artist for extreme texture.  She has been nice enough to send us some links to her blog posts on an additional couple of texture techniques she uses.    Here is part of her email to me with the links she has provided.  Like Sandy said, "Sometimes some people don’t connect with something unless it is shown in different ways."  Enjoy taking a look at what others are doing with texture!

I think I have used similar techniques, but in different ways. I tried to get texture inspired by Chestnut tree bark. http://sandysnowden.blogspot.co.uk/2010/08/chestnut-tree.html
and also used broomsticking and poking into cooling racks to manipulate texture into fabric.  This link is to some of what I have done myself and some with students. http://sandysnowden.blogspot.co.uk/search/label/broomsitck

The link to the Threads magazine article is good, too.
I have done some interesting work with velvet or on shiny fabrics. I use loom state calico to get the look. I know there is a new product that people have been using for similar looks, but you can use wool or loom state calico just as easily.
C June Barnes is also someone to look at. She is doing exciting things with texture – trapping things in the sandwich that resist the shrinking and then using wool batting or pre-felt. Then when you wash it, there is interesting distortion due to some areas shrinking and some not.
http://www.cjunebarnes.co.uk/Textiles/Gallery_16_-_2007.html some of the art quilts with the technique  

Sandy

Monday, November 5, 2012

Getting Ready--Quilter Beth

I'm so excited to get started with the technique for this month. I gathered my materials this afternoon. I have a piece of base fabric approximately 17" X 28", some gauze I hand dyed awhile back, some silk sari strips, some heavy string (I don't have any cording.), and some plastic rings (I'm thinking I might be able to hand sew them under the base fabric. Of course, I know that I'll need to keep my sewing machine away from these rings.). I'm hoping to have time this evening to add the "puffs" into the fabric. I'm not sure that I'll actually use all these supplies (particularly the yellow rings) but these caught my eye.

My son is getting married this weekend, and we are leaving for a "destination wedding" in a couple of days. I won't be able to work on it for awhile, but I will be giving it some thought while I'm gone!

Extreme Texture-Finishing Touches

We have already covered  the three main techniques for adding technique: puffs, scrunching, and cording.  Now we are just adding some finishing touches to balance the design in the piece and to add any last minute pop.  Take a good look at your  piece and decide where it needs something more.  While you probably can't add any more cording under the fabric, you could add more on the top.  Probably you can't add any more puffs but you could add buttons or beads.  I bet Kathy would add some buttons!  I added more stitching on the scrunched fabric but wanted something more.  Here are a couple of things I added.


Here is a picture from yesterday to show off some embroidery stitches.  Notice one of them is very 3-D.  It is a button hole stitch that builds up  The other is just a decorative stitch that plays with the texture.  Remember the goal is not to necessarily show off your embroidery skills as much as to add to the texture in another way.  If  you want to learn a few more embroidery stitches to use in your piece, please go to Sharon's blog, Pintangle.  Believe me, she is the queen of embroidery tutorials!

Still staying with my hand dyed embroidery thread, I gathered scrunched fabric that had not been stitched down and stitched it with an overcast stitch.  I really like the way it looks and the variegated thread really is exciting I think.  I chose to only add this technique around the puffs.  Kinda makes them look like octopuses don't you think?  Do notice that I chose not to overcast all the wrinkles.  I liked having both the overcast wrinkles and the loose ones.

This picture also show a third way that I secured the cording on top of the fabric.  I simply stitched it with an invisible stitch.


I thought the orange side of my piece was a bit flat looking.  It did not have any cording or puffs on it.  I thought the variegated orange thread would not pop.  I did not want to add buttons or beads because I had not used them elsewhere in the piece.  I finally decided to thread paint with variegated blue thread.  That helped to tied the orange side to the blue side of the piece.

Once you are satisfied with your piece, it is time to decide how to present it to the world.  Your edges are probably quite wiggly.  Want to be really brave and leave it that way?
 I wasn't that brave and decided to trim the edges to a bit more straight.  Here I am half done.  I did not use a straight edge and my finished piece is only roughly rectangle.  That was the choice that I made. Did you ever think you had so many choices when making a piece?


To finish it I decided to sew a false back on it. Other choices you could make are 1) o put a backing on it, add a little quilting to all three layers, and then finish the edge; or 2) put a facing on it and mount it on a stretched canvas or atop another quilt. ohhhh!  Think of the super extreme texture of a quilt on a quilt!

 To sew a false back, I laid the piece face down, front to front, onto a fabric I thought would complement the front.  Sometimes when I face a wall hanging, I like to use a complimentary color that will peek from the back.  I debated using an orange to peek from the back on this one.  I auditioned it but felt a blue one that was less visible was more successful.  I had put a lot of work on the texture and this time I did not want the back to steal any of the attention.

Sew all the way around the piece about a 1/4 inch to 1/2 inch from the edge.  Do try and round the corners a bit to make turning easier. "WHAT?" you say, "How do you turn it when you have stitched all the way around?"  Good question.  You carefully lift a pinch of the back fabric and cut it.
 I choose to cut it across the piece a couple of inches down from the top.  After turning the piece right side out, I will iron the piece while carefully rolling the edges so nothing of the false back shows, then fuse the cut closed.  You won't see the cut once I add the  hanging sleeve.  Some artist prefer to make a smaller cut and hide it with their fused label.  Either works.

Finished!
Now I would love to see your extreme texture!

Sunday, November 4, 2012

Extreme Texture--Cording technique


Here is where we ended up last time.  The fabric has some puffs and has been scrunched and partially stitched. Time to add some cording.

You can see here the fabric that has been scrunched and the upper half has been stitched.  The bottom half I wanted to add some cording so I left it unstitched. Cording comes in different thicknesses and densities.  You do want cording large enough to show but remember that you will at some point be finishing the edge of your quilt.  Your two options are to choose a cording that you can stitch through to put on a binding or to not take the cording all the way to the edge. I used two types of cording.  This is the ugly type of cording you can get at the fabric store.  It is meant to be covered with fabric and that is how I used it. 

You will want to change your free-motion foot for your zipper foot so that you can stitch right up next to the cording.
Here are three cords that I stitched in place.  Easy Peasy.  Just place the cord between the scrunched fabric and the batting. Please notice that I did not try to smooth out any of the scrunching!  Think about design as you place the cords.  You can place the cord in straight lines or curves.  I would suggest you start with a straight cord first.   I found that it was hard to stitch the first side close to the cording because the cording kept moving around.  I finally got smart and pinned the fabric on the opposite side of the cording so the cording had no where to go and then stitched the first stitching line.  When you stitch up the second side, you just want to make sure the cording is tight against the first stitching line.

A second way to stitch the cording in place is to couch it in place with some hand stitching.  Beth Berman showed me this one!  Here I used some embroidery thread I had dyed. Beth showed me how to do that too!  I chose a variegated orange thread to go with my blue-orange complementary color scheme.  In the picture you can see the couched cord right next to the machine stitched cording.  I used just a simple overcasting stitch but you could be creative and use any embroidery stitch that you like.

I decided to use some cording on top of the fabric too.  This is a different cording that is meant to be shown off.  It is very shiny and it really adds to the total texture of the piece to have it showing.  Do think through how you are going to secure your cording ends.  These types of cording often frays.  You will need to have the cord go off the edge of your piece into the binding, be secured in some way so that it won't fray, hide the end under some texture, or intentionally let it fray to add to the texture.


In this picture I just  overcast couched the cording to emphasize the twist in the cording.  I'll talk tomorrow about the other embroidery stitches you see in the picture.


In this picture I just had fun with the cording and pulled it apart and was a bit more creative in my stitching. 

So there you go!  Four ways to add cording to your extreme fiber piece.

Tomorrow we'll talk about finishing touches.