
A TECHNIQUE DRIVEN Blog dedicated to mastery of surface design techniques. First we dye, overdye, paint, stitch, resist, tie, fold, silk screen, stamp, thermofax, batik, bejewel, stretch, shrink, sprinkle, Smooch, fuse, slice, dice, AND then we set it on fire using a variety of heat tools.
Showing posts with label Shibori. Show all posts
Showing posts with label Shibori. Show all posts
Friday, September 30, 2016
the clothesline
A pdf of instructions for indigo and woad can be found here: Indigo and Woad.
Read more about new discoveries of the oldest indigo textiles here.
An excerpt:
"The discovery of indigo dye more than 6,000 years ago couldn't have been mere happenstance. Indigo dye is quite complicated to make, Splistoser said. Many dyes are made from flowers and require simply boiling the blossoms in water to extract the color, he said."
"'Indigo does not work that way,' he said. 'If you put the leaves — and it's leaves, not flowers — in water, nothing will happen.'"
"Instead, the leaves have to be fermented. Then, the fermented mixture must be aerated so that a solid compound falls out of the mixture to the bottom of the tub. This mixture can be taken, dried and stored. To reconstitute it requires an alkaline substance, often urine, which makes white indigo, a water-soluble compound. Yarn dipped in white indigo will turn yellow, green and finally blue, 'like magic,' Splitstoser said."


Monday, September 26, 2016
more stitched and clamped resist
A workshop in the Guild House at the end of August. I cannot tell a lie, I never pass up an indigo vat - it's always more fun to dip with friends.
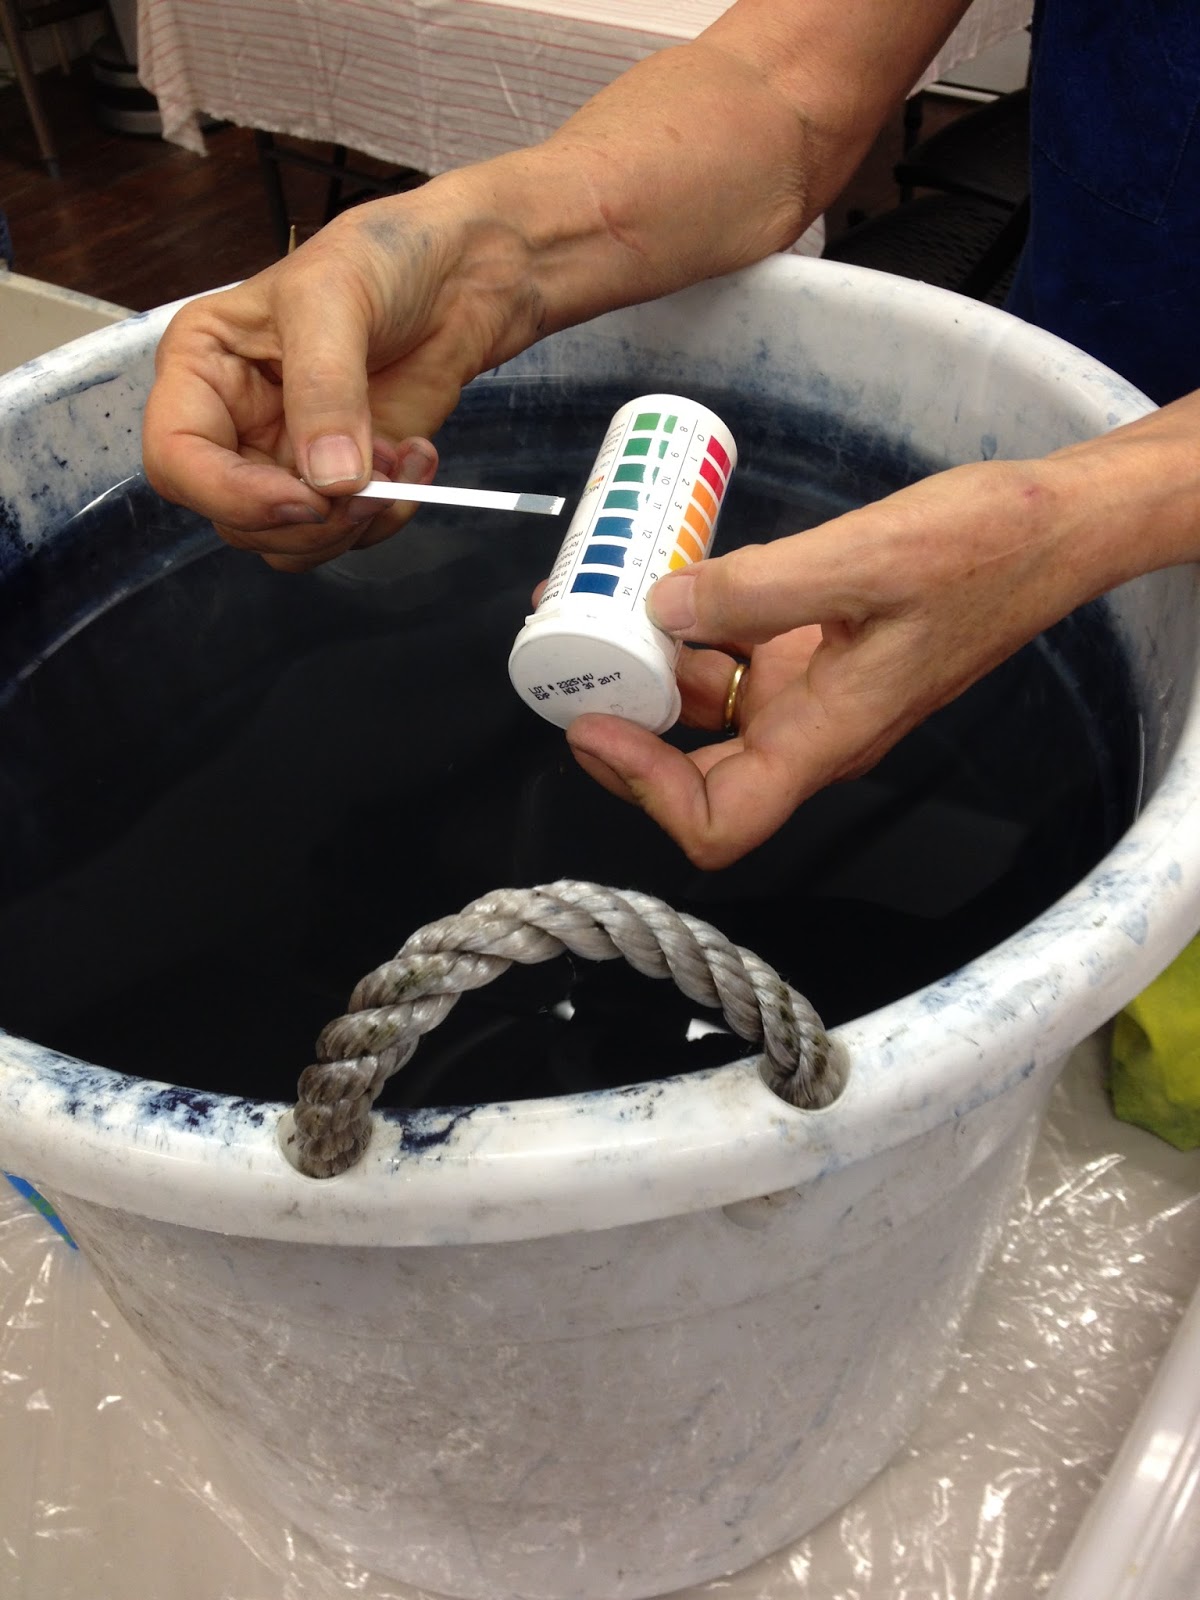
 Connie was in charge of the two vats, one was made the old fashioned way and one with pre-reduced indigo crystals. Both require that the vat is the right pH and the easiest time to do this is before adding in the blue indigo or you won't see the color accuratly on the indicator of pH stick. Some pointers are so simple; why haven't I heard this before?

 Here is the bundle after the first dip in the indigo - still turning from that neon green to indigo blue. Gotta capture it in photos because the green doesn't last.
Here is the linen, finished and ironed. A nice repeat that would be a cool background for embroidery.
 An even quicker method is to use zip-ties for a resist. They are plastic single-use fasteners you can find at the big box home improvement stores. They come in wonderful colors, too.
 Once the fabric has been dipped in indigo and allowed to oxidize, you have to snip the plastic fastener to release it. I hear there are reusable ones, but I haven't found them in stores yet.

In every workshop there is at least one nugget of information that is memorable and worth the fare. First it was test pH before adding indigo and then this one! Double bonus in this workshop. Connie uses pony beads to begin her stitching lines. Below you see them before she has pulled up the stitching and they are obviously reusable as you can see by their color.

Below is one of her shibori dragonfly napkins...
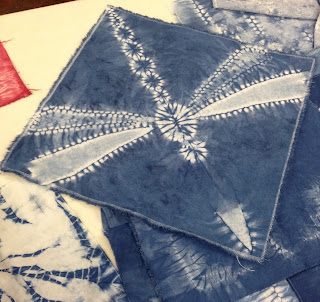 ... and she is demonstrating how easy it is to do by folding down the mid point of the body. She draws her circles with water soluble pencil. The wings are drawn and then stitched either by folding and using a running stitch or simply a running stitch along each side - she did both styles of stitching.

 Here is it with some of the green glow still on it. I had to refold and dip a second time to get all four squares with holes.

I see reflections in a skyscraper window. A little wavy; a little shadowy. Again, I think some embroidery is in its future.


In the kit of materials for the workshop, there was a crisp square of linen and I ironed an accordion fold and then made very long stitches through the center of the fold and pulled it up tight. If you spritz the fabric with water, you can often pull up even tighter but this linen was resisting my efforts. Crossing my fingers this will have some definition. I used buttonhole twist doubled for the stitching.

Here is the linen, finished and ironed. A nice repeat that would be a cool background for embroidery.


Here's the way the zip-tied fabric turned out - fast and easy.
In every workshop there is at least one nugget of information that is memorable and worth the fare. First it was test pH before adding indigo and then this one! Double bonus in this workshop. Connie uses pony beads to begin her stitching lines. Below you see them before she has pulled up the stitching and they are obviously reusable as you can see by their color.

Below is one of her shibori dragonfly napkins...


My husband has been cleaning out the garage lately and I scored these two instrument panel fronts that his company produced for an engineering firm. They did a lot of panels and some were rejects for one reason or another. They were cut using a CAD system. I folded some canvas cloth and clamped it between two of the instrument panels matching the holes exactly.


I see reflections in a skyscraper window. A little wavy; a little shadowy. Again, I think some embroidery is in its future.

Friday, January 30, 2015
no loose strings


The rest of the bundles looked like this before we opened them.

The cloth below was the one in the middle with the red rubber band wrapped fairly tight around a dowel. She laid strings on the cloth and folded it accordion style from corner to corner. She used both the blue and the purple strings.

This cloth with the distinct folds was the darkest one in the bundles photo. The beginning and ending are nice but the middle was only lightly marked.

The last silk and cotton scarf was the long one wrapped into a U shape. I can't remember how she wrapped this... but those marks look like magic writing.

So I promised to mail out eight samples of the strings that dyed cloth after being boiled for 30 minutes. Over on my personal blog, there are over 30 comments to date and, as of noon Central time on January 30, I going to pick the eight names and contact them via email for their physical addresses. Thank you for following my tutorial and your interest in knowing more. Many commenters have asked for advice on buying yarn that will work so I've ordered some new cotton warp to test what happens with fresh stock. I'll post an update! I'm taking a small risk because I can always weave it up if it doesn't bleed good enough for dyeing.
Thursday, October 2, 2014
Stitch resist shibori - the basics
For this month of experiments we will focus on cotton and silk to work with.
The fabric must be clean/PFD before you start your process.
The thread for binding has to be STRONG as it has to be tighten firmly. Nylon thread is too elastic, dental floss can really be difficult to get it tightly knotted. Cotton is a stable and strong thread and an added advantage is the shrinkage of cotton once in the water, causing the binding to fit even tighter.
Polyester is easier to remove because it takes no color. My tutor (a real shibori expert) Karla de Ketelaere recommended using Guterman Max Mara Polyester Thread, Detex 1000/3, 300 meters:

We will stick to regular stitches this month and see how many possibilities we will have with these!

The proces:
Tying:
1. Draw your design onto fabric in soft pencil. Thin material may be folded.
2. Systemise the pattern so that the thread can be tied together for contraction.
3. Stitch the pattern, if possible use double threads, which makes tightening and knotting much easier
4. Tie the loose ends together after you have sewn the whole pattern!
Dying:
When the material has been prepared, it is often an advantage to soak the material into water. Now that the water is in the fabric, the cotton of the binding will shrink and these two facts, will give the dye a hard time to get into the tied parts.
We will not explain the dye process as each of us has its own favourite dye/process.
But we have a few hints,

PS. For those of you, who prefer a short procedure description, please check this one:
1. Pour the dye solution in the salt solution
2. Place material in this and dye for 30 minutes
3. Remove the material, add the soda solution and continue dyeing for another 60 minutes
The material must be moved about in the dyebath!
4. Rinse in luke warm water until the rinsing water is clear.
5. Remove the thread. It might be helpfull to let the bundles dry before doing so.
6. Decoct in a mild soap detergent
So now that we know the basics, let's start with the straight stitched pieces. Tomorrow Sheila Fowler, one of our teammates this month will share her experiments!
The fabric must be clean/PFD before you start your process.
The thread for binding has to be STRONG as it has to be tighten firmly. Nylon thread is too elastic, dental floss can really be difficult to get it tightly knotted. Cotton is a stable and strong thread and an added advantage is the shrinkage of cotton once in the water, causing the binding to fit even tighter.
Polyester is easier to remove because it takes no color. My tutor (a real shibori expert) Karla de Ketelaere recommended using Guterman Max Mara Polyester Thread, Detex 1000/3, 300 meters:
We will stick to regular stitches this month and see how many possibilities we will have with these!
The proces:
Tying:
1. Draw your design onto fabric in soft pencil. Thin material may be folded.
2. Systemise the pattern so that the thread can be tied together for contraction.
3. Stitch the pattern, if possible use double threads, which makes tightening and knotting much easier
4. Tie the loose ends together after you have sewn the whole pattern!
Dying:
When the material has been prepared, it is often an advantage to soak the material into water. Now that the water is in the fabric, the cotton of the binding will shrink and these two facts, will give the dye a hard time to get into the tied parts.
We will not explain the dye process as each of us has its own favourite dye/process.
But we have a few hints,
- Use a narrow but high container, so the ratio water/dye solution will be strong enough. These 5 liter containers for water, soap or wine ;-) are great to work with when you remove the top.
- Please use salt to make the dye move throught the water.
- And don't forget to add soda in the final stage if you use reactive dyes and cotton.
1. Pour the dye solution in the salt solution
2. Place material in this and dye for 30 minutes
3. Remove the material, add the soda solution and continue dyeing for another 60 minutes
The material must be moved about in the dyebath!
4. Rinse in luke warm water until the rinsing water is clear.
5. Remove the thread. It might be helpfull to let the bundles dry before doing so.
6. Decoct in a mild soap detergent
So now that we know the basics, let's start with the straight stitched pieces. Tomorrow Sheila Fowler, one of our teammates this month will share her experiments!
Wednesday, October 1, 2014
October with Nienke Smit & CO - Stitch resist shibori
Welcome in October, a new month, a new technique. That's the concept of this blog! Thank you Mags Ramsay for a great series of working with acrylic paints. It has been very inspiring!
Last year, I spend a whole month on '30 ways to fold your fabric' before dying. This month we (as I have a team of contributors with me!) will share our experiments of many ways to stitch your fabric before dyeing!

A great resource on theory is this website:
http://shibori.org/traditions/techniques/
(And by the way, the book they recommend is the best you can get on Shibori dying to my opinion. And lucky us, there was a reprint in 2012.)

Now for some theory, (source: Shibori resist dyeing techniques from Grethe Wellejus, out of print) the word Shibori is Japanese and means twist, turn, press, which are the basic principles in the ways in which these methods may be used to decorate a piece of material.
Having placed a piece of material in a folded or sewn pattern, it is pressed firmly togehter and dyed int he chosen dye and thus will receive most colour on the surface area.
The dye will penetrate in proportion to the type of dye, length of time, type of material and the pressure applied. Thus you obtain a variation in the shade. At the bottom of the folds, the pattern will stay undyed.
In this way parts of the materials have resisted the dye, - hence the name resist techniques. The various shades and the three-dimensional effect are the characteristics of these techniques.
And from another source Shibori.orghttp://shibori.org/traditions/techniques/:
The unique effects possible with nui shibori (stitch resist) are determined by the type of stitch, whether or not the cloth is folded, and the arrangement of the stitches: straight, curved, parallel, or area enclosing. After the stitching of a piece is completed, the cloth is drawn into tight gathers, along the stitched thread(s), and secured by knotting. It is then dyed. The cloth within the gathers is largely protected from the dye.
The simple running stitch is commonly used and sewn evenly in a constant forward movement. The only other type of stitch used in Japanese shiboriis an overcast stitch called makinui. This stitch is made over the edge of a fold of cloth, and stitching proceeds from right to left with a circular motion of the needle. The thread is not drawn up with each stitch, but the cloth is gathered on the needle. As the stitching continues, the gathered cloth is pushed back over the eye of the needle onto the thread.
This month, in four weeks, we will concentrate on the mentioned arrangement of stitches:

We made samples just to see the effect and hope you will find inspiration in these to try yourself!
Tomorrow some basic information!
Last year, I spend a whole month on '30 ways to fold your fabric' before dying. This month we (as I have a team of contributors with me!) will share our experiments of many ways to stitch your fabric before dyeing!
A great resource on theory is this website:
http://shibori.org/traditions/techniques/
(And by the way, the book they recommend is the best you can get on Shibori dying to my opinion. And lucky us, there was a reprint in 2012.)
Now for some theory, (source: Shibori resist dyeing techniques from Grethe Wellejus, out of print) the word Shibori is Japanese and means twist, turn, press, which are the basic principles in the ways in which these methods may be used to decorate a piece of material.
Having placed a piece of material in a folded or sewn pattern, it is pressed firmly togehter and dyed int he chosen dye and thus will receive most colour on the surface area.
The dye will penetrate in proportion to the type of dye, length of time, type of material and the pressure applied. Thus you obtain a variation in the shade. At the bottom of the folds, the pattern will stay undyed.
In this way parts of the materials have resisted the dye, - hence the name resist techniques. The various shades and the three-dimensional effect are the characteristics of these techniques.
And from another source Shibori.orghttp://shibori.org/traditions/techniques/:
The unique effects possible with nui shibori (stitch resist) are determined by the type of stitch, whether or not the cloth is folded, and the arrangement of the stitches: straight, curved, parallel, or area enclosing. After the stitching of a piece is completed, the cloth is drawn into tight gathers, along the stitched thread(s), and secured by knotting. It is then dyed. The cloth within the gathers is largely protected from the dye.
The simple running stitch is commonly used and sewn evenly in a constant forward movement. The only other type of stitch used in Japanese shiboriis an overcast stitch called makinui. This stitch is made over the edge of a fold of cloth, and stitching proceeds from right to left with a circular motion of the needle. The thread is not drawn up with each stitch, but the cloth is gathered on the needle. As the stitching continues, the gathered cloth is pushed back over the eye of the needle onto the thread.
This month, in four weeks, we will concentrate on the mentioned arrangement of stitches:
- straight
- curved
- parallel
- area enclosing
We made samples just to see the effect and hope you will find inspiration in these to try yourself!
Tomorrow some basic information!
Thursday, June 19, 2014
Sun Printing with SolarFast - Stamping & Shibori

I took some leaves and brushed on Black SF to the back of the leaves then placed them on top of my hand dyed (dry) fabric. I used my brayer to 'stamp' the leaves.
I removed the leaves and set the entire piece of fabric out in the sun (on my foam board).

I also just painted SF in spots and then laid some metal washes on top of the fabric.

I did not try just painting the fabric and then laying leaves on top as Lynda showed in her post(s) this month for sun printing. I would think you need to lay glass on the leaves or make sure the leaves were really flush with the fabric. That's pretty much the same technique for any sun prints. As you can see the metal washes showed up nicely but they are heavier than leaves and didn't blow away.
Same as before, make sure you bring your piece inside once you've removed your objects.
Now on to one of my favorite dyeing techniques! Shibori!! SF worked great on this technique and no mess or presoaking fabrics!!
 |
| This was a piece of Shibori I did last summer using Orange SF on white fabric (wrapped around a PVC pipe) And another small shibori piece using Red SF that I did this year (again wrapped on PVC pipe). 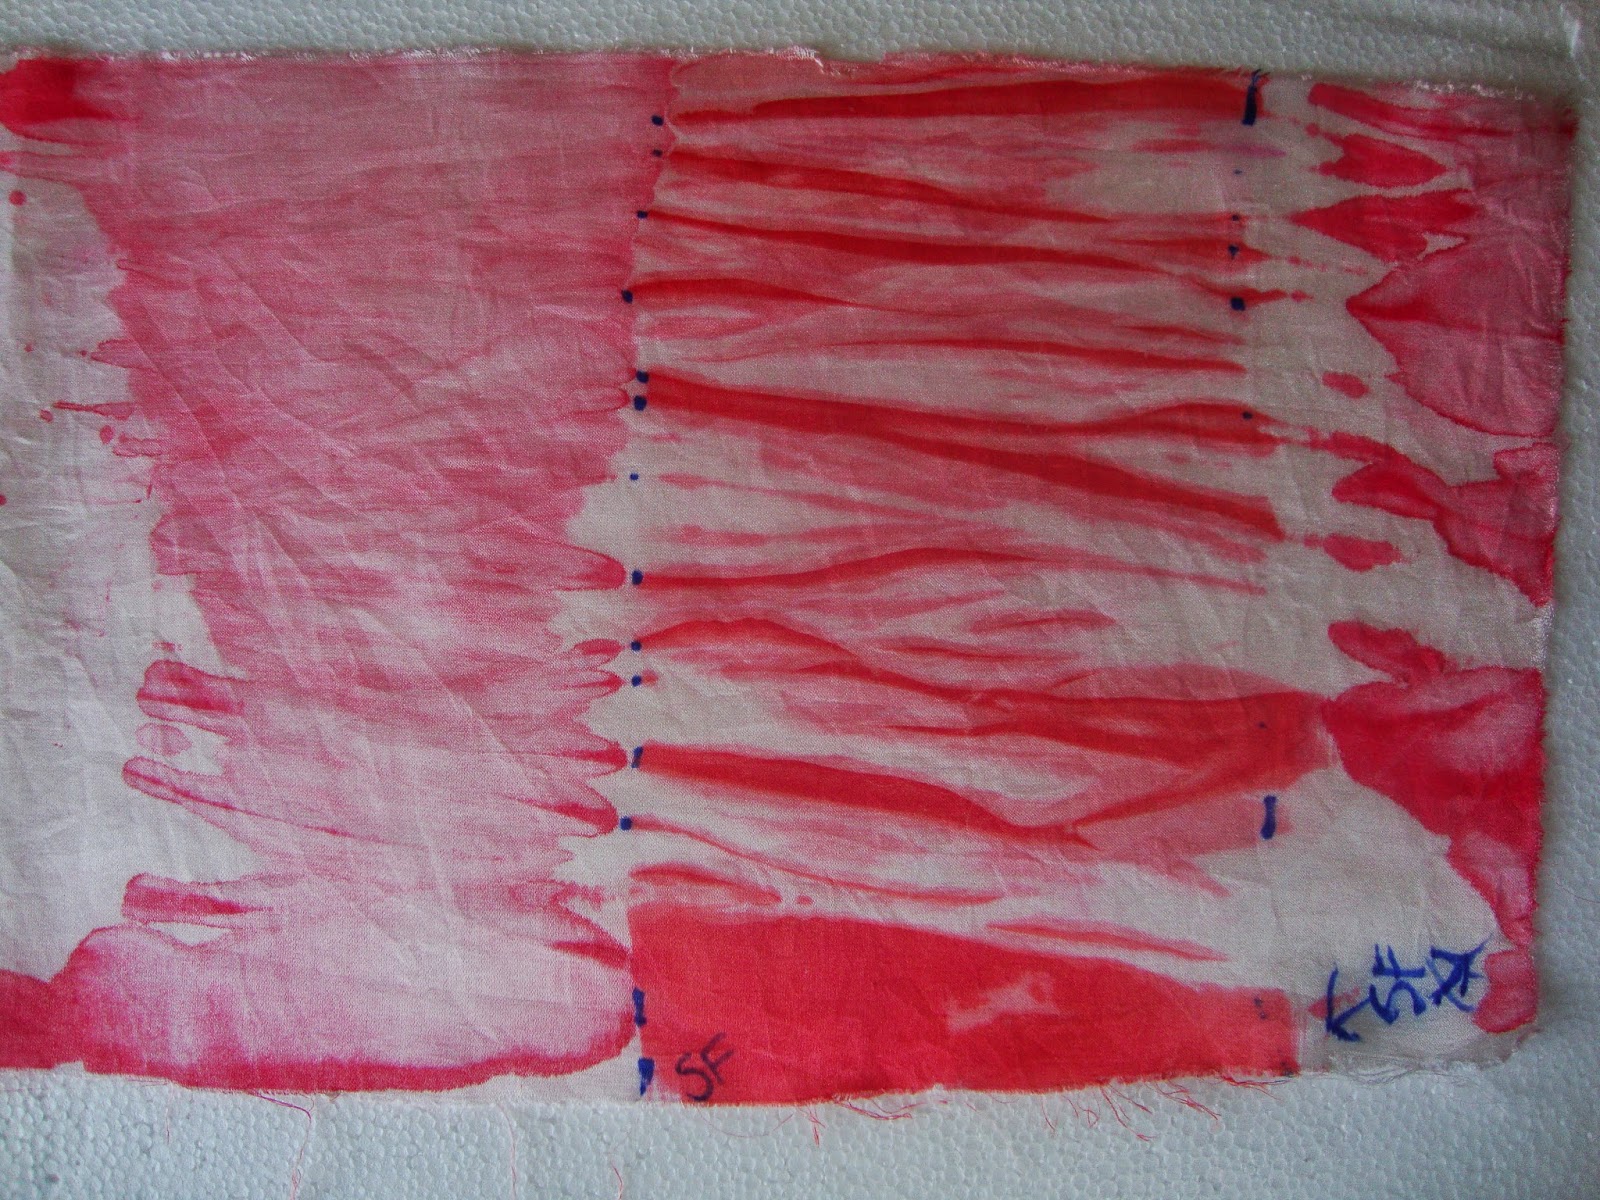 |

So for my next Shibori piece, I took a hand dyed fabric, which wasn't the most exciting fabric, and. wrapped it around a 3" PVC pipe. I used a cheap paint brush and then painted the entire piece using Black SF.
p.s. It was wrapped on the diagonal on the tube.
 |
| Shibori sunning! |

And my results! Not a bad piece!
 |
| For this piece, I painted the entire piece with Black SF, then wrapped it (diagonally) on the pole, then scrunched it. Because it was wet and this pole was quite small in diameter (1 1/2") I didn't need to wrap string around it. I did keep turning it as it was laying on my foam board and not standing up. |
 |
| This turned out pretty cool too! |
I think by painting the fabric first, the intensity of the sun printing was better?? Not really sure as both the last two pieces sat in the sun for the same amount of time. I'll probably experiment more with Shibori and SF just because it's not messy...quick to do and cleanup a snap. Washing out the dye is a snap compared to MX dyes too.
So I'm nearing the end of my posts...one more to go and I hope you stop by for that one! I'm going to show how you can use SolarFast on other substrates!!! Again, if you have any questions, please email me or check out Jacquard's web site.
Friday, April 25, 2014
Shibori and Dye Na Flow
Lynda here again. One of the techniques I wanted try in Cheryl Rezendes' Fabric Surface Design book was using Dye-Na-Flow with folding techniques or shibori. She called the chapter Fold and Color.
I've tried these techniques with Indigo dye, but never with Dye-Na-Flow. So here we go.
I folded the fabric the following three ways: flag, accordian, and jelly roll.
Below is the flag fold. After folding it and securing with rubber bands, I used pipettes to drop three different Dye-Na-Flow colors on the fabric. You can find directions for flag folding and the other folds on the web. Her book has illustrations for these and other folds.


Once I was happy with the colors I let the pieces sit for 24 hours or until they were dry.

Once dry, I opened them up and ironed them for three minutes on the back side of the fabric.
And here are my results.
My favorite of the three was the jelly roll. Using Dye-Na-Flow was easy. This would be a fun project for kids using bandanas or tshirts.
I must admit, my Indigo dye pieces were much more impressive. However, this was easy and fast. I will redo this project again with different colors. These came out a bit brighter than I would have liked them.
Dye-Na-Flow is a great product to quickly add background color to fabric. I also love using it with sun printing. Be sure and stop back by in June when we'll spend the whole month blogging about different ways to sun print.
Do you use Dye-Na-Flow? I'd love to hear your favorite ways to play with it.
I've tried these techniques with Indigo dye, but never with Dye-Na-Flow. So here we go.
I folded the fabric the following three ways: flag, accordian, and jelly roll.
Below is the flag fold. After folding it and securing with rubber bands, I used pipettes to drop three different Dye-Na-Flow colors on the fabric. You can find directions for flag folding and the other folds on the web. Her book has illustrations for these and other folds.
Once I was happy with the colors I let the pieces sit for 24 hours or until they were dry.
Once dry, I opened them up and ironed them for three minutes on the back side of the fabric.
And here are my results.
 | |
| Flag Fold |
 | ||||
| Accordion Fold |
 | ||
| Jelly Roll Fold |
I must admit, my Indigo dye pieces were much more impressive. However, this was easy and fast. I will redo this project again with different colors. These came out a bit brighter than I would have liked them.
Dye-Na-Flow is a great product to quickly add background color to fabric. I also love using it with sun printing. Be sure and stop back by in June when we'll spend the whole month blogging about different ways to sun print.
Do you use Dye-Na-Flow? I'd love to hear your favorite ways to play with it.
Wednesday, July 24, 2013
No Strings Attached Shibori - Part Deux

As I mentioned in my previous post, I planned an over-dye session, so I wasn't really concerned when three turned out kind of boring.

This becomes much more interesting after a second trip through.


The patterning is so much better after the over-dyeing.
These were half yard cuts of my usual mercerized cotton fabric. I mixed up a half cup of dye for each with about a teaspoon or less of dye powder. I soaked the fabric in soda and wrung it dry in my washer before I wrapped the poles. The fabric was still slightly damp when I added the dye -- I've found that this works better with damp rather than dry fabric -- the dye seems to spread more easily.
 I laid the pipe with scrunched fabric on a plastic surface (the lid to a large plastic tub) and slowly poured the dye over the fabric. I rolled the fabric in the dye that pooled on the surface and rubbed with my gloved hands to make sure that the dye was fairly evenly distributed.
I would have gotten much different results had I dipped the pipes or used stronger dye solutions -- something to try on a different day. And another trip through the land of wrapping and dyeing for these guys is not out of the question.
Sunday, July 21, 2013
Karen - No Strings Attached Shibori - Part 1
 I'm sure someone else has already thought of this -- but it's a new idea for me.
Usually when I do shibori, I wrap the soda-soaked fabric around the PVC pole, wrap string around it, sometimes a rubber band at each end, scrunch it down, dip in or drizzle over with dye, batch, remove rubber bands, untie string, unwind string, unwrap fabric, rinse, wash, iron, and enjoy. Phew. I'm tired just writing about it.
But there has to be an easier way. Right? Since most of the work is in the prep, what if a couple of the steps were eliminated? Like the string. It's a hassle. And, I've discovered, not really necessary.


I like this one just the way it is. I used one of the smaller diameter poles for this.
The one wrapped around the largest diameter pose was not that interesting -- a perfect candidate for over-dyeing.
Next: The over-dye results
Subscribe to:
Posts (Atom)