A TECHNIQUE DRIVEN Blog dedicated to mastery of surface design techniques. First we dye, overdye, paint, stitch, resist, tie, fold, silk screen, stamp, thermofax, batik, bejewel, stretch, shrink, sprinkle, Smooch, fuse, slice, dice, AND then we set it on fire using a variety of heat tools.

Thursday, July 31, 2014

Round Robin Solo Style - A discussion on techniques


I still have some time left this month, and thought I would re-visit the technique list I posted at the beginning of the month… checking to see what I have used, and what didn’t get into the mix:
Fabric Dyeing
Batik
Stamping
Screen Printing
Monoprinting
Stenciling
Foiling
Discharge dyeing
Breakdown printing
Clamp-dyeing
Masking
Spray dyeing

So, after a review I highlighted the techniques I used in my round robin… that leaves a lot of unused techniques I didn’t touch on!  I know that Beth is scheduled to have an in-depth section on Breakdown (or deconstructed) printing later this year, so I think I will defer to her on that.  I have some examples in my collection using some of the other techniques, so I thought I would post pictures of them here, and give a brief discussion of how I used the techniques.
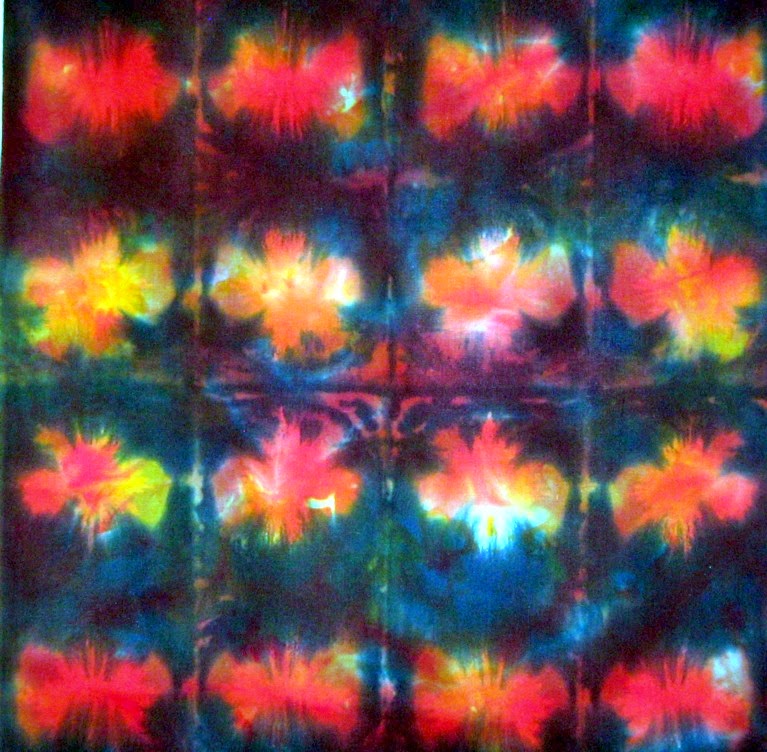
The fabric above was first dyed with the colors (yellows, oranges, reds).  Then I accordion folded, covered with several can lids, and clamped together.  Then I applied black dye to the exposed areas.  If I tried this 100 times more, I would never be able to replicate the pattern!  I call this “Butterflies to Hibiscus”, because it looked like the butterflies (see top row) morphed into Hibiscus flowers.  I made this into a whole cloth quilt.
This was a piece of fabric dyed similarly to the first piece above, but I used DVD’s and clamps instead of can lids. The shapes were all interesting, and I ended up creating several wall pieces with various embellishments.  In this case, I used foil glue and foil to enhance the design.  I call this “Sun and Moon”.
This is my very first art quilt!  I had fabric I created in a class I took from Melanie Testa, and she challenged us to cut into some of the fabrics we created and make something of it… very scary!  In this piece, the swirls you see were discharged using dishwashing gel with bleach and a foam stamp.  I embellished them with beading.  I also used a bleach water solution to spray over some of the fabric before I cut into it, using sequins laid on the fabric to resist the discharging.  You can see a couple of the dots where the sequins were at the top of the blue pear shape, just below the upper ‘arm’.  That fabric was a deep blue before I sprayed it!
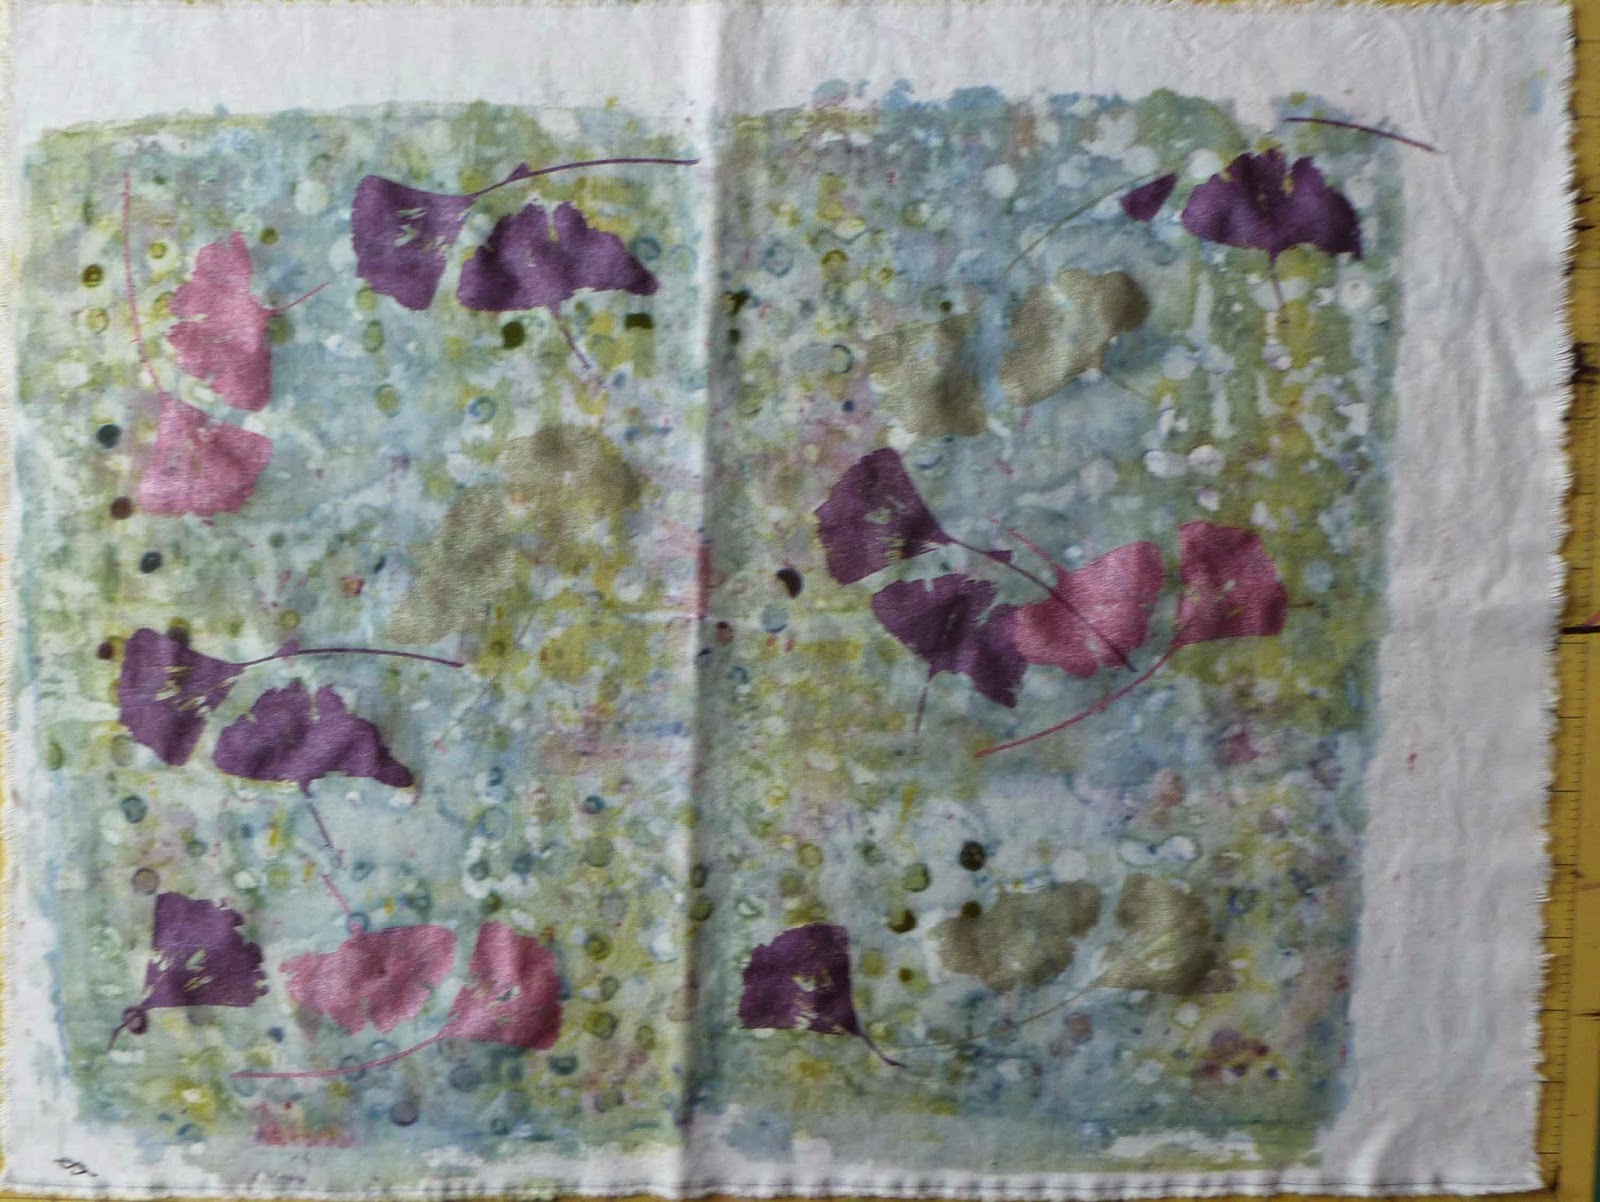
This isn’t a finished project, but it is an example of spray dyeing.  I had a piece of light green dyed fabric, and put a couple of sprigs of leaves on it, then sprayed with a blue dye.  Worth revisiting!
This may be my only example of using stencils!  I used Dye-Na-Flow and stencils to create this, using Jacquard’s instructions from their website.  The project took forever, and I doubt if I would repeat it… but using stencils is something I hope to get into more as time permits… would love to see examples of stencil use by others!

I will leave you with a challenge:  If you haven’t tried many of the techniques discussed here this month, I hope you will try some and let us know how they come out!  And if you have used some of the techniques we haven’t talked about in this series, we would love to hear about them!  Thanks for stopping by, and happy creating!

Wednesday, July 30, 2014

Round Robin Solo Style - Epilog from Judy


As promised, I spent some time studying my fabric after round 5.  The first thing I decided was that some of my colors were not as bright as I had hoped for, and I decided to use some Dye-Na-Flow to over paint the areas.  I have not used Dye-Na-Flow much, but have seen how well it works for some other fiber artists, so I dug out my yellow, orange and pink.  Here is how it looked afterward:

I was very pleased with the increased brightness, and glad I decided to give it a try!  At this point, I still wasn’t sure how I would use the fabric, so I studied it awhile longer.  Finally, I decided I didn’t want to cut it up… it was a good candidate for a whole-cloth art quilt.  I rummaged around and found I had enough batting, and a large piece of black hand dyed muslin for the backing.  So with not too much else in mind, I set about to start free-motion quilting.  The first area I stitched was the section just above the middle where the yellow stripe has black on either side (remember how the dye migrated after I painted it over the batik?).  I just followed the zigzag design across.

Then I went to the section just below and followed the black stripes the same way.  Next, I outlined the organic shapes made by using a lotus pod to apply wax.  So far, I had been using black thread (which, by the way, drove me crazy because the thread was slubby and kept breaking!).

When I finished those three sections, I studied the piece a little.  The batik swirls had not come out too clear, and I thought maybe using contrasting embroidery floss to hand stitch the design might be fun:

L-R: Running stitch, Couched floss, and a straight stitch across the swirls using some hand dyed variegated floss.
Next, I studied the screen printing I did towards the bottom.  I decided using free-motion to follow the lines would be best – I really didn’t want to interfere with the screen design:
Above, the section on the right has been stitched.  I did a little creative fill-in in some areas where the screen stopped, and will probably do something similar to join the sections where one print ended and the next began.
I’m not totally sure yet what will be done to the rest, but wanted you to get an idea of how I am using the fabric  I hope you have enjoyed watching this piece come together so far, and I also hope you have been inspired to get out the dyes, paints, wax and whatever else you have waiting to be put to use!

Tomorrow I will be discussing some of the techniques I didn’t use for this piece that were mentioned in my first post.  I have some examples to show you  where I have used some, and a challenge for you as well! 

Monday, July 28, 2014

SHISHA EMBROIDERY OR MIRROR WORK USING CHAIN STITCH (EASY METHOD)

What am I going to do with all this fabric????

The first thing I had to do after a WEEK in the chaos of paints, dyes, thermofax screens and stamps was CLEAN UP!! I can't stand chaos and it was only the excitement of creating those 5 pieces that saw me though the mess!! But now...


About five or six years ago I "painted my first piece of fabric. I used lots of techniques similar to the past self round robin that I just finished. I used some of the painted fabric to cover a small (4 X 6") lined notebook that I carried in my purse. It got so much abuse in my purse that the beaded edge came of in a small area. In addition to the surface design techniques I used on it, I also attached a small Shisha mirror. The embroidery technique was very complicated and I could never remember how it worked. I found a fabulous and EASY method for attaching shisha mirrors.


Here is my little book


You'll recognize some of these stamps. You can see the reflection of my finger in the mirror.


I also made a pencil case which I have put on my blog at least once or twice. I love it and the little fabric beads with glass beads on them!!


Next is a short story. When I was a kid, my grandmother used to buy me the "Doll of the Year" every birthday/christmas - within a week of each other. So this one year I wanted a doll called Poor Pitiful Pearl. She came with a dark dress, black socks and shoes and a babushka.


She was SAD


She also came with a pretty white party dress, white shoe and socks and YOU could save poor pitiful Pearl and bring her joy!! I loved that doll but my mother hated it and threw it away. As an adult, I bought another one.


Pearl and me!


So and this is where the story is taking us, I bought two of the ugliest to-go coffee cups that were the best at keeping coffee hot and NOT SPILLING even if turned upside down EVER.  Solution: I made pretty dresses for my poor pitiful coffee cups.


 Over the course of time the binding which I made with used color catchers wore out. This material which is like a spun polyester was made to absorb dye during a wash load NOT last for years with daily use.


Opened up and waiting for new bindings


These two will get new bindings and return to active duty, dressing up my pathetic coffee cup!


This one still looks OK. The fabric was a clean-up rag. Always the best looking fabric (sigh)


Now I have loads of new fabrics to make new dresses from. I will wait until after the giveaway to make the new frocks. But just to give you a few ideas about what you can do with this fabric:

  1. coffee cup dress
  2. book cover
  3. small purse - I'm making one tomorrow
  4. make-up bag
  5. pin cushion
and I'll leave you to your own imagination!!

Friday, July 25, 2014

What can I do with this?


When I was going through my fabric stash looking for likely victims candidates for the self round robin, I came along this old piece which was a "failed" deconstructed silk screen on linen. The fabric was so scrumptious and the pale colors so appealing That I had hung on to it thinking there might be a place for it in my life one day. 

I badly needed a new purse and if I folded this is half it was just about the perfect size. Hum...let me see. There were bits of these colors.  


So I decided to thermofax screen some ginkgo leaves in all three colors.


This is an old thermofax screen I had made by Lyric Kinard 


Now I need a lining fabric. I think mint green is one of the ugliest colors ever created!! BUT, I needed a light colored fabric so my old eyes could actually see inside the purse, plus I had it in my stash so....


Fabric trimmed square, horrible green about to be trimmed to size and a binding color needed to be chosen. Second from top I think!


Yes


Heavy quilting done. This is just so relaxing to do.


Quilting on lining side.


I stitched it up with my new Baby Lock Eclipse which I bought myself for living through chemo and radiation. It threads itself by vacuuming the thread through the lower loopers. Be still my heart!!

I made the box seam on the bottom then...


Cut, ironed, folded, and ironed in half both the binding and the handle fabric


I cut a half inch wide strip of warm and nature cotton batting for inside the handle for heft, strength, and a dense surface for stitching.


 Binding was attached with the cut edge (top) of the purse like binding on a quilt. I started the binding with about 4" unattached so that at the end I could get a perfect fit. You can see the seam in the center top edge of the picture.

After ironing the seam open, I stitched it down with a double row of stitching.


Now the handles could be attached.


I also tacked the "corners" of the box shape to keep the purse square and not so floppy.


Done


 I was out of magnetic snaps so I just ordered them from ebay. I usually use the poke through kind. I have various ways of hiding the metal plate on the outside but


This time I also ordered some sew in kind. First I will use some E6000 fabric adhesive then stitch them down as well.


Snaps in with stitch and E6000