

Now that you have your puffs in place, see why I wanted you to iron the fabric first? Yeah, the fabric is no longer laying flat is it? Good! Great beginning. If yours is still pretty flat, you might want to put in a few more puffs.
Now Let's talk design here for a few minutes. Think about visual interest as you prepare to scrunch.
1. How much of the visual interest in your piece do you want to be from the scrunching? You may want a lot of all over scrunching or a little. A little scrunching is going to produce a larger finished piece. More scrunching is going to produce a smaller piece.
2. Do you want this piece to have a a flow or movement? So maybe the folds are going to all kinda go in one direction or another. Or swirl or form boxes or whatever.
3. Do you want pockets of more and less scrunching for interest or do you want a more evenly scrunched background to show off other textural elements?
Don't get in a tizzy over the questions and your answers. There is no right or wrong. No texture police are going to come and take away your iron. It is just that you CAN get different affects and you might think about what you would like to try. There is also something to be said regarding working in a series so you can focus most of the visual interest on one technique or the other in different pieces rather than throwing the kitchen sink into every piece.

Detail shot

Next step for me was to cut the batting. Now to be honest, you could cut the batting first, place the fabric on the batting, do all the scrunching of the fabric (not the batting) while it is sitting on the batting, then do all the ironing of the fabric and batting together. Me, remember how I hate to waste? I don't like cutting the batting till after the scrunching and I know the size I am working with. Cut your batting with a wide enough border showing that you can free-motion stitch all the way to the edge of the fabric.
A second word about the batting. I used polyester, in fact, a double layer of polyester thinking it might give a bit more depth to the piece. Not so much. I would rather have used a cotton or wool or felt that was more flat and stable. I would absolutely avoid any of the bamboo mixes that are so soft and drapable and good feeling. Not what you need here! Remember, the texture is coming from the puffs, the scrunching, the cording, and the stitching. You need the batting to give you a firm platform to work on.
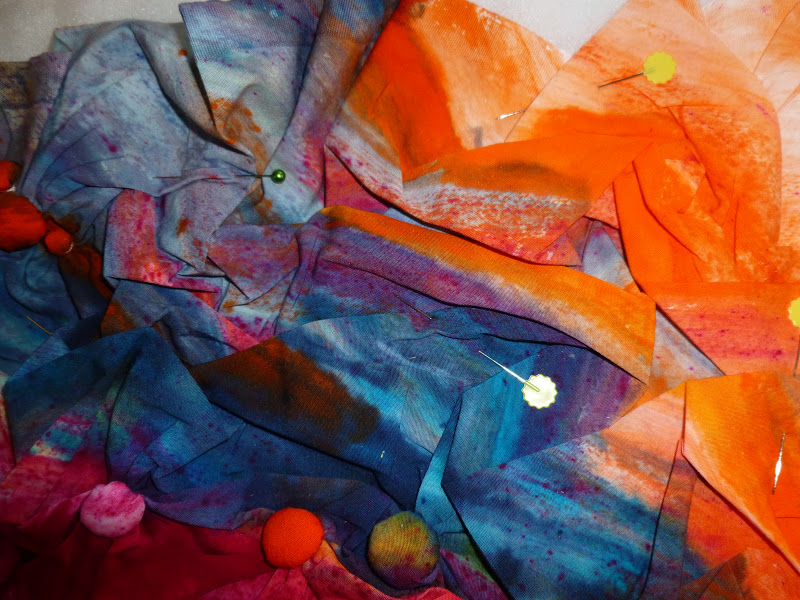
Now that you have the scrunched fabric and the batting together, you need to do some pinning to keep the scrunches from expanding as you sew them. Again, this is not like making pleats that are going to be evenly distributed. The purpose of the pinning is just to keep the texture in place while you sew it. Pin randomly on the fabric and with the pins in random directions.


Now that you have selected the amount of scrunching and pinning, and the free-motion foot to use, it is time to choose the pattern for stitching. Again, you may want to spend some time thinking about design. Do you want the design you stitch to be a big visual element or merely to hold the scrunched fabric down and let the texture of the scrunching shine? Once again, let me assure you there are no right or wrong answers here. And you can start stitching without thinking about design if you want. Just be aware that you have choices here and you can think about what you want to produce. I used one stitching pattern throughout the piece because I didn't want a lot of attention to the stitching itself. That strategy would have been more effective if I had use a more meandering type of pattern than the identifiable pattern I used. I'll remember that next time.

The color of thread you use will be related to how much your want the stitching to add to your visual texture. You can tell in my piece that I chose to use a variegated blue thread. I did that for a couple of reasons. I chose a variegated thread because I was willing to let the variation in the color do some of the texture work for me. Second, there were lots of colors in this fabric making it kinda feel chaotic for me so I went with a blue thread to compliment the orange in the fabric and calm down the multi-color to more of a complimentary color scheme. I think the blue did a good job of that.

Here is a question I asked when I took the workshop: should the stitching echo the folds or go over the folds in the fabric? The answer is whatever you want. Do a little of both and see which affect you like.
Okay, ladies (and men if you are out there) you can now free-motion stitch your scrunched fabric to your batting. No backing yet! BUT only stitch half or less of your fabric piece so that you will have room to add cording tomorrow! Just to be clear, leave at least half of your fabric unsewn so that you can add cording. Okay?
See you tomorrow.
This just looks like SO much fun.
ReplyDeleteI am absolutely loving this. Can't wait to see the next step!!
ReplyDeleteI am loving this. Texture is my thing and your fabric is fabulous for this. Isn't it funny how some of the best fabric we make was serendipitous? Like the clean up cloth I used as backgrounds for the crows! Great tutorial Judith.
ReplyDelete