
This is a process that creates a very interesting background texture and, again, is very simple to do. I use Mistyfuse exclusively for my fusible webbing. If you don't know Mistyfuse, it is a lightweight fusible webbing that comes without backing paper. If you use a different variety then you will have to try it out and see how it works. Perhaps a note in the comments if you have success with different fusible.
This is what Mistyfuse looks like.


You are going to need a piece of interfacing cut to size for the bottom of your screen, with a margin for taping, and up to 6 pieces of fusible webbing cut to the same size as your interfacing.
Put the interfacing onto a piece of baking parchment, place one piece of fusible web on top of the interfacing and another piece of baking parchment on top. Iron with a hot dry iron, making sure that the whole piece is fused. Allow the piece to cool slightly before removing the baking parchment. Don't be tempted to do without the bottom layer of baking parchment. The interfacing will allow some of the fusible to go through onto your ironing board.


Repeat the process again, adding the second piece of fusible on top of the first. Repeat again with a third piece of fusible. You will need at least 3 pieces of fusible and can use up to 6. Fusing one piece at a time ensures a really good bond, rather than just laying all the pieces of fusible on at once. The effect when printing will be different according to how many you use. I'm going to show the different effects that you get with 3, 5 and 6 layers of fusible.
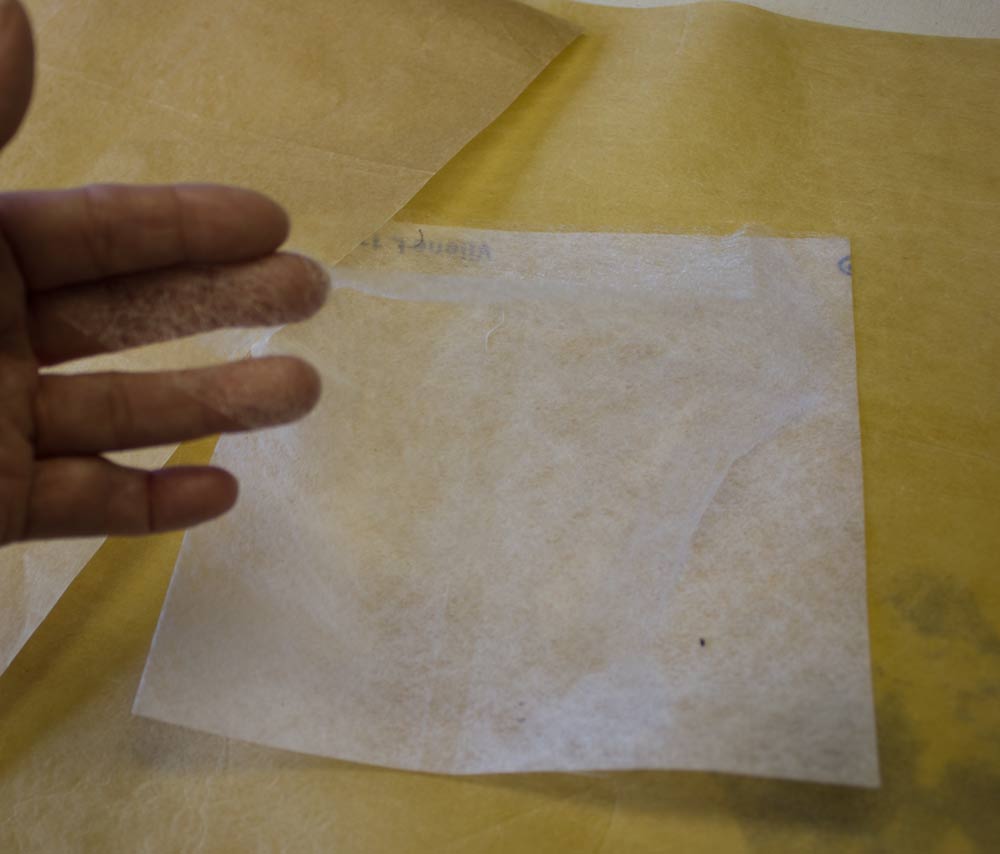
When you have your piece ready paint the edges with either wax or acrylic paint to both soften the edges and also to give them more body. I actually added some soy wax after I had taped my piece to the bottom of my screen and then forgot to take a photo of it! This is the interfacing taped to the bottom of the screen, before I added the wax. I taped it with the fusible next to the screen.


Place your screen onto your fabric and choose your first colour. I prefer to start to work from the centre and then print randomly for this technique.

For the first and second pieces I used the interfacing with 3 layers of fusible. The first is on a silk cotton mix and the second on silk noil. For the first piece I began with Royal blue and then changed to Golden Yellow. As you can see, it gives quite a heavy coverage.

With the silk noil I continued to use the Golden Yellow and then switched back to the Royal Blue. Still quite heavy coverage but the texture of the silk noil creates a softer look.

I repeated the above with 6 layers of fusible attached. The coverage is much more dappled.

Silk/cotton mix

Close up

Silk noil

Close up
I actually did the 5 layered screen first, before I decided to compare the results of the layers. I used charcoal and chestnut brown, firstly on a previously dyed piece of heavy silk habotai. As this was my first attempt I did get a bit heavy handed and so lost some of the texture.

I then used the same colours on a piece of undyed cotton, again a bit heavy handed in places.

Because I was disappointed with these two pieces I decided to see what selected areas looked like. By using a piece of mount board as a frame I was pleased to see that smaller areas turned out to be very interesting. They definitely have potential.

This technique has so much potential for creating interesting backgrounds and, like the other interfacing screen techniques that I have covered, just peel off the screen at the end of the printing and wash it out, in cold water, so that it's ready for another day. I can't say how long these particular screens will last for as it is the first time that I have used this technique having discovered it in Screen Printing by Leslie Morgan and Claire Benn. It is an excellent book that I can recommend.
This is awesome! And I had some new packets of Misty Fuse for my birthday!
ReplyDeleteThis is something I can see working for the type of things I do.
Actually, I LOVE the piece you decided to do small frames of sections.
Sandy in the UK
Fascinating technique! A must try...just need to find the time now...but I will.
ReplyDeleteThis is a very inspiring technique Maggi. Thanks for showing it here. You've got some lovely effects that can be taken further. I shall have to give it a go.
ReplyDelete