
This month I will explain more about printing with aluminium foil, tinfoil,( die-stamp printing) and screen-printing with a quilt ring and glue.
Material:
A piece of hard cardboard
Dried leafs and flowers or material that will give a good relief
Glue
Aluminium foil (the heaviest you can find)
paint ( textile paint, block print paint)


Make a composition on the cardboard and attach it with glue.
Let dry COMPLETLY
Apply glue on the entire surface. Attach the foil to the composition. Make sure the composition is tightly encapsulated with the foil. Therefore press with your finger the foil in every surface. The back of the cardboard also needs to be covered with the foil.

Again let it dry completely
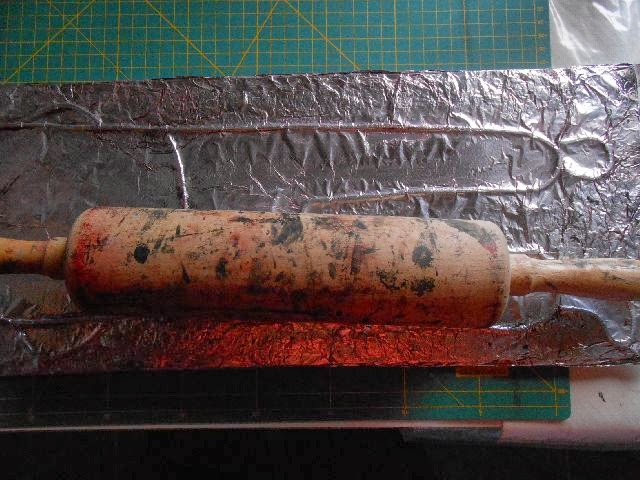
Press everything hard with a glass bottle ore a
rolling pin


Since your plate is completely covered with
foil it is possible to change colours. Wipe the plate clean with water, let dry
and it is ready to be used again. Once you are familiar with the technique it
is easy to adjust size and subject. The plates will go a long way.
Send photo’s of your work and I can let them
seen on the blog. Next week another way to print with foil.

I am excited this is your month. I have been looking forward to this technique all year!! Just in time to collect plants too before winter!.
ReplyDeleteI think I know what I did wrong last time. Will try this again.
ReplyDeleteAnn, what a great project! I think I have all the materials already, so I'm hoping to give this a try very soon. Thanks for the instructions!
ReplyDeleteIs there an advantage to using foil rather than something like Press and Seal? Texture? Longer lasting?
ReplyDeleteThis has lo many possibilities! Thanks for the tutorial. I can't wait to give it a try.
ReplyDeleteYum!
ReplyDeleteKathy,
ReplyDeleteThis is a method I learned from printers. With the foil you can adjust the texture the way you like it. I don't know press and seal but if it is something that will give you the same result I think it is fine.
Oh my gosh!!! This is fantastic!!! My studio is packed up right now and it is driving me bonkers. Thanks for a fantastic tutorial!
ReplyDeleteschitterend ann. Ga het zeker eens proberen.
ReplyDeleteAnn, I was just reviewing this post so I can give the technique a try, and I'm not sure about how to do the actual print on the fabric. Do you lay the fabric over the foil piece after you have applied the paint, then use a brayer of some sort to press the fabric and make the print? I see an old rolling pin in your photo, but wasn't sure if you used that for the print, or to flatten the foil around your objects.
ReplyDeleteI used the rolling pin to flatten the foil but also for printing.I put down the fabric, than the print with the design face down. the rolling pin is very efficient because I can usse my strengt to press the print on the fabric.
ReplyDelete