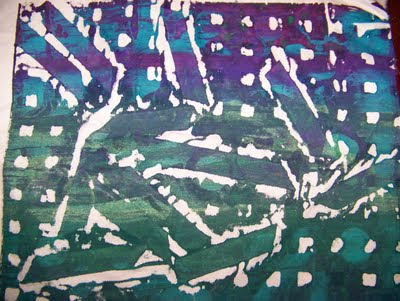
Here is the process that we started with. First we had a padded surface which we covered with plastic. I added another layer of cloth just to act as a drop cloth. Next we put down the low relief items we wanted to print THEN we put the cloth we wanted to screen OVER them. Last comes the screen laid directly on the fabric( over the stuff, over the drop cloth, over the plastic, over the padded surface.) Got that? Then you screen the fabric paint pressing hard with your squeegee. Here are my results.
Hard to see but this among the printed wrinkles of the drop cloth but this is a vine. See the vine coming from the right edge of the picture? It is the pink line with the white edges.
This one is wrinkles from the drop cloth, some yarn circled up in the top right corner, and the circles are my Vitamin D gummy drops. They printed well.
This one is a print of the wrinkled drop cloth and pieces of flat belting material. This is the first one I kinda like.
These last two are prints of the belting material on top of a plastic drain mat for the sink. I have had that mat for some time but this is the first time I have used it. I knew it would print great. The little circles are the bottom print are a carry over from the Vitamin D gummy drops.
At this point we stopped because we were not getting the prints we expected. I went back and re-read the directions and decided we were missing a stage. I tried again the next day and here are the results.
This one is the direct print. I made it just as you would expect--padded surface, plastic, cloth I want to print on, a couple of ferns, the screen, and then paint squeegeed on.

This one is the shadow print. This time I placed the screen from the direct print onto a new piece of fabric. There was still paint on the screen. There was nothing between the screen and the new piece of fabric. I squeegeed the screen with a clear textile medium and the paint left on the screen where the fern was printed on the fabric. You can see it best on the top left. It would have shown up better if I had been careful about the wrinkles and had used a darker color on the direct print. This is like the image we saw posted on the link.
This one is the reverse print where I put the ferns down on the fabric and pressed them just to get the paint off of them. That gives me three prints.
Now here is what I learned. Both those techniques are interesting. The first technique is really easy. I might try that again. The second technique which is really the low relief screen printing method (I think) is very nice but is a lot of work. The direct print requires a dark paint. The shadow print requires you to remove any extra paint from the well of the screen so that you can screen with the clear textile medium. And you need to do it quickly so the thin layer of paint on the screen does not dry on your screen and ruin it. THEN you need remove the clean medium so that won't dilute the paint for your next direct print. I think I can get the same results from a monoprint without having to worry about ruining my screen or having to keep cleaning it.
My two cents. I would love to hear if you have tried the technique


I actually like the results you got in the first pictures! I'm assuming you are using fabric paint, not thickened dyes? The cleanup issue would go away (having to clean up quickly before the medium dries) if you use thickened dyes, and you would get good results that way as well. I may have to give this one a try!
ReplyDeleteYep, I like the first results too.
ReplyDeleteYes, I do think using thickened dyes would relieve my anxiety over paint drying in my screen but you would still need to remove the extra dye in the well so you could squeegee with a clear print paste and then clean out the well again so you could squeegee with the thickened dye. If you don't do this then the dye overwhelms the shadow print and the clear paste mixes with the dye causing a lighter direct print which does not shadow print as strongly. That is still a hassle even with the time constraint removed.
Don't get me wrong--I like the results. But I still think it would be easier to get the same results in a monoprint--perhaps from gelatin.
Great to see your results.
ReplyDeleteThere are more steps involved but you are on the way there !
Looking forward to seeing more of your print versions.