I like foliage prints and do them often. This time I
plucked some leaves off Beth's lupines (sorry Beth) and used them to act
as a mask for the thickened dye spread on a 12" square acrylic plate. I
printed the direct, indirect, and ghost prints. Here are process pictures.
And here is the finished fabric (washed, dried, and ironed) and some detail shots. The material is a cotton/bamboo blend and a yard in length.
A TECHNIQUE DRIVEN Blog dedicated to mastery of surface design techniques. First we dye, overdye, paint, stitch, resist, tie, fold, silk screen, stamp, thermofax, batik, bejewel, stretch, shrink, sprinkle, Smooch, fuse, slice, dice, AND then we set it on fire using a variety of heat tools.
Tuesday, May 29, 2012
Monday, May 28, 2012
Playing with Stencils

IN the scrapbooking section of the local Joann's store, there are these laser-cut papers that looked like they would make cool stencils. So I bought a few on sale and tried to figure out how to use them. They're made of heavy paper, but I wanted to use them to stencil dye on fabric.
Well, Mr S came to the rescue. In his own personal stash he had some stuff that he uses to coat the handles of tools with rubber so that they have non-slip grips. Why not try it?
So after a test on some notebook paper, I sprayed it on my laser-cut paper and it worked! It made my paper stencil usable with wet media.
Alternatively, I suppose I could have just used paint, but this was too cool to pass up. Mr. S claims it comes in different colors, so I could have had something in other than basic black.
I had these boring hand-dyes, so I stenciled on some thickened dyes. But the dye wasn't strong enough (it's been in my fridge for a while) and it's better, but still pretty boring.
I was too impatient to do more dyes. So I got out my Setacolor paints and rolled on some fuchsia and purple.
And voila! Much more interesting.
I had these boring bits from my deconstructed screen printing experiments. So I made up a plate with cardboard and hot glue and used these colored pencil sticks to rub the design onto the fabric.
I really liked the circular feel of Nienke's Rosarium (here) And I tried to get the feel of it without copying her work. --Still pretty boring.
So I took a cue from her and stenciled on flowers and leaves and sprayed them with water. I'm not crazy about mine. Maybe it needs some gold? I think that the paint colors fight with the background color. And the circular thing just isn't happening at all.
But for this side, I used a mixture of golden yellow and purple paint and just rolled it on over a stencil of leaves and I love this one. The colors are much better together and I could see using this whole or cutting it up.
More Sloppy Monoprinting
I recently bought Claire Benn and Leslie Morgan's new (I think)
"Making Your Mark" book with DVD. Judith and I only made it 3/4 of the
way though the DVD before we launched out of our chairs and started to
sloppy monoprint and use other mark making techniques we'd just seen. I
have to admit, the sloppy monoprinting really appealed to me. Here I am
having a go at it.
Sloping out the print paste
Really getting into it
This was the "before". I had "deconstructed" a screen (boring) so this made a great candidate.
Brings new meaning to swiping a credit card.
Weeeeeeeeeeeee!!!
In case I forget my name (smile)
Wet plastic sheeting
Voila!
This is the effect of the bubbles (yum)
applying print paste to a 6"square Plexiglas square with a handle on it.
Press!
Boring
Lets obscure the squares with some sloppy monoprinting.
That's better
washed and ironed
I used this roller I made at Wen Redmonds painting class with print paste on this small piece
washed out and ironed
I did this scraping with a credit card.
The ever popular clean-up rags
Saturday, May 26, 2012
Sloppy Monoprints
Beth and I got together on Friday and played with thickened dye. Since it is "Monoprint Month" I suggested we make some more monoprints and Beth had the perfect technique lovingly called sloppy monoprinting.
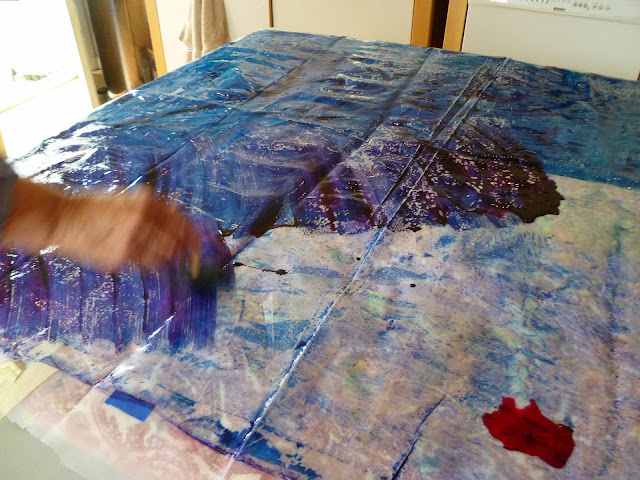
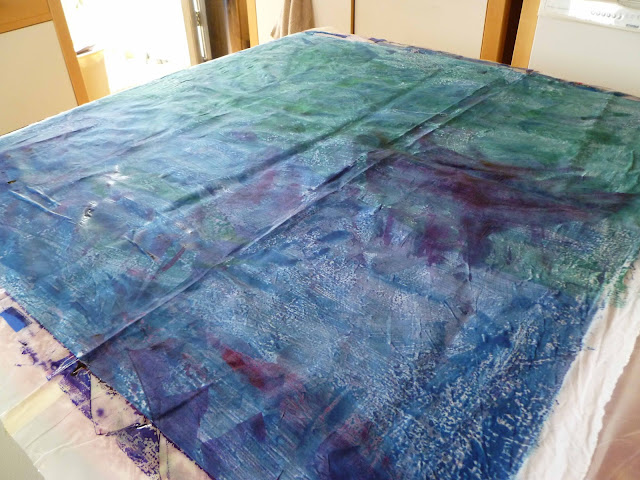
First we covered up Beth's print table with a large sheet of plastic. Second we marked the plastic with tape to indicate the measurements of our fabric. Then came the sloppy fun; we spread thickened dye on the plastic. Now if it had been paint, it would have laid nicely and behaved but because it was thickened dye it bubbled on the plastic making wonderful bubbly patterns.
We laid the fabric on the dye, rubbed with our hands and with a credit card, then peeled off the fabric and draped it over the railing on Beth's porch. One layer done.
We repeated the steps till we liked the results. Then we batched the fabric. Here are my first attempts at this technique (washed, dried, and ironed) and some detail shots. I used cotton/bamboo fabric and both were 1 yard pieces.
This technique makes a great first layer for a whole cloth masterpiece or some wonderful material for cutting up and using in a pieced quilt.
Subscribe to:
Comments (Atom)


