A TECHNIQUE DRIVEN Blog dedicated to mastery of surface design techniques. First we dye, overdye, paint, stitch, resist, tie, fold, silk screen, stamp, thermofax, batik, bejewel, stretch, shrink, sprinkle, Smooch, fuse, slice, dice, AND then we set it on fire using a variety of heat tools.

Wednesday, July 13, 2016

Lutradur Part 2

I painted some Lutradur using Jacquard paints with Liquitex Iridescent Medium added for some sheen:


And layered the Lutradur with organza, then stitched some leaf shapes using Free Motion stitching:


And cut out using the stencil tool (forgot to mention that you need to use cotton threads for this, because rayon or poly threads will melt!):


Finished leaves ready for my quilt:


Some other ones I made last fall using a dead leaf as my template, and some orange organza on top of  lutradur:


See you tomorrow for my last post of the month!


Monday, July 11, 2016

Working with Lutradur Part 1

I have to admit to being fascinated with "hot" textiles, and the works of people like Kim Thittichai.  So I got her book at the library in the hopes of learning a little more about them..and since she is based in the UK, it's almost like learning a foreign language when trying to interpret the supplies used, it seems that just about everything is called something different here in the US.


She uses a lot of Tyvek, so I got some old envelopes out and painted them with acrylic paints.

I also want to share a tip: If you want iridescent paint and only have regular acrylics or fabric paints, add some Iridescent Medium to your paint (available in craft stores.)

I melted the tyvek with a heat gun, which was too quick, and a huge hole appeared.

I just cut some circles out of the finished product, but haven't used them yet in a project.  Tyvek isn't my favorite product to use, haven't had much luck with it!


Not wanting to give up yet, I layered some interfacing (painted), organza in various colors, nylon netting, and lutradur on top.  I stitched some leaf shapes into it, then hit it with the heat gun.


You can hardly tell I added all those layers, the lutradur melted really fast, and not much else because I was afraid of melting the whole piece. Obviously I need more practice using the heat gun!

Now more on Lutradur.  Lutradur comes in two different weights (probably more, but that's all I could find here in the US). 

And I learned that Lutradur is sold on Fabric.com as yardage, not just the little sheets generally found at craft shops, and at a way better price.  Check it out Here

I painted some Lutradur with acrylic paints, then layered some organza on top, and stitched some designs into it using free motion quilting.  Then got out my stencil tool, which is just a fine-tipped soldering iron, and started tracing the edges with it.


Sample 1:


Sample 2 - with some angelina fibers sandwiched in between the lutradur and organza

Sample 3


Positive and negative


Next, I stitched some designs onto painted Lutradur and using my stencil tool, melted some sections by applying heat.  The stitching was SO tedious, I'm not sure if I'll ever want to try this again...


Anyway, more on this topic next time!


Friday, July 8, 2016

Embroidered flowers Part 2

Here's a couple of easy ways to finish your small stitched art pieces.

First, I used some watercolor paper that's heavy but flexible, I'm not sure of the content because my sister sent it to me, but its a nice, heavy paper that may have linen in it.  I cut an opening in the paper, then placed it over my stitched piece, ran a light line of glue to adhere the fabric and paper together, and stitched a zigzag stitch along the paper edge.


I found that it's helpful to use the same color thread in the bobbin and on top, which I didn't do here, because the bobbin thread was darker and got pulled to the top in a few places, but still looks okay.


Here is the whole piece, I'll still need to trim the ragged edges of the paper to even it up for framing.


Next, on this piece, I took some yarn and laid it down parallel to the edge of it (after I trimmed it up evenly) and I just stitched a medium width zigzag along the edge. 

After the first round, I went around the entire piece one more time with the same zigzag, just for stability.


 I suggest starting with your finished size in mind, not just make a random sized piece like I did.  It's easier to find frames if your finished piece is somewhat standard! And if anyone reading this has done embroidered pictures, please comment with any helpful hints or suggestions you may have learned in the process. 


Wednesday, July 6, 2016

Embroidered flowers

I picked up a book called The Art of Embroidered Flowers from the "free" table at my quilt guild meeting a couple of months ago.


It was written by Gilda Baron, who I googled and found out she had recently died.  There are several YouTube videos out there that she had done, showing demonstrations of her techniques, and this book is wonderful.  I'm sure most of you already have all the materials necessary to try some of these techniques.

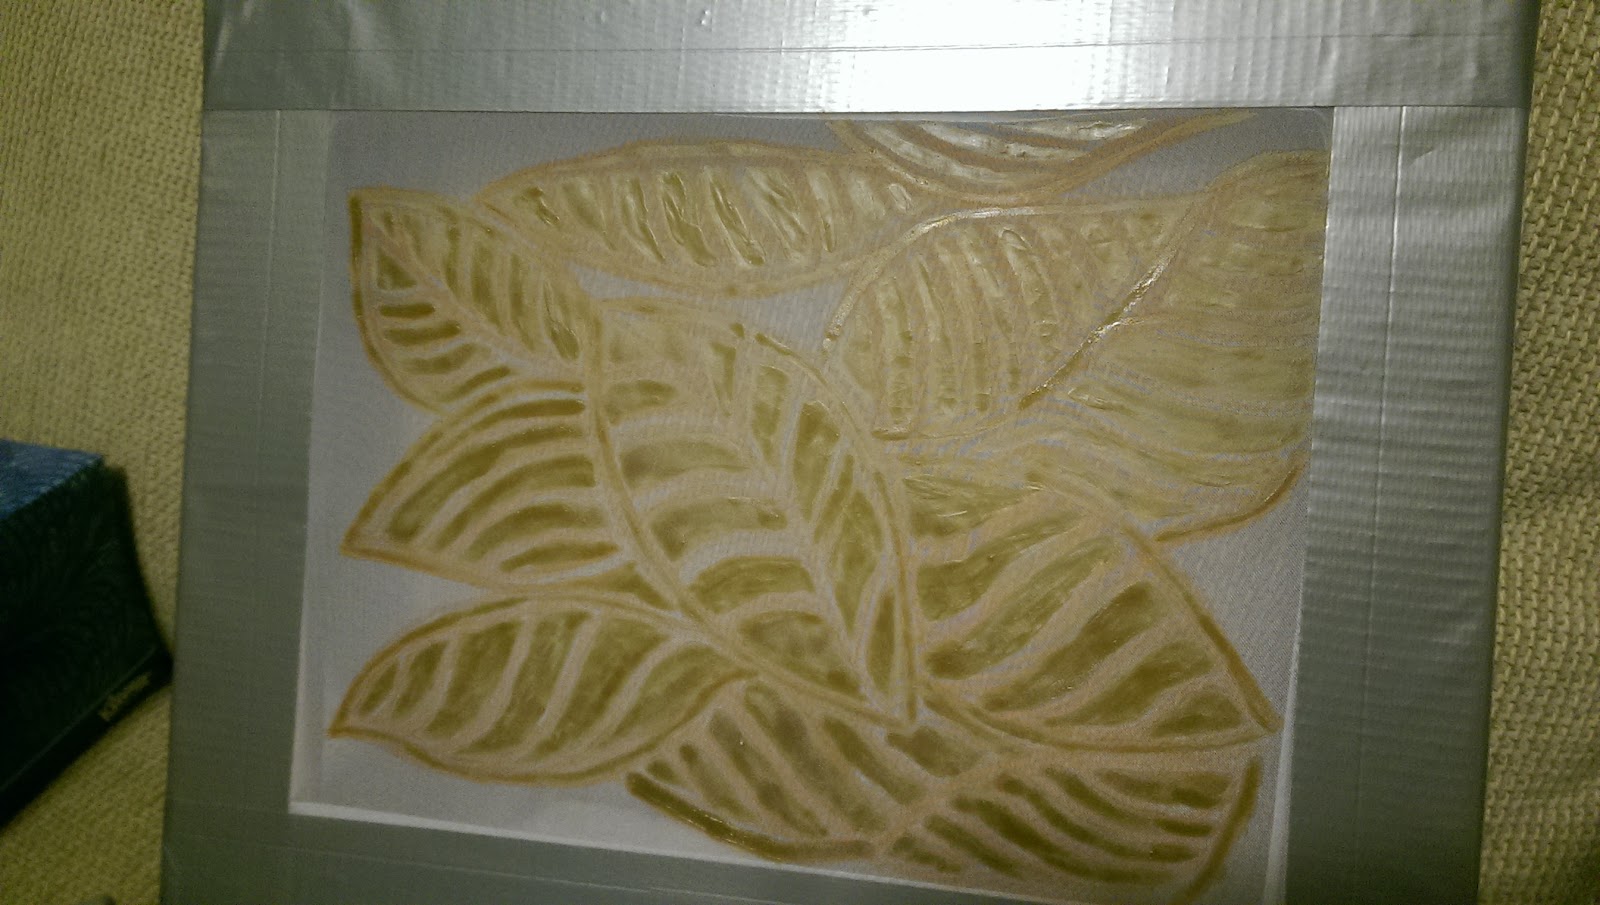
I had already painted some pieces a few years ago using an assortment of Dynaflow and Jacquard fabric paints, so I dug them out and finally put them to use for this project:


First I drew some lines using fabric markers:


And of course heat set with an iron.


For a backing, the book recommended just using batting (wadding) but I have found it not to be stiff enough in the past, so I used some pretty heavy pellon interfacing.  I didn't use a hoop, but some people feel more comfortable using one, it's really not necessary if your stabilizer is sturdy.  

Then I started free motion stitching some lines to suggest grasses using an assortment of threads (rayon, cotton, polyester):


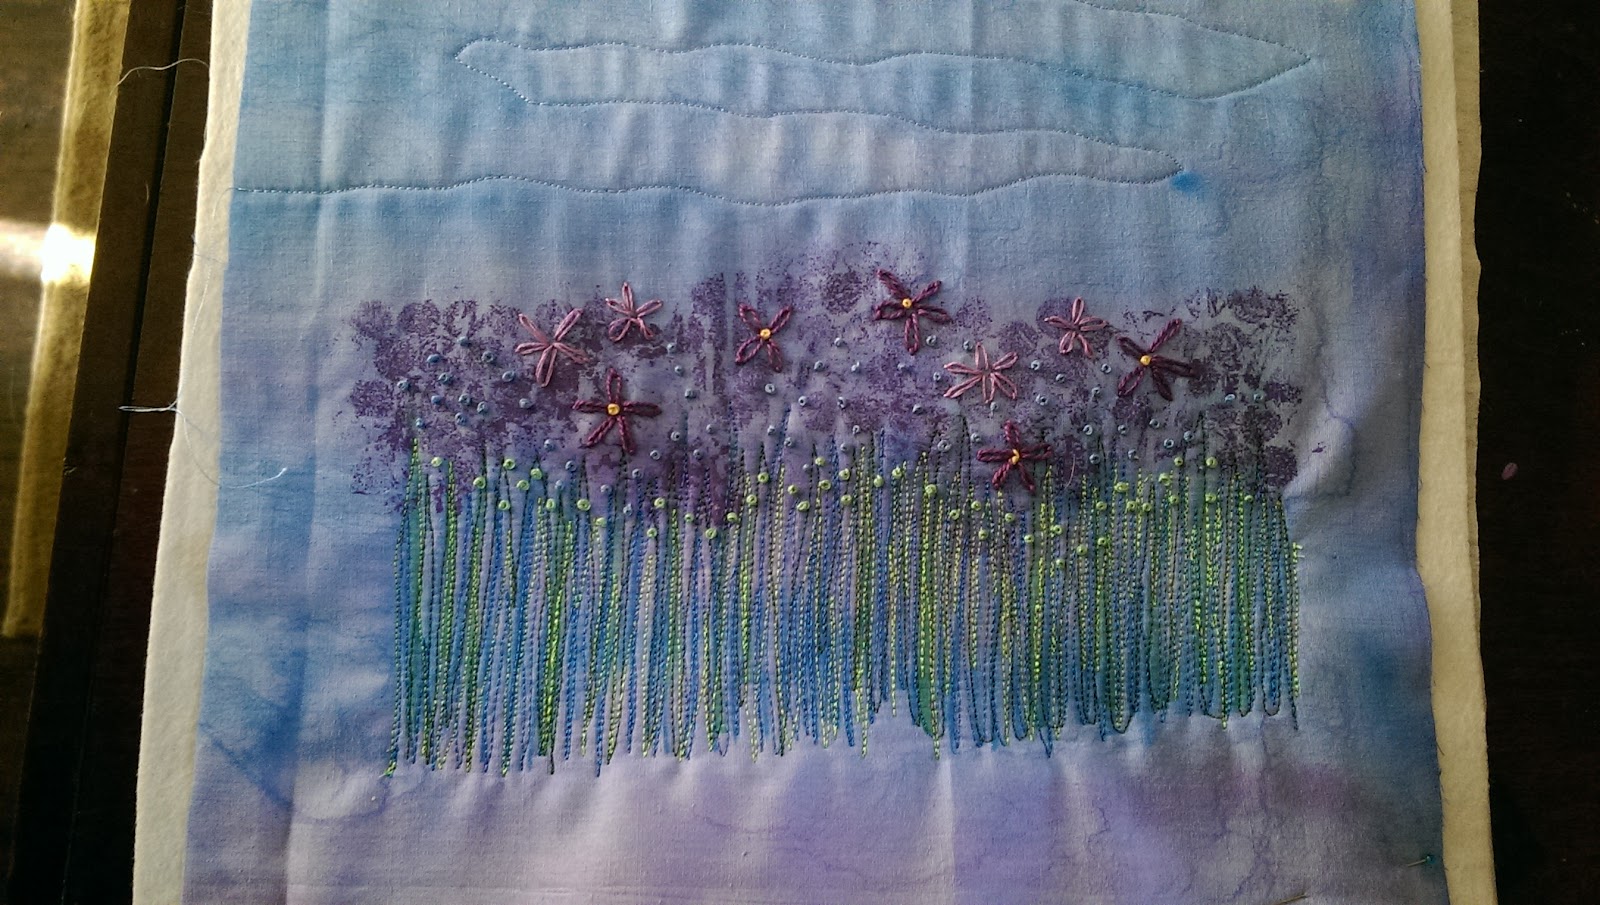
For the blue background, I painted some bubble wrap with purple paint then pressed it onto the fabric, then stitched some vertical lines: 


And finished them both off with some simple hand stitching, mostly french knots and flowers.


There was some minor puckering on these, so I asked my friend Jenny Williams (an extraordinary thread sketcher) what I could use for backing to eliminate some of that problem.  She suggested regular cotton duck, so I tried that for my next ones.  It was a lot easier to do hand stitching through than trying to get a needle through the pellon.

Also, if you're doing a lot of lines, it's smarter to add some zigzag stitches in first, as they fill up the background a whole lot faster than straight lines do.

Here are two more simple techniques from the book, using a zigzag stitch to suggest a flower like delphiniums or larkspur:


And cutting out  some little circles, which I glued to the piece before stitching--


Then took to my machine and made a quick series of zigzags which I later clipped--


With some french knots added:


And I tried out a different stitch for foliage here:


Just need to add a few french knots--


Next time I'll show you an easy way to finish them for framing.


Monday, July 4, 2016

Boring Quilt Top - part 2

After screen printing some designs on the top, and washing it, I decided to get out my batik wax and some plexiglass circles that I bought years ago and wax-resisted several circle shapes all over the quilt top.


Then I dyed the whole thing using Procion Stormy Grey color. Here it is after the dye bath, the circles aren't as prominent as I had hoped. In fact, they hardly showed up. I have to admit that I did this dyeing back in December, and the conditions in my basement weren't that great for a good dye job.


This picture was taken in bright sunlight last month, and I still haven't decided what I'm going to do with this...

And by now, this quilt top is starting to fall apart at the seams-- check out the fraying going on in these pictures of the back.  Dyeing a couple of times, then throwing it in the washing machine has really caused some problems.


I still like it, but I'll probably end up cutting it up and using parts for various projects.


Would you ever try this with a quilt top you've already quilted?  It would definitely hold up better, being less likely to fall apart or fray...

Happy Independence Day, America!


Friday, July 1, 2016

A boring quilt top re-imagined

Hi everyone, I'm Laura McGrath, and I was one of the original artists on this blog way back in 2010. I'm doing a few posts this month, on a few random topics that are totally unrelated. I'm one of those surface design people who likes to try everything, but it doesn't always work out the way I'd hoped (or planned)...

Here is my first topic--This quilt top was one I sewed together many years ago, and has been in my UFO pile forever. It's about twin bed size, and just very "blah".


I decided to spice it up a bit, so I got out this Cleanline Resist that I bought a while ago and never used, and painted some of the resist on some new screen printing screens I had made up. 


This product is about the consistency of acrylic paint, yet is water soluble, so it will eventually come off the screens.


I mixed up some Procion dyes and sodium alginate thickener to pull through the screens.

I like how the original patterns of the fabric still shows through.


The screens were good for about 6-7 pulls each before the design disintegrated

I think I used Mixing Blue, Sage, and Bronze dye colors, but I didn't write them down so I'm not 100% sure of that.


I had to pull out a few of my other screens to finish since the quilt top was so big!


So here it is after washing, it looks a little different now, doesn't it?


I liked it, but wanted to do more.  Since I had no emotional attachment to this piece (meaning I don't care if I really mess it up) I decided to do some more. Stay tuned!