A TECHNIQUE DRIVEN Blog dedicated to mastery of surface design techniques. First we dye, overdye, paint, stitch, resist, tie, fold, silk screen, stamp, thermofax, batik, bejewel, stretch, shrink, sprinkle, Smooch, fuse, slice, dice, AND then we set it on fire using a variety of heat tools.

Friday, February 8, 2013

Projects using scrunch dyed fabrics

Now that we have scrunch dyed some fabrics, what do we do with it?  Well, I thought I would share a few projects I have made using my scrunch dyed fabrics.  Most of the time, the project comes to mind after the fabrics are dyed, but I do have one Landscape Quilt I created several years ago, where I specifically dyed the fabrics to use in making the quilt:


I used a photograph I took of some rocks as my inspiration, but needed to enhance the design with color.  I had a lot of fun experimenting with various colors to come up with the right combinations!
For the fabrics I dyed for my earlier posts, I did not have any specific ideas about what I would do with them ahead of time.  I was more interested in comparing the different variations to see what results I would get.  Once I finished the dyeing, I had to go through a period of mulling over what I thought might be a good project that would showcase the fabrics in an interesting way.  I actually came up with a couple of ideas, and I'm in the process of pursuing one based on Rayna Gillman's book, "create your own free-form quilts.  If you are unfamiliar with Rayna or her techniques, you can see posts here in the January 2012 archives, or visit Rayna's blog here for more info.  
Here are some pictures of stripsets and blocks I have created so far using my scrunch dyed fabrics, other hand dyed fabrics and  commercial fabrics all from my stash:


Needless to say, I have just begun, but already I'm caught up in ways I can use these fabrics in what will probably end up an abstract wall hanging.  I hope to use a couple of larger pieces to showcase the designs that I got with the scrunching technique.  I will post more as I go along, and I hope to see posts or links from others this month showing your dyeing experiments as well as projects where you use the fabrics you dyed!

Tuesday, February 5, 2013

Scrunch Dyeing - Part 3


SNOW DYEING

This is only my second try at snow dyeing… my first, done a few years back, was not great.  But since my friend Wendy has had such great results, I decided this would be a good time to revisit this method of dyeing.  By the way, you can see Wendy’s snow dyeing experiments here.
A note here – many dyers recommend doing ice cube and snow dyeing on a grid, to allow the melted ice or snow to drip through into a container and avoid having the fabric sit in a puddle.  I decided to try both methods in this experiment, so first I dyed in a bucket without using a grid.  I covered my scrunched fabric with snow, then I sprinkled dye powders over the snow.  I let it batch until the snow melted, about 2 hours or so.  Here is how it came out:


I like the results, but wanted to try the 2x dye concentrate as well.
Here is the 2x result:


How interesting!  The colors are much more intense than the powdered dye version, which must mean I would need to use more dye powder to get the same intensity.  But I also love the crisper markings I got using 2x dye concentrate!  Both were batched about the same amount of time, so I’m not sure why the results came out so differently.
Here is a side by side comparison of the two:


So after doing those 2 pieces, I decided to try one using the grid method:


Here is my fabric scrunched, setting on the grid, with snow packed on top


Next, I poured small amounts of the 2x dyes over the snow.  Looks like a velvety
sno-cone, doesn’t it?


After batching for several hours, here is the result.  Again it has softer markings and more muted colors than the regular low water immersion, but it still has some visual interest.
 FROZEN DYES

My last experiment was to mix dyes and freeze them in ice cube trays, then cover a pre-soda soaked piece of scrunched fabric with the ice cubes.  One thing I noticed was that the cubes didn’t totally freeze the way just water does, even after 24 hours! 
I used the same 3 dye colors – Orchid, Lilac and Avocado, although I didn’t have a lot of lilac.  And I just randomly placed the ice cubes on the fabric, but as you can see below, I didn’t get as much color blending with this method:


I think this piece will make a great background for a landscape quilt.  Which reminds me, I hope to have at least one project finished using some of this fabric before the end of the month, and will add a post then!    Questions?  Post them in the comments section, and we'll get a discussion going.  I know I'm not the only one of this group who has dyeing experience, and I'd love to hear other methods for scrunching!  Meanwhile, I hope you will find something here that will inspire you to pull out your dyes and play with these techniques. Be sure to let us know if you do, either by linking to a blog post, or you can send me an e-mail with pictures if you don’t blog, and I will post about your experiments here!  Happy scrunching!

Sunday, February 3, 2013

Scrunch Dyeing Variations - Part 2


FREEZE DYEING
  
For a variation on the regular scrunch I described in Part 1, I wanted to include freeze dyeing.
This piece was scrunched, put in a bucket, then I placed it in my freezer for about an hour:


When I removed it from the freezer, the fabric had frozen solid.  Then I poured the dyes over the same way I did in the first example, only I left it to batch for about 6 hours to allow the fabric to ‘defrost’ before I rinsed/laundered.  Below is the frozen fabric with dyes applied.


 Here is the Freeze dyed fabric:


It looks similar to the regular scrunch dyed piece, although the
markings are different… more pronounced, with more contrast between
light and dark.
ICE CUBE DYEING
Here's another way to alter your results when scrunching.  For this method, I placed ice cubes over the scrunched fabric:


Then I sprinkled dye powder in the 3 colors over the cubes and left it to batch for about 6 hours before I rinsed/laundered:


Here is the ice cube dyed piece:


I did not use a lot of the avocado in this piece, and wish I had used more.
I decided to try another ice cube dye piece, only instead of using dye powder, I wanted to use liquid dyes, and instead of my usual 2 tsp dye powder per 8 ounces of water, I doubled the amount of dye powder in mixed dyes.  In other words, I used 4 tsp dye powder per 8 ounces of water.  Here is the result of the 2x ice cube dye:


I like the markings here, but it seems a little faded looking compared to methods 1 and 2… still, it does have visual interest! 
In my next post, I'm going to show you a few more experiments then we'll do a side by side comparison of the results.  I hope you're busy dyeing by now, because I want to hear all about your experiments!

Friday, February 1, 2013

Scrunch Dyeing variations - Part 1


OVERVIEW
One of my favorite dyeing methods is “scrunch dyeing”, where you literally scrunch up fabric that has been pre-soaked in soda ash solution, and add dyes to create wonderful organic patterns and color combinations.  I struggled for awhile in the beginning to come up with the look I was striving for, but once I finally ‘got’ it, I have 
been happily scrunching ever since!  Somewhere along the way, I started doing a little experimenting with alternates to the standard Low Water Immersion dyeing method, and I found I could get some pretty interesting results, so I thought I would do a little ‘compare and contrast’ demo here to let you see what the different methods look like, side by side.  But first, a little ‘housekeeping’.

SAFETY FIRST

If you are an experienced dyer, you already know the safety guidelines for dyeing, but if you are new to dyeing, please use the following guidelines:
Only use tools that are dedicated to your dyeing, not to be re-used for food preparation. 
To ensure you do not ruin your work area, it is advised that you cover your surfaces with plastic before working with dyes or the auxiliary chemicals associated with dyeing, or have an area set up that you can easily wipe down after a dye session.  I work in my laundry room, so I can use rags to wipe up after myself. 
When mixing dyes, it is suggested that you use a mask or ventilator to prevent inhalation of dye powders, especially if you have pulmonary issues such as asthma or allergies.
Always wear rubber gloves when you dye, to prevent staining your hands, and wear old clothing that will not be ruined by dye splatter.
Keep rags or paper towels handy to wipe up spills.
If you need basic 'how to' information on dyeing, I can recommend Dharma Trading Compay, where I buy my Procion MX dyes and other supplies.  They are great, have an online store, as well as lots of experienced folk to help you on your way.  
OKAY, ON TO THE DYEING!
For all of the following examples, I pre-soaked the fabric pieces in soda ash solution (1 cup soda ash powder stirred into 1 gallon hot water prior to starting my project; any unused solution can be stored in a covered container indefinitely).
First off, I tore 4 pieces of cotton muslin into fat quarters; then I numbered them 1 – 4, so I could keep track of which dye variation I applied on each


Then I mixed the dyes.  I chose one of my favorite color combinations: Orchid, Lilac and Avocado.  I mixed them at medium strength – 2 tsp dye powder per 1 cup of water.  I don’t use urea, salt or any other additives.


.


I like to store my mixed dyes in Spaghetti Sauce jars – they have measurements on the side to help me make the proper amount.  With a few exceptions, I can store my mixed dyes for at least several months in a refrigerator out in the garage without them losing their strength.  I have noticed that yellows and blues tend to lose their strength sooner than other colors.  I also try to remember to agitate the dyes a little when they have been sitting for awhile, to mix any solids that have separated and migrated to the bottom of the container.
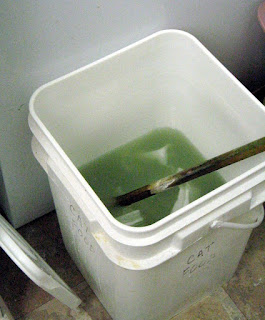
Below is the soda ash container, with the fabric soaking.  I also stir the soda ash to dissolve any solids that have settled to the bottom.  I pre-soak the fabric (which was pre-washed to prepare for dyeing) for about 15 minutes.  Then I squeeze out the excess solution and prepare to scrunch the fabric for dyeing. 


Next, I spread the fabric on the top of my washer for scrunching: 


Then I scrunch the fabric, trying to keep the ‘peaks and valleys’ pretty even:


Once I have the fabric scrunched to my liking, I place it in my container:


Now it’s time to dye!

1)      Standard Scrunch dyeing
I pour a small amount of my first color into a measuring cup with a spout, then I pour randomly over the scrunched fabric:


Then I repeat with the remaining colors, usually working lightest to darkest.  Below is the first piece with all 3 colors applied.  I batched for about an hour before I rinsed and laundered.  I rinse first in cold water with a few drops of Synthrapol textile detergent; then I wash with hot water and more Synthrapol, and finally I rinse 2-3 times in warm water.  If you do a large batch of dyes, you can do the wash/rinse in your washing machine.  Then I dry and press.  


Here is the first piece:


One reason I love scrunch dyeing is that I am able to achieve light and dark, and I love the fractured patterns that frequently occur.
In my next post, we will explore a couple of variations that I have experimented with, and compare the results to standard scrunch dyeing.  Stay tuned!

Wednesday, January 30, 2013

My Beading

First let me thank Beth for her fabulous hosting of the Fire Blog this month.  WOW!

Okay now to my thoughts on beading.  I am not a much of a beader and this month has allowed me the opportunity to think about that.  Why have I ended up here?  As I have thought about it I have gone back to some of the things that Beata has said about beading as embellishment.  I think that a piece of art work needs to have a focus. When I have beaded I have started out with the plan to bead and I tend to bead a lot. When I have not beaded, my focus was on other design elements or techniques.  Generally I feel my voice is more into intricate piecing.   And when I have a failed design and have tried to cover that with the glitter of beads--well, lets just say that you can't turn a sow's ear into a silk purse no matter how many beads you add.

I do want to share two of my pieces that include beads. The first is a underwater coral scene that I made after taking a class with Judith Montano.  From the very beginning I planned to use lots of embroidery and beads.


My second piece was created after listening to my daughter complain that her husband thinks he is the center of the universe and everything should revolve around him.  What I kept hearing was that SHE should be the center of the universe and everything should revolve around her.  LOL  I suggested that they take turns but she will not thrilled at that suggestion.  At any rate, the quilt represents the universe with her face at the center.  Please do notice the string theory I have incorporated in the quilt. This is a work in progress.  While I do display it, I keep taking it down and adding more beads and embroidery to it.  When it is finished, I expect it to be encrusted, especially around the center of the universe. (Please ignore the other stuff behind it on the design wall.  I got lazy and did not crop it.)


Tuesday, January 29, 2013

The Winner of Nancy Eha's Book Is...

Jeanne! You are the winner of Nancy Eha's book "Bead Creative Art Quilts." Contact me (Beth Schnellenberger) with your mailing information.

Jeanne Aird said...
I really enjoy reading and looking at all your posts. They are filled with inspiration and great techniques. I even have a link to your site from my site. http://jeanneairdartfabricandquilts.blogspot.com/
I'd love to be the winner of Nancy's book.

Congratulations Jeanne. Thanks to everyone who worked so hard to make this month a success on the Fire blog--followers of the blog, readers who commented, those kind artists who donated items for the giveaways, and the resident artists who shared their work with you.

Sunday, January 27, 2013

Beading with Karen

 I enjoy using beads to highlight fabrics or other kinds of embellishments.  Used ColorCatchers that I painted and cut out in leaf shapes were tacked to this little bag with beads.

I was going for a fall/grape kind of feel with this, although the beads are way too small to look like grapes.


This was a piece of fabric from my very first foray into marbling.  I call this little piece "Heart Like a Wheel" and it's a work in progress.  I get it out and add more beads every so often.

I particularly like the look of beads "marching" across the fabric.


"Winkin', Blinkin', and Nod Set Sail" was created for a nursery rhyme challenge.  I beaded the entire sky inside the first border with tiny sparkly seed beads.


And I hunted for weeks for tiny silver fish for the net, but couldn't find any.  I wound up using wee silver bugle beads to fasten the net (painted cheesecloth) -- I think it's probably fortuitous that I couldn't find any fish because I think the beads look better anyway.