Hi and welcome back to 31 Days of Stitch Design. I hope you've been practicing. I got questions from some of you so I know some have been.
This week, we’re going to look at how to thread shade you outline drawings.
Introducing the Concept of Thread Shading
Shading is used to show levels of darkness or lightness in a drawing. Without shading your drawing looks flat like the hand drawing we did last week. Shading however, transforms a flat object into a three dimensional form.
The most basic form of shading is Parallel Hatching which is our subject of discussion today.
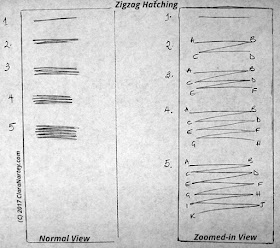
Parallel Hatching consists of drawing a series of closely spaced parallel lines to create shading effects.
 |
| Illustration - Zigzag Hatching |
“Zigzag” Hatching
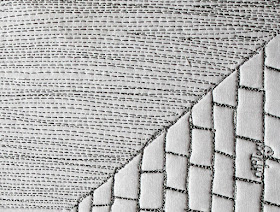
Since we’re doing continuos drawing with our sewing machines, we’ll have to modify this technique to suit our purposes. Because we don’t want to stop at the end of each stitched line, cut the threads and then start stitching the next parallel line.
 |
| An Example of Stitched Zigzag Hatching |
So to modify this technique, you’ll start at one point stitch a line to the end point and travel back to your starting point in a “zigzag- like” manner. The only difference is that in our case we want the “zigzag-like” stitches to be close to each other. That's I coined the name zigzag hatching.
See the pencil illustration above.
The left hand side of the illustration shows the shading effect of zigzag hatching when stitched. The right hand side is a zoomed in version that shows that the shading is actually made up of long “zigzag-like” stitches.
Also review the stitched illustration above as well.
 |
| Pencil drawing of teacup |
Value Variations in Drawings
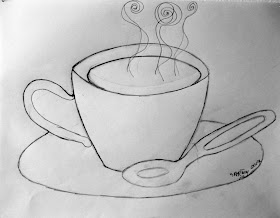
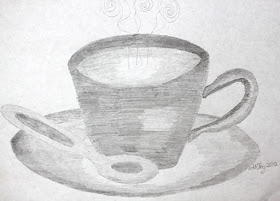
Every subject you draw will have value variations in it. That’s to say, you’ll have different degrees of darkness in your subject.
Depending on where the light source falls on your subject you’ll have light, medium and dark values. Some greyscale charts show as many as 31 increments or values of grey.
 |
| Value = Shaded Teacup |
For us, we’re going to keep it real simple. We’ll use only three values - Light, Medium and Dark.
Pro-Tip: If you’re not using your own drawing and you’re using a photo, then here’s how to figure out the values in your picture.
1. Make a black and white photocopy of the picture
2. Print a black and white copy of the photo
3. Use a photo editing software to change the picture to a grey scale
4. Use a photo editing software to posterize or separate the values
Then create what I call a “shading map”. Simply write L,M, D on your photo where you have light medium and dark values. This will become your shading map. You’ll refer to it to know where to thread shade what values on your fabric.
Thread Shading with One Thread Color
Now we’ll use the zigzag hatching method to thread shade the three (3) different values L, M, D in our reference photo or drawing on our fabric (quilt sandwich). First trace your drawing onto your fabric.
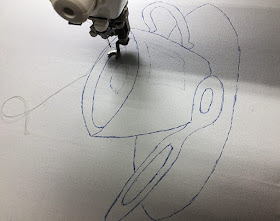 |
| A Drawing Traced onto Fabric and Ready for Outlines to be Stitched |
Pro-Tip:
Draw your outlines first before shading.
1. Helps hold all 4 layers together and prevents shifting when you start shading
2. It helps prevent puckering.
3. Acts as a guide to show you the edges of your drawing
 |
| Thread Shaded Teacup - Stitch on Cotton by Clara Nartey |
To thread shade a:
Dark Value: Stitch your lines close together
Light Value: Widen distance between your stitch lines
Medium Value: Keep the distance between your stitches mid-way between that for light and dark value.
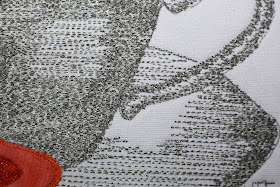 |
| Detailed View of Thread Shading |
In order to achieve dark values, you should resist from piling stitches on top of each other multiple times. That’s ok if you’re drawing a single thick line. But when you thread shade or stitch an entire area very densely, you’re likely to end up with a distorted piece of work which won’t lay flat.
Shading Direction
One way to keep your thread shading looking neat is to stitch in a consistent direction. Zig-zag hatching can be horizontal, vertical or at an angle. Which ever you decide on, just keep it consistent.
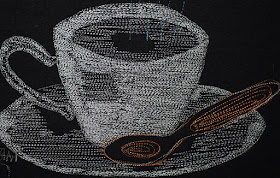
Practice Exercise: Feel free to print out my teacup example for practice. Create a shading map, and trace the outlines of the drawing onto fabric. Then thread shade your drawing in three values with any color thread of your choice. I used a grey thread in mine, you can use a different color if you want.
See below a video I created for you to further help.
You can also practice with a different drawing or a photo.
I'll be waiting to answer your questions. All you've got to do is ask.
Let’s draw.
Clara

WOW! What a great post!!! I have it bookmarked and will need to review often! Thanks so much for all this information!
ReplyDeleteYou're most welcome, Robbie
Delete