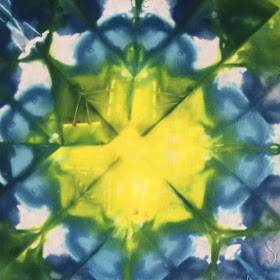
Just as I described in the previous post I folded small quares of fabric (10"x10") in different ways and used binder clips to keep them like that.
I had poured left over dye concentrate from previous dye sessions in ice cube containers and placed these in my freezer. No idea exactly which colors it were, as I did that last year. I use these containers only for dye and not for making regular ice cubes.
The folded fabric was soaked in soda ash and placed on plastic plates.
On each fabric several dye cubes were placed. I advise to put on gloves when you do this, as it is very messy :-).
The plates were left batching till the next day at room temperature. After rinsing, washing and ironing this is how the fabric turned out:
As you see you have more control of where which color shows up. Of course you can do this with bigger pieces of fabric. Keep in mind that the thicker the folded layers are, the more difficult it will be for the dye to penetrate the centre. I used plastic dinner plates, but if your fabric is bigger you will have to use bigger trays or containers.
A TECHNIQUE DRIVEN Blog dedicated to mastery of surface design techniques. First we dye, overdye, paint, stitch, resist, tie, fold, silk screen, stamp, thermofax, batik, bejewel, stretch, shrink, sprinkle, Smooch, fuse, slice, dice, AND then we set it on fire using a variety of heat tools.


Very clever. I really like this idea.
ReplyDeleteGreat idea and great results!
ReplyDeleteBeautiful results once again! I use a large plastic automobile drip/drain pan when working on bigger or multiple pieces.
ReplyDeleteLove the idea of freezing concentrates!
ReplyDeleteThey look like stained glass!
ReplyDeleteI really like this. I'm thinking I could tr it the lazy way. Ice cubes plus the powdered dye sprinkled carefully atop.
ReplyDeleteYou are a busy bee!
ReplyDeleteThere is a link on my blog to the You tube video where the curved seam method is described.
cool...I like that this is really compact and can be done without my mess!
ReplyDelete