I still have some time left this month, and thought I would
re-visit the technique list I posted at the beginning of the month… checking to
see what I have used, and what didn’t get into the mix:
Fabric Dyeing
Batik
Stamping
Screen Printing
Monoprinting
Stenciling
Foiling
Discharge dyeing
Breakdown printing
Clamp-dyeing
Masking
Spray dyeing
So, after a review I highlighted the techniques I used in my
round robin… that leaves a lot of unused techniques I didn’t touch on! I know that Beth is scheduled to have an
in-depth section on Breakdown (or deconstructed) printing later this year, so I
think I will defer to her on that. I have
some examples in my collection using some of the other techniques, so I thought
I would post pictures of them here, and give a brief discussion of how I used
the techniques.
The fabric above was first dyed with the colors (yellows,
oranges, reds). Then I accordion folded,
covered with several can lids, and clamped together. Then I applied black dye to the exposed
areas. If I tried this 100 times more, I
would never be able to replicate the pattern!
I call this “Butterflies to Hibiscus”, because it looked like the
butterflies (see top row) morphed into Hibiscus flowers. I made this into a whole cloth quilt.
This was a piece of fabric dyed similarly to the first piece
above, but I used DVD’s and clamps instead of can lids. The shapes were all
interesting, and I ended up creating several wall pieces with various
embellishments. In this case, I used
foil glue and foil to enhance the design.
I call this “Sun and Moon”.
This is my very first art quilt! I had fabric I created in a class I took from
Melanie Testa, and she challenged us to cut into some of the fabrics we created
and make something of it… very scary! In
this piece, the swirls you see were discharged using dishwashing gel with
bleach and a foam stamp. I embellished
them with beading. I also used a bleach
water solution to spray over some of the fabric before I cut into it, using
sequins laid on the fabric to resist the discharging. You can see a couple of the dots where the
sequins were at the top of the blue pear shape, just below the upper ‘arm’. That fabric was a deep blue before I sprayed
it!
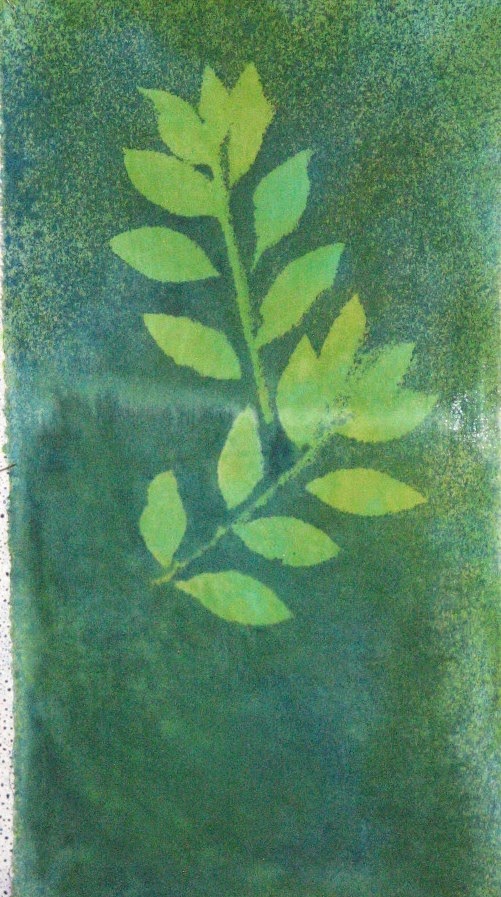
This isn’t a finished project, but it is an example of spray
dyeing. I had a piece of light green
dyed fabric, and put a couple of sprigs of leaves on it, then sprayed with a
blue dye. Worth revisiting!
This may be my only example of using stencils! I used Dye-Na-Flow and stencils to create
this, using Jacquard’s instructions from their website. The project took forever, and I doubt if I
would repeat it… but using stencils is something I hope to get into more as
time permits… would love to see examples of stencil use by others!
I will leave you with a challenge: If you haven’t tried many of the techniques
discussed here this month, I hope you will try some and let us know how they
come out! And if you have used some of
the techniques we haven’t talked about in this series, we would love to hear
about them! Thanks for stopping by, and
happy creating!


Fabulous examples and I LOVE the top (last photo). You have challenged me to do something with a white sweatshirt I have sitting on my sewing table waiting for the Muse!! Great month Judy!!!
ReplyDeleteJudy, Great month! Spray dyeing I have got to do!! Love the leaf print. Also using cds. But so much more! Lots of things I need to try. Thanks again for a great month.
ReplyDeletegreat! I'd really hoped to play this summer but it hasn't happened. darn
ReplyDeleteI just love seeing all the awesome dyeing and printing you do! What wonderful pieces you have made too.
ReplyDeleteIt was fun to participate this month, thanks Judy and Beth. Hope we inspired one person to try something new!
ReplyDeleteThese are all stunning results. Sun and Moon, really spoke to my heart and I'm amazed with your first art quilt. I'm intrigued by the spray dying and your results in the first piece. The t-shirt is fun and fantastic. Thanks for sharing.
ReplyDelete